

Previous post about this here.
Here it is, squawks and waddlers: The Dork Designs Harrier Utili-Song.
(No, not named after that kind of harrier. The other kind. )
▓▓▓▓▓▓▓▓▓▓▓▓▓▓▓▓▓▓▓▓▓▓▓▓▓▓▓▓▓▓▓▓▓▓▓▓▓▓▓▓
Updated! 2023-12-04: Now includes minor improvements to the latch, and three additional handle scale styles.
Link To .STL Files: Here.
The above is provided completely as-is, with no guarantees whatsoever. If printed and assembled correctly, the included files will physically produce a friggin’ knife, which is an inherently dangerous instrument and may or may not also be a type that is illegal to own, carry, or possess in your local country/state/province/city/principality/prefecture. Whatever you do with it is on you, unless what you do with it is redistribute it or attempt to sell it, or share it without crediting me, in which case I will come down on you like a coal scuttle full of tiny anvils.
▓▓▓▓▓▓▓▓▓▓▓▓▓▓▓▓▓▓▓▓▓▓▓▓▓▓▓▓▓▓▓▓▓▓▓▓▓▓▓▓
Additional information, and some more harping on:
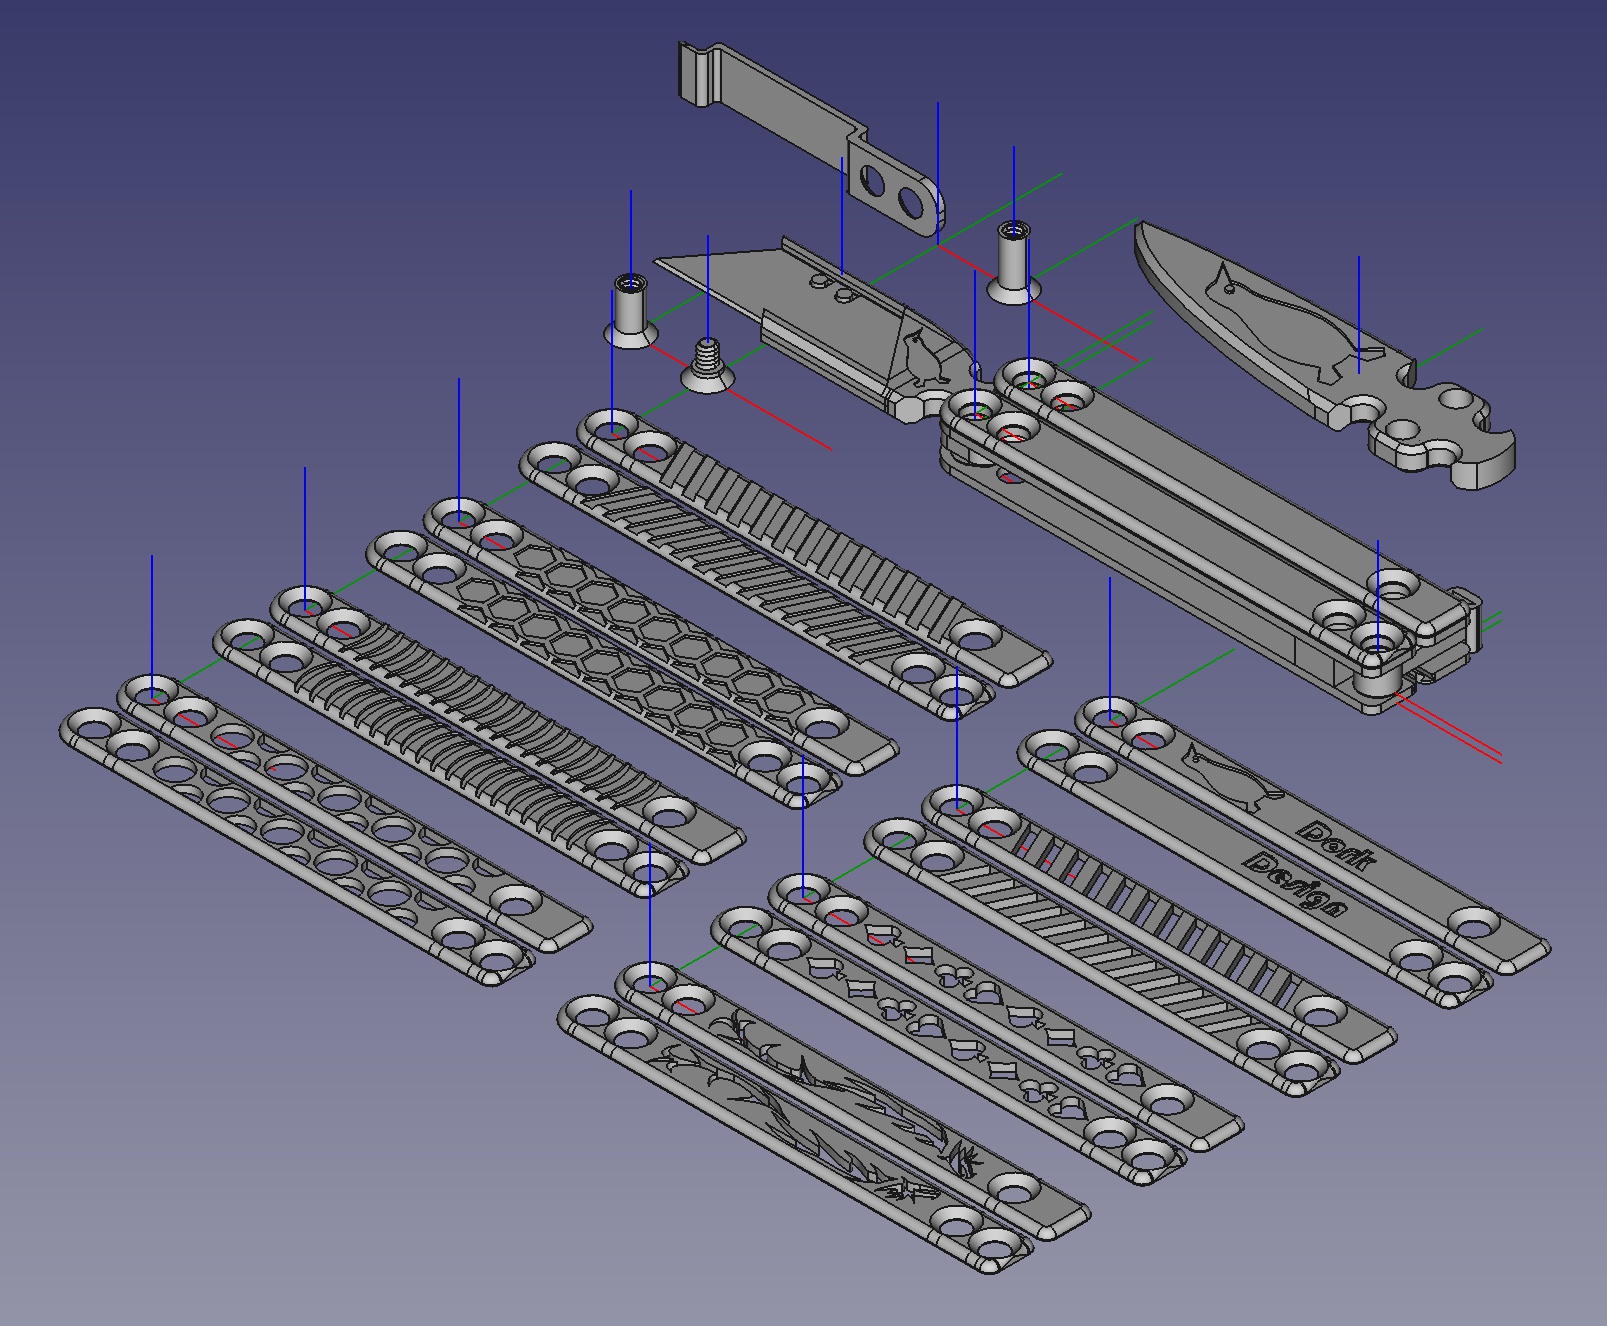
Did I mention that the handle scales on this are modular? That’s so I can make a bunch of silly designs for them. There are six now nine included in the above release if you also count the boring plain scales. They are, in order presented in the headline image above: Plain, Herringbone, Hive, Helios, Hydrogen, Hyperego (which is the one I have on in all the pictures), Hazard, Hustle, and Hellfire.
More to come, probably. Or make your own to show off and amaze, baffle, or irritate your friends and/or strangers on the internet.
▒▒▒▒▒▒▒▒▒▒▒▒▒▒▒▒▒▒▒▒▒▒▒▒▒▒▒▒▒▒▒▒▒▒▒▒▒▒▒▒
Printing instructions and tips:
As you will see if you download and crack open that .zip file, this thing consists of a whole shitload of parts which are all separate files. You could arrange them all on your print bed and do them in one whack, if your printer is big enough, but I wouldn’t if I were you. My recommendation is to print one or two of the interference fit parts first and ensure your printer is dialed in sufficiently to pull this off. My preferred print order is to do the liners in one job; then the blade holder, latch, and scales in another; then all the screws in a third.
100% infill is absolutely required for the screws. It’s probably a good idea for the liners, and optional for the blade holder or trainer blade.
This is a precision assembly with several parts that are either very close or interference fits. These models are designed around printing with 0.2mm line height, with a 0.4mm nozzle. Your results will vary with other heights and widths. Printing with a larger nozzle is NOT recommended; this may result in an inability to assemble due to clearance critical features not producing the correct size or spacing.
All of my examples were printed in fairly ordinary PLA+ (I’m using Inland at the moment; other brands are available). Or you could try your luck with your choice of higher temperature/high impact/fiber reinforced material instead, but it’s probably not necessary.
All parts are designed to be printed without supports. You should print everything in the orientation you see in the files except the upper handle liners, which will work best with the flat side down against the bed (i.e. upside down). The pocket clip should be printed standing on its edge just like it comes in the file. You can attempt to print it laying flat, but if you do your printer had better be heckin’ good at doing bridges.
The complete bill of materials to complete the assembly is as follows:
- 1x Blade Holder or 1x Trainer Blade
- 1x Liner, Safe Side, Upper
- 1x Liner, Bite Side, Upper
- 1x Liner, Safe Side, Lower
- 1x Liner, Bite Side, Lower
- 2x Scales of your choice, Safe Side
- 2x Scales of your choice, Bite Side
- 1x Latch Shank
- 1x Latch Head
- 7x Screws, Male
- 7x Screws, Female
- If you are going to affix the pocket clip, you will need to print 1x Pocket Clip (no kidding) and replace 2x of the female screws with the “Screw, Female, Long for Pocket Clip.”
You’ll have to provide your own blade. This will take a typical “Stanley” style trapezoid utility knife blade.
░░░░░░░░░░░░░░░░░░░░░░░░░░░░░░░░░░░░░░░░
Assembly instructions:
If you’re not going to build one of these, normal people can probably stop reading now. Unless you’re morbidly curious about how I solved various fabrication challenges inherent in making such a thing with an FDM printer, in excruciating detail.
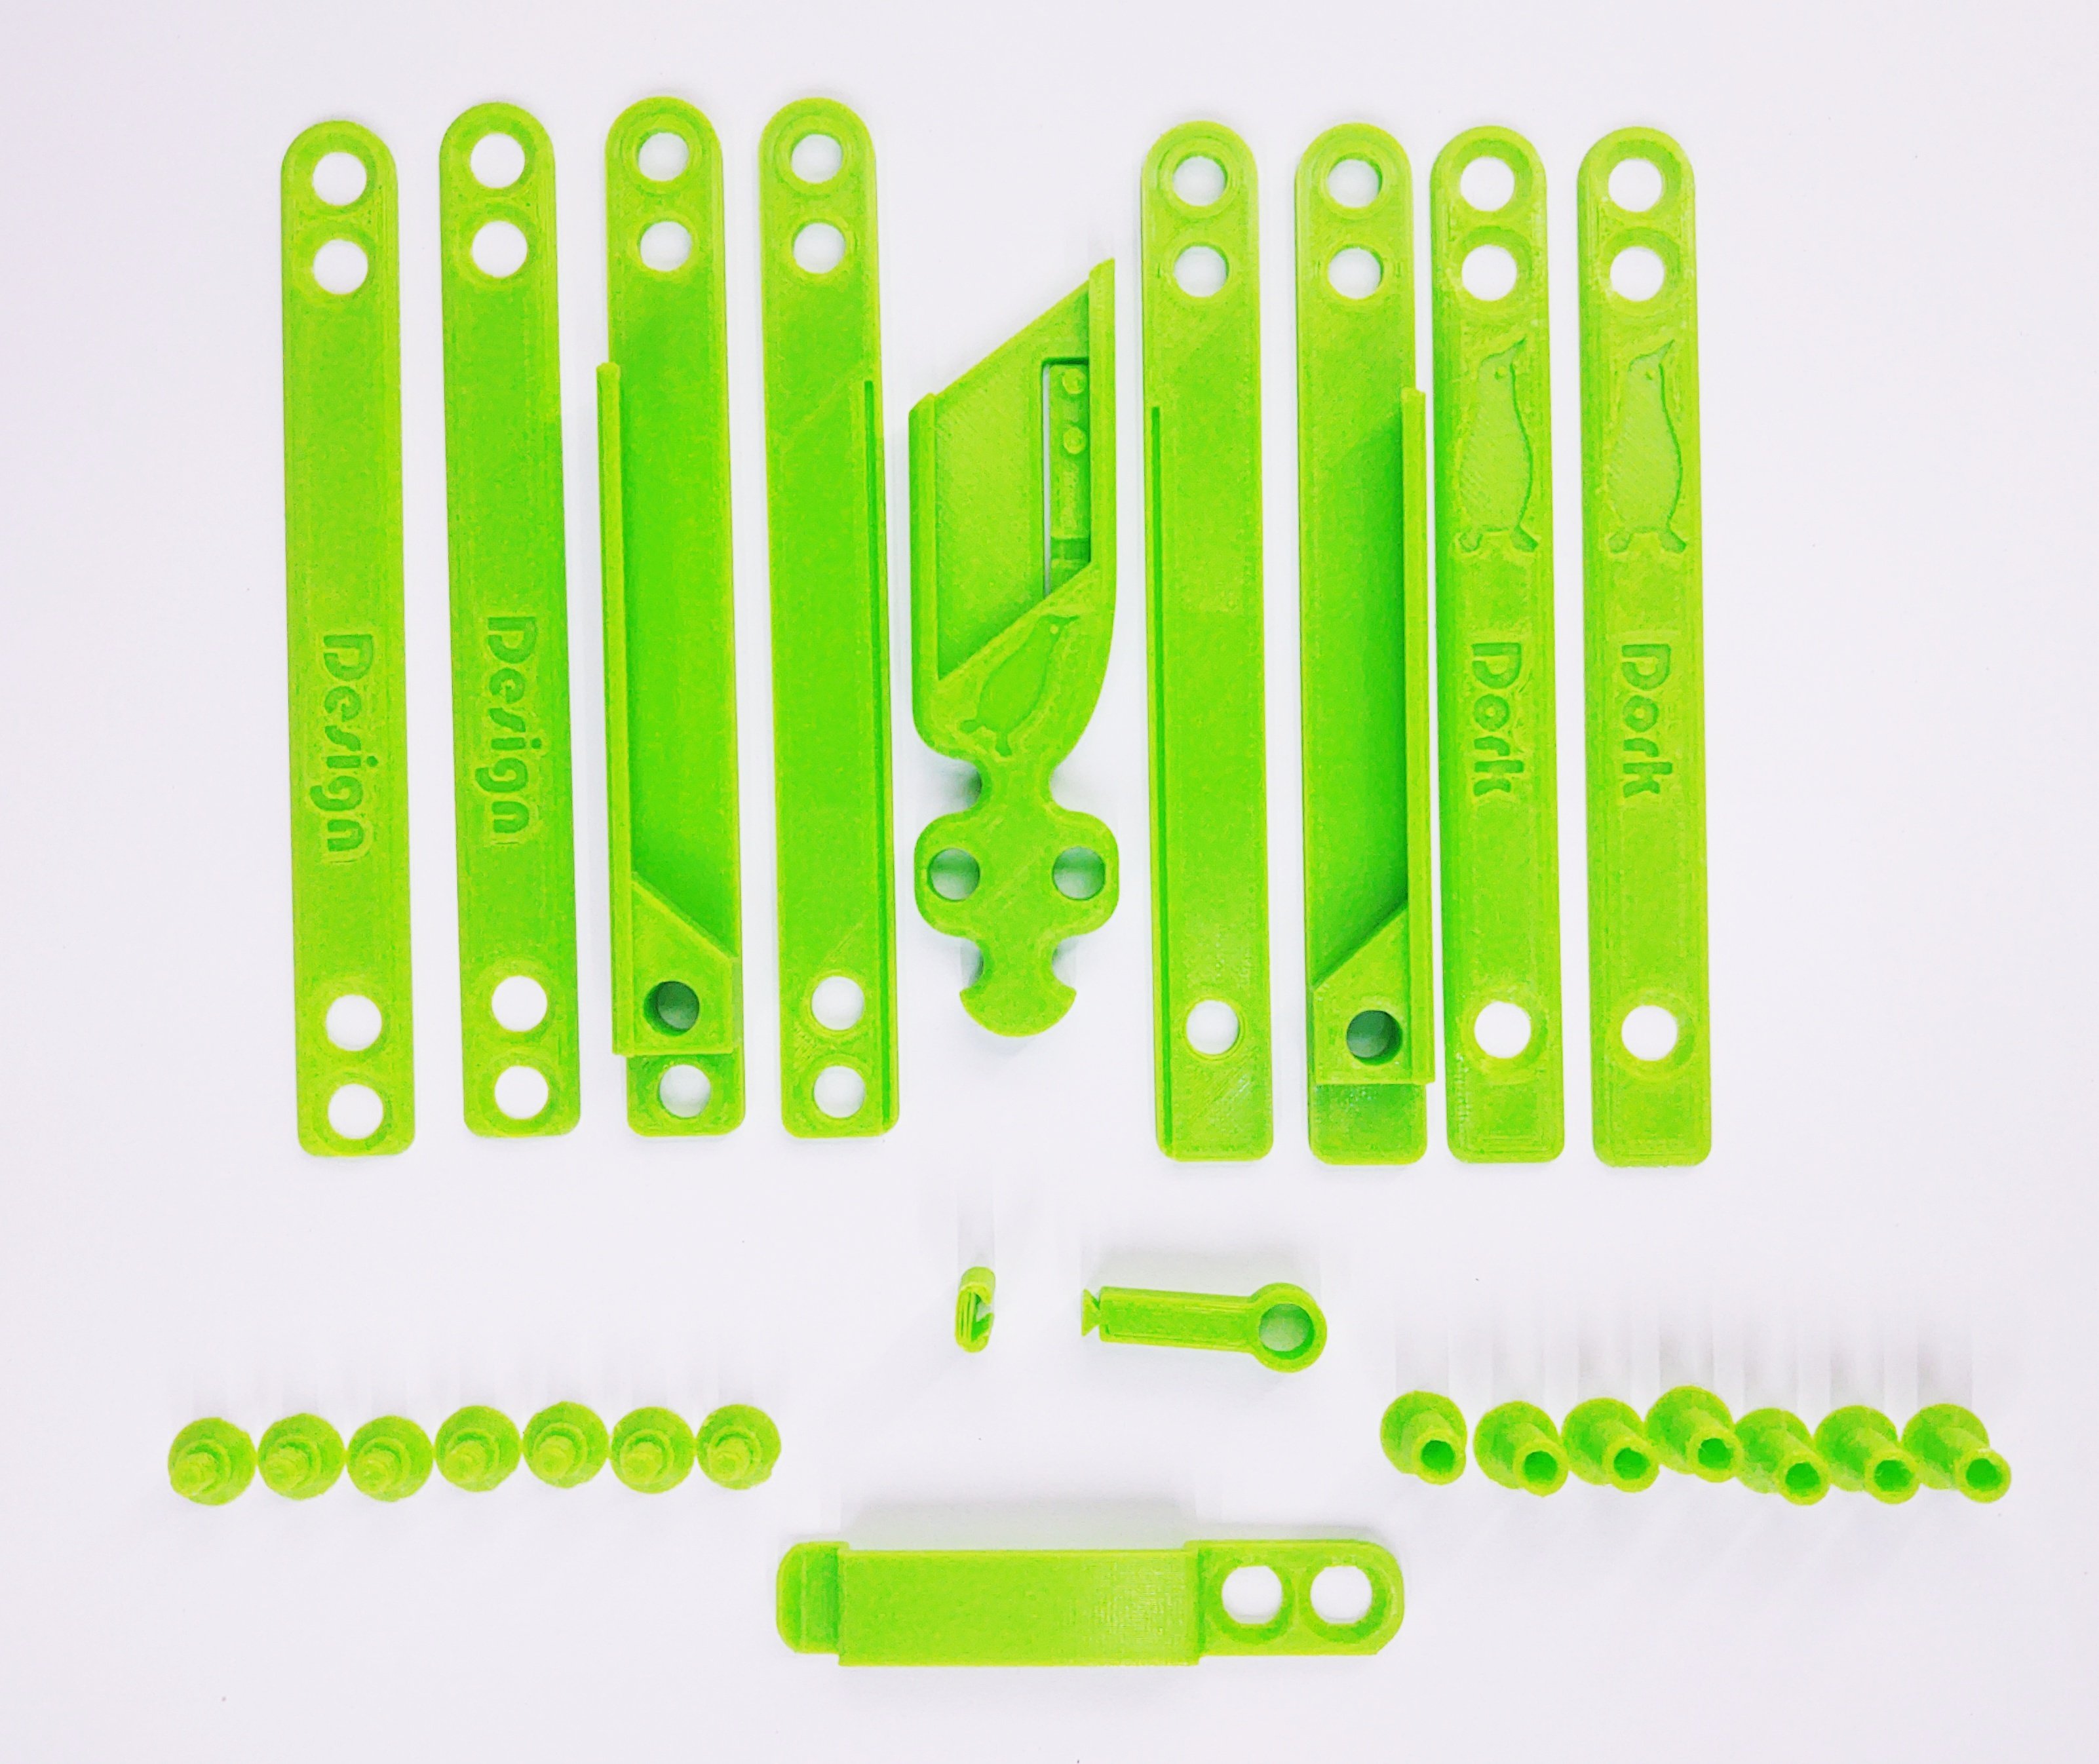
You’re going to need all of these parts.
First, what’s all this malarkey about safe side, bite side?
A balisong knife has two handles [citation needed]. The sharp edge of the blade slots into one of them, and that handle is called the “bite handle.” I’ll bet you’ve already figured out why: Getting your fingers in between the bite handle and the blade usually results in you getting… bit. The other handle is the “safe handle,” and that’s typically the one you should hold when manipulating your knife. On a traditionally and correctly set up bailsong, the bite handle can be identified as the one that the latch is attached to, and usually also the pocket clip if it has one.
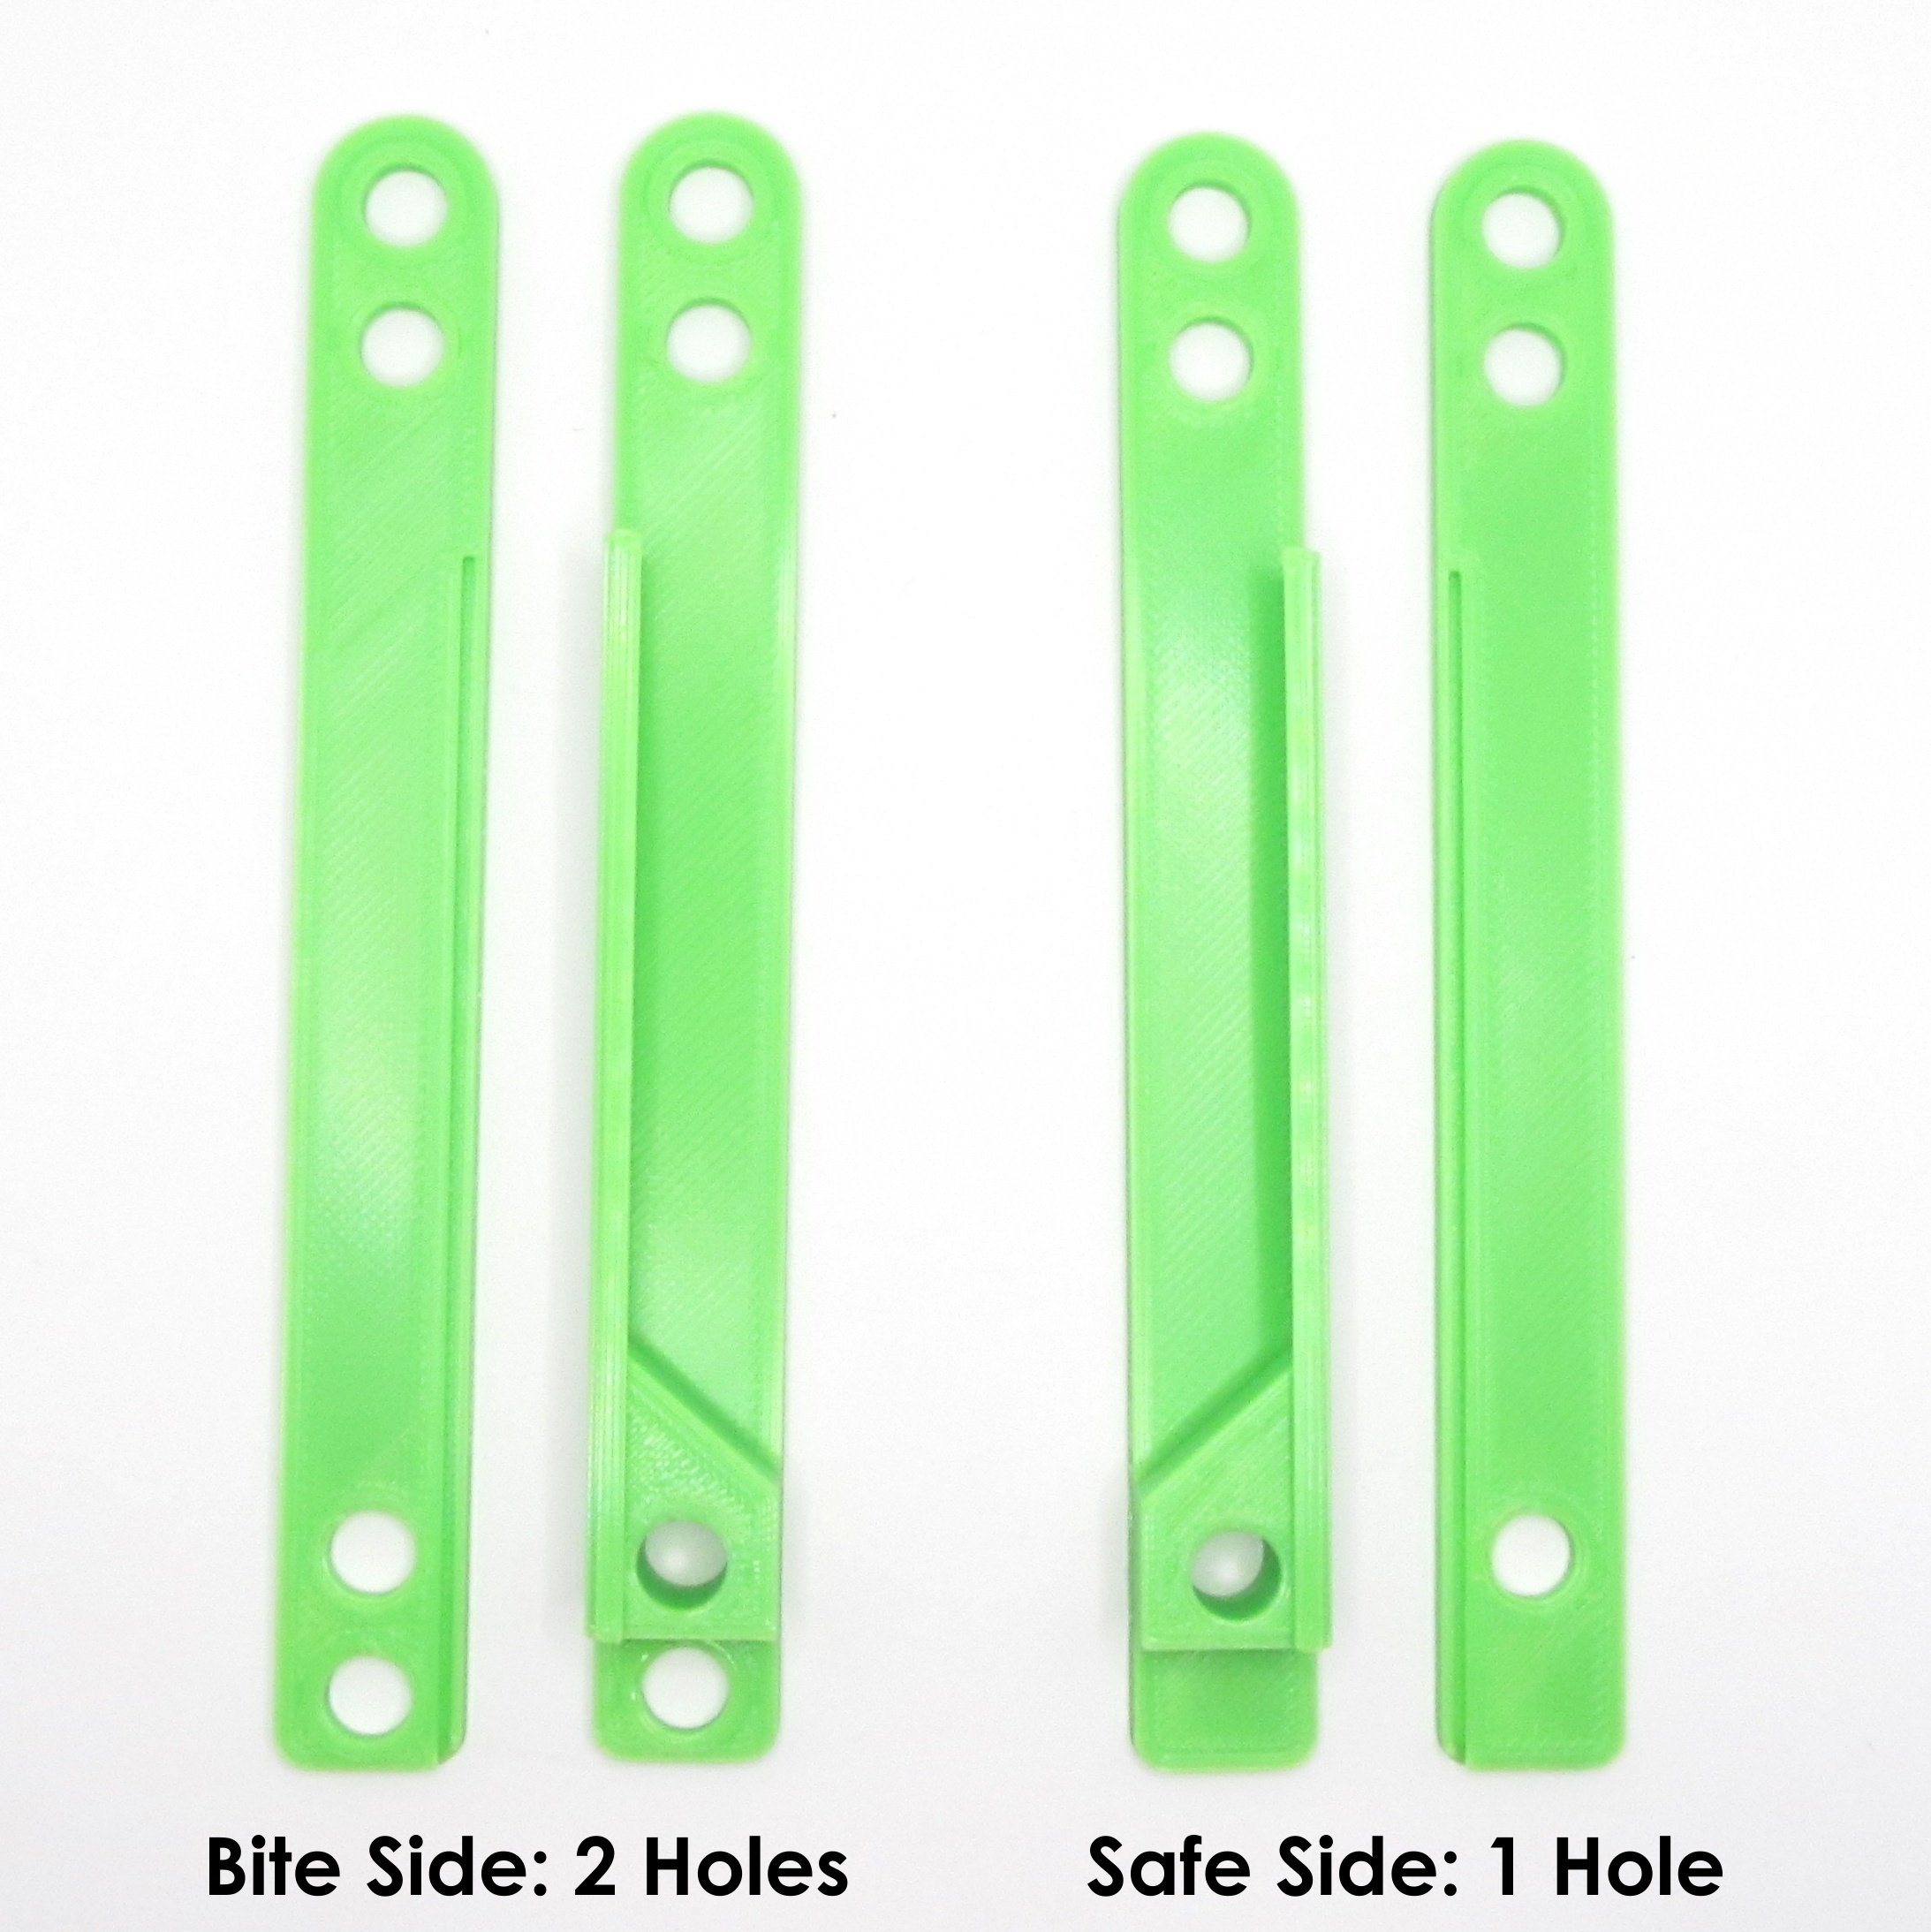
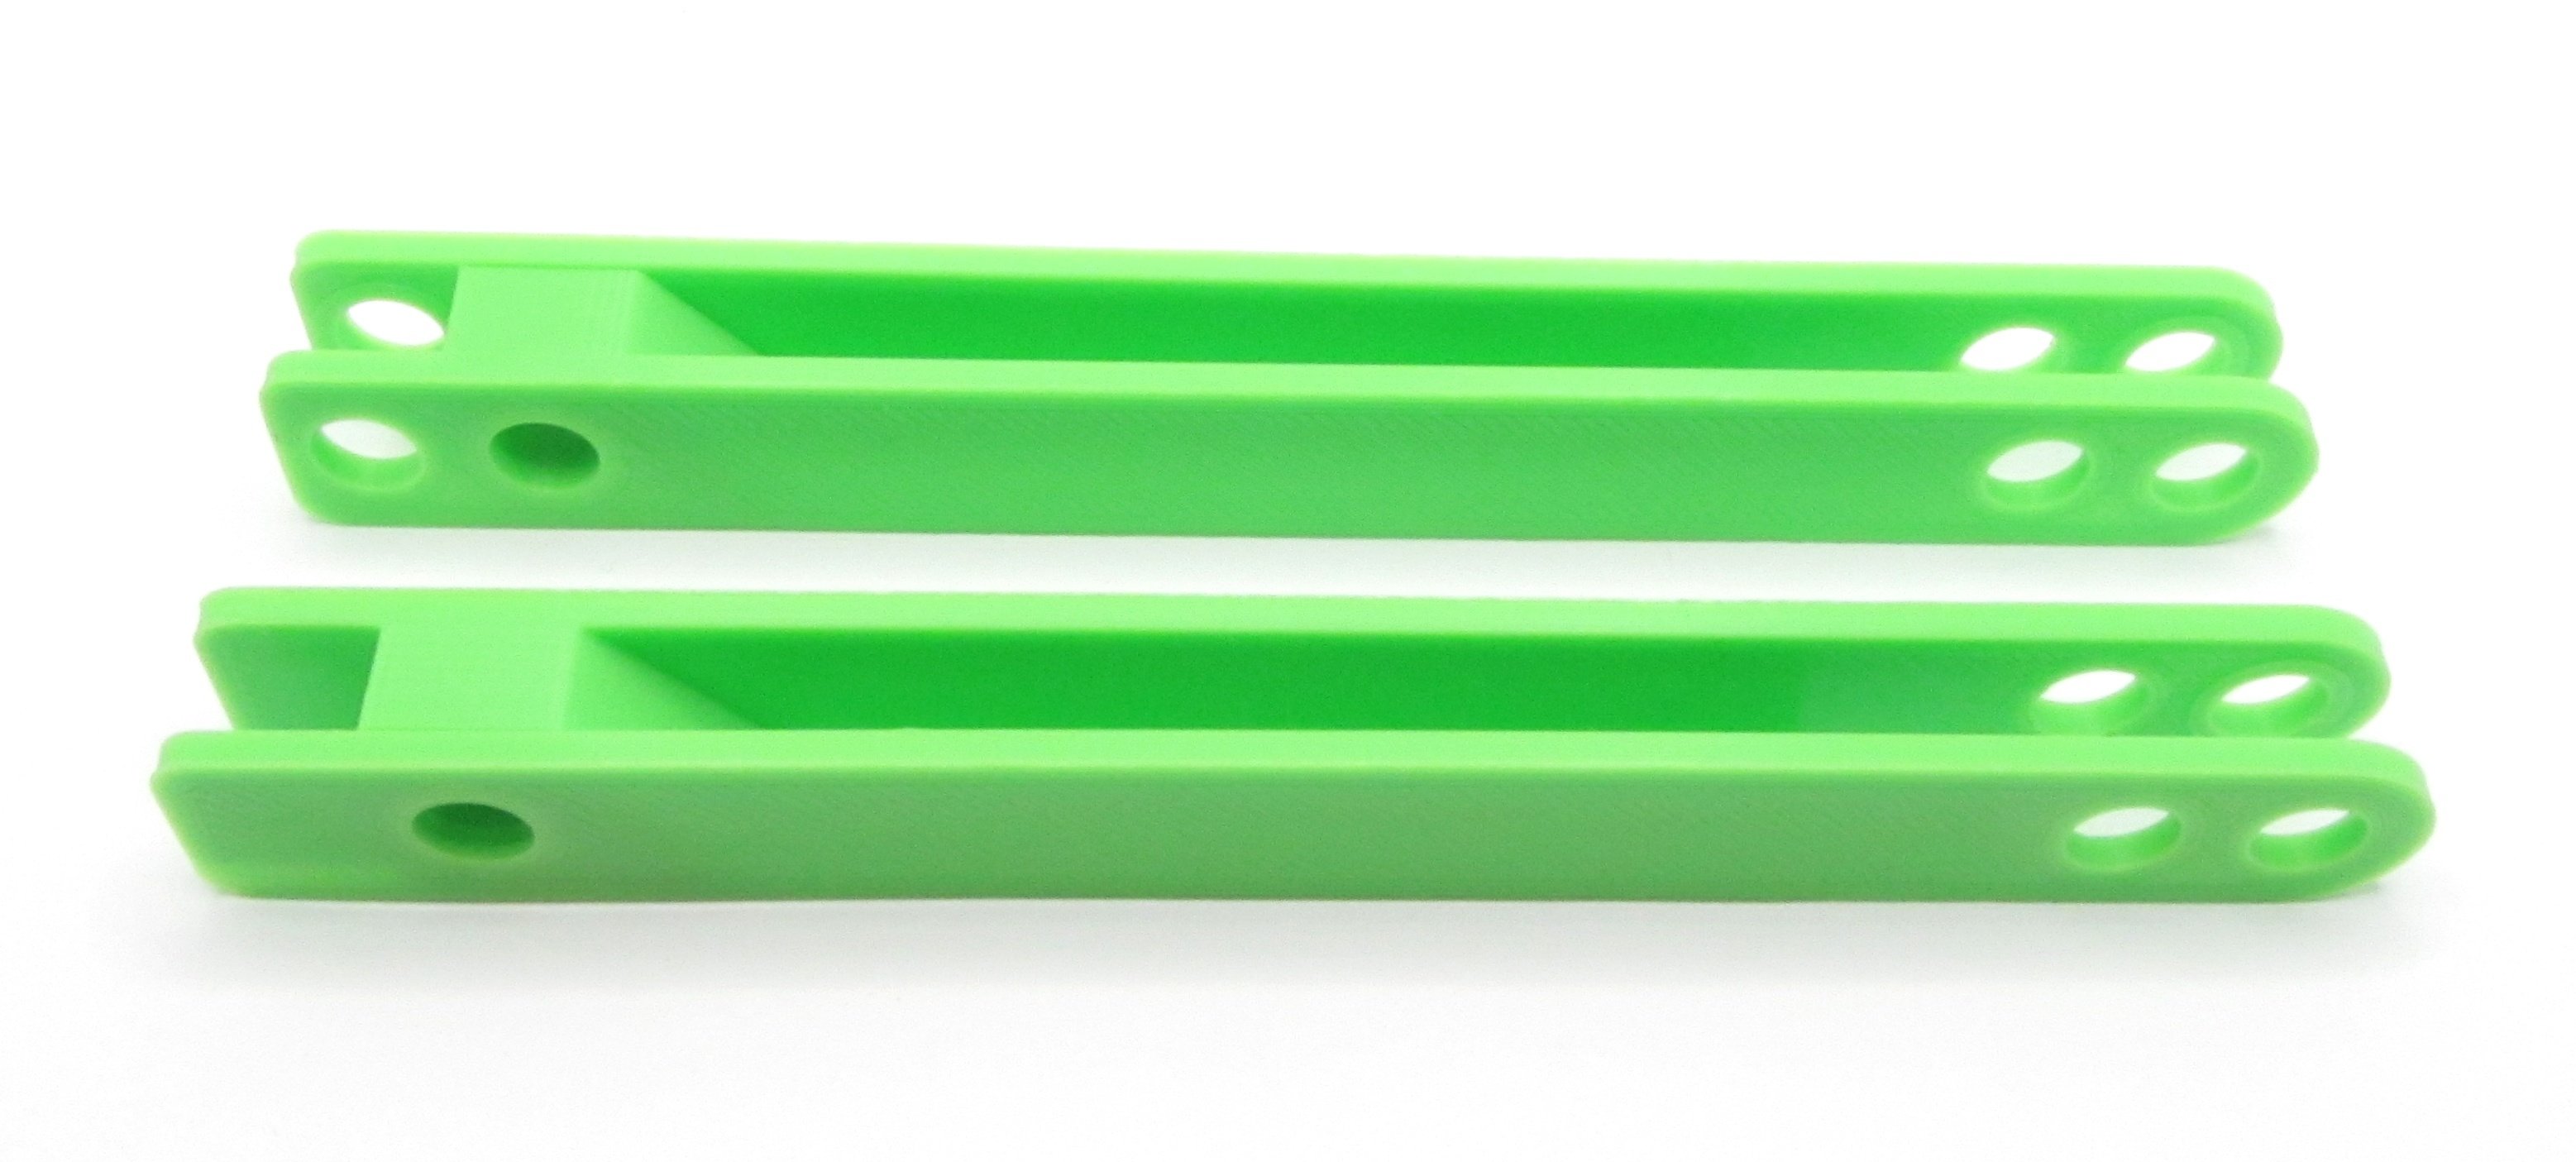
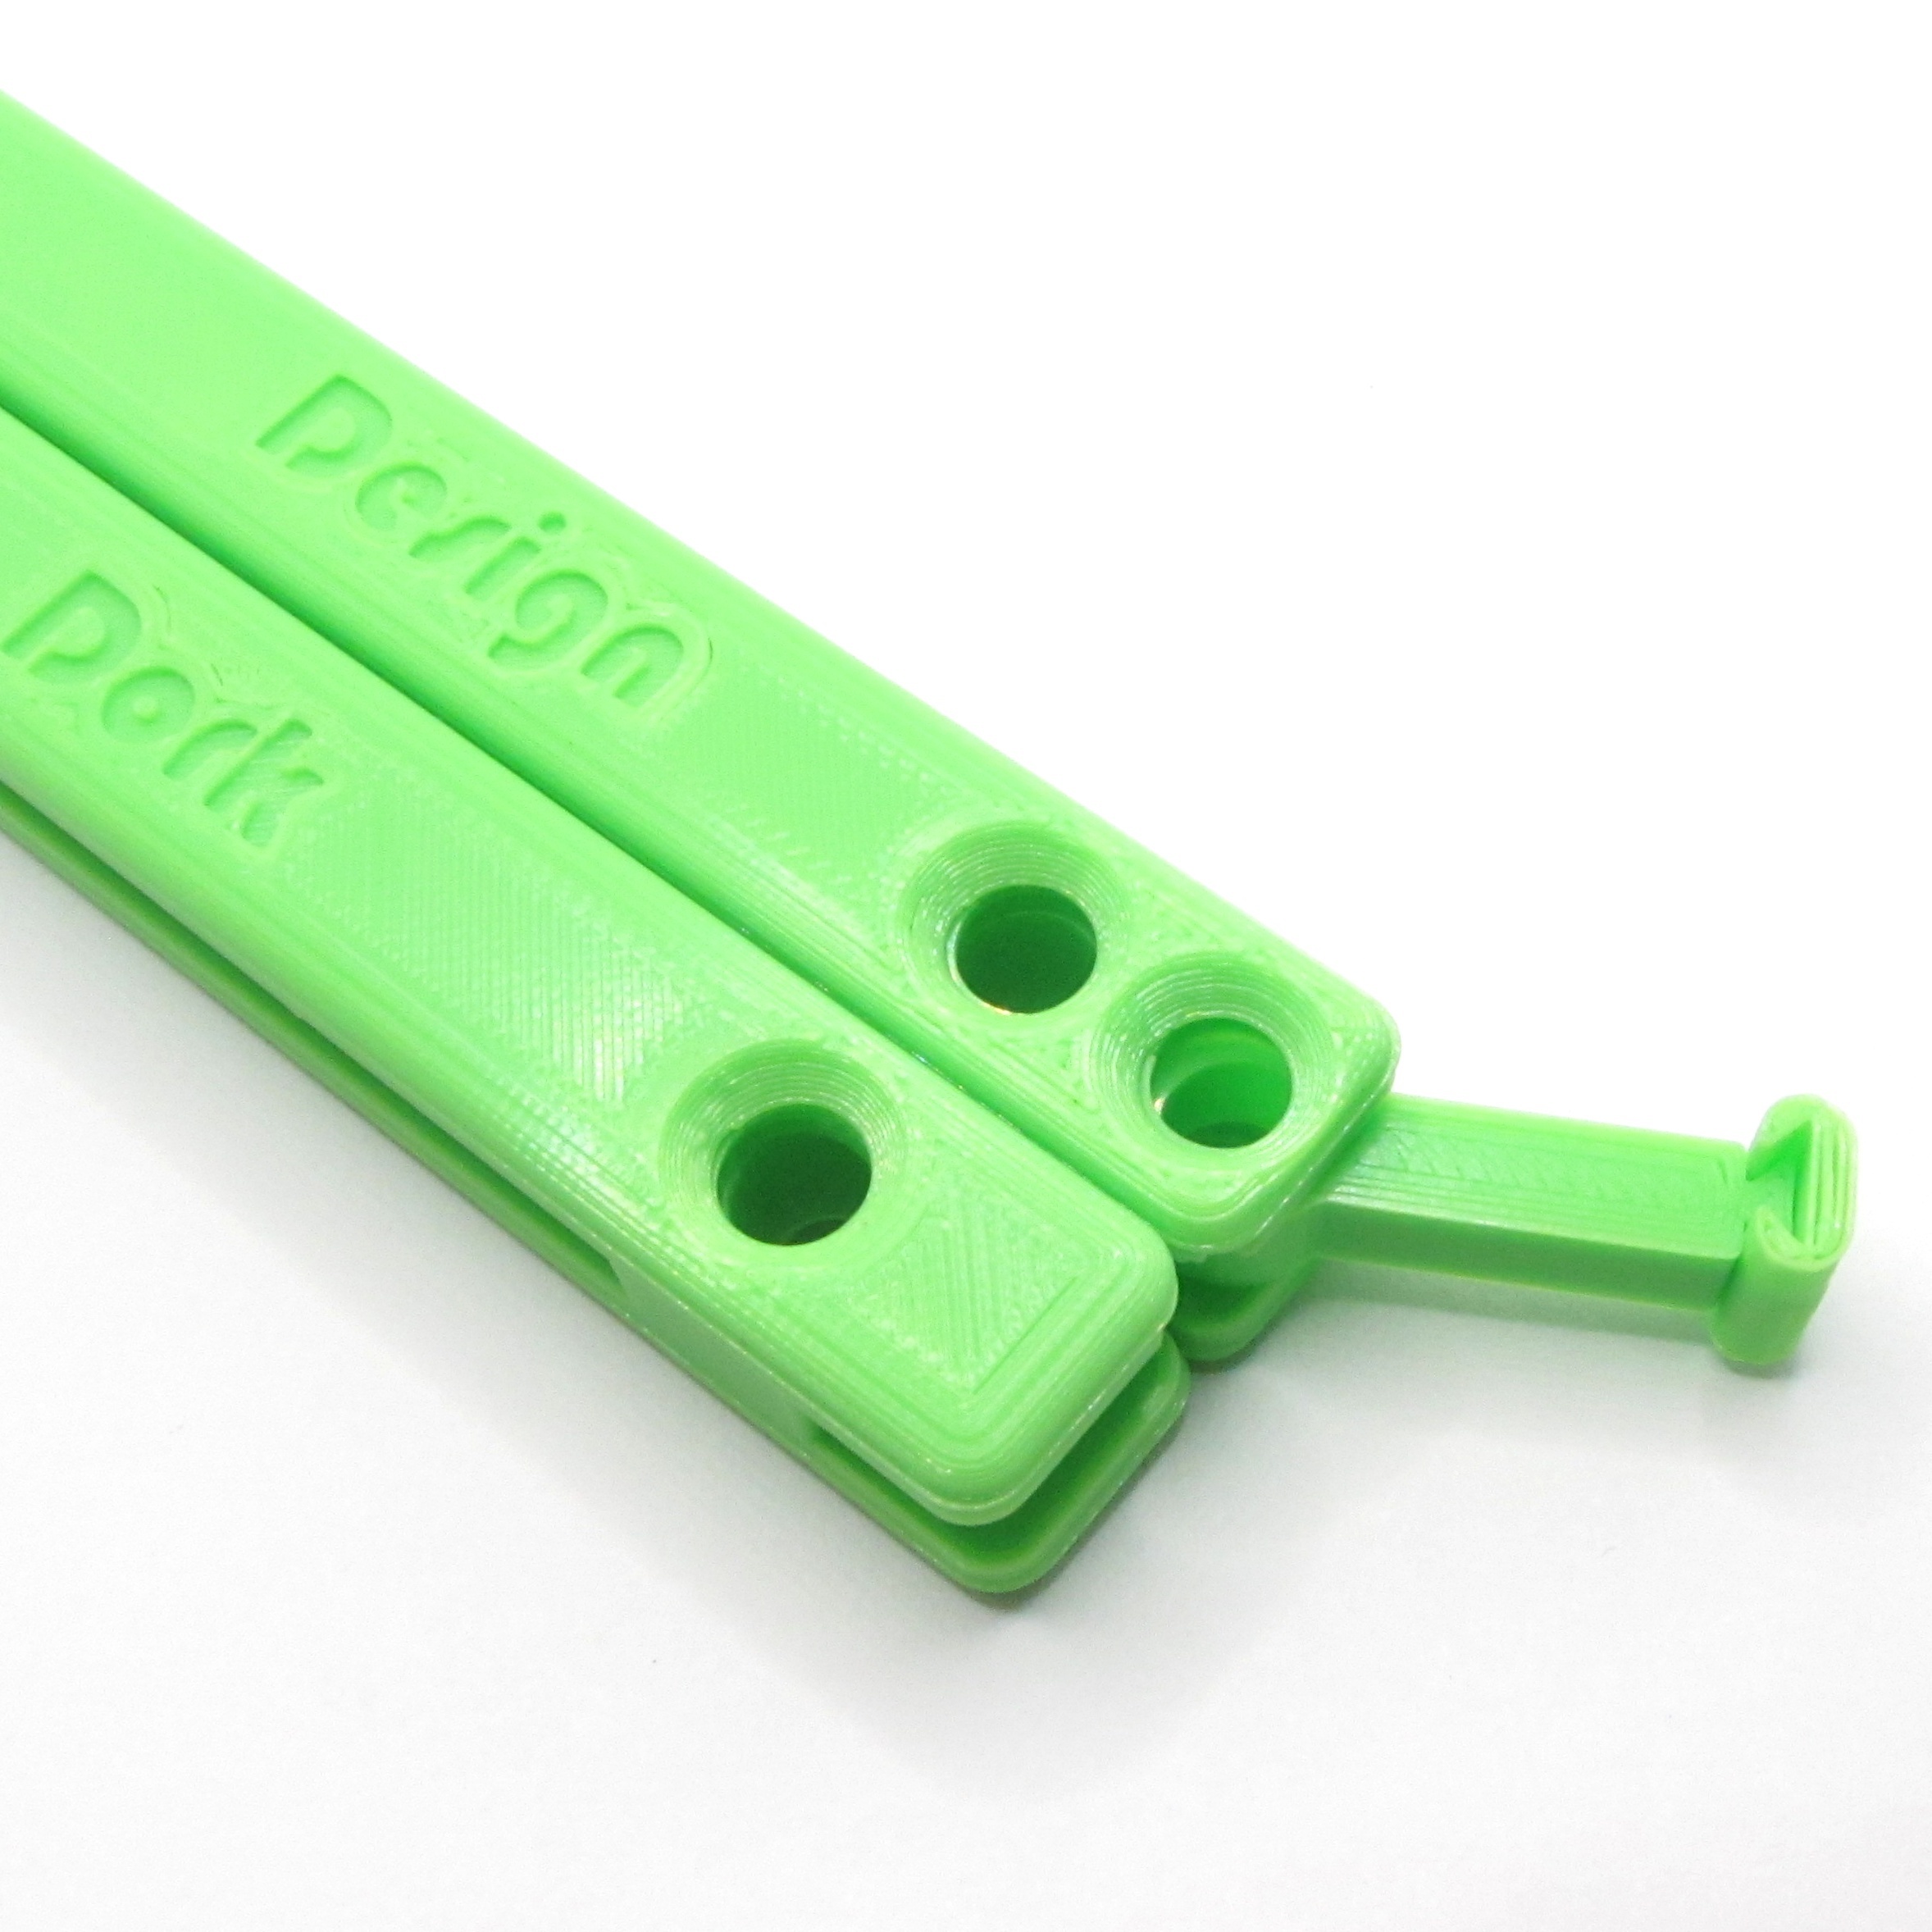
In your pile of parts, you can identify the handle liners by the number of holes in the tail ends. The safe handle parts have one hole, and the bite handle parts have two. The additional hole is for the latch.
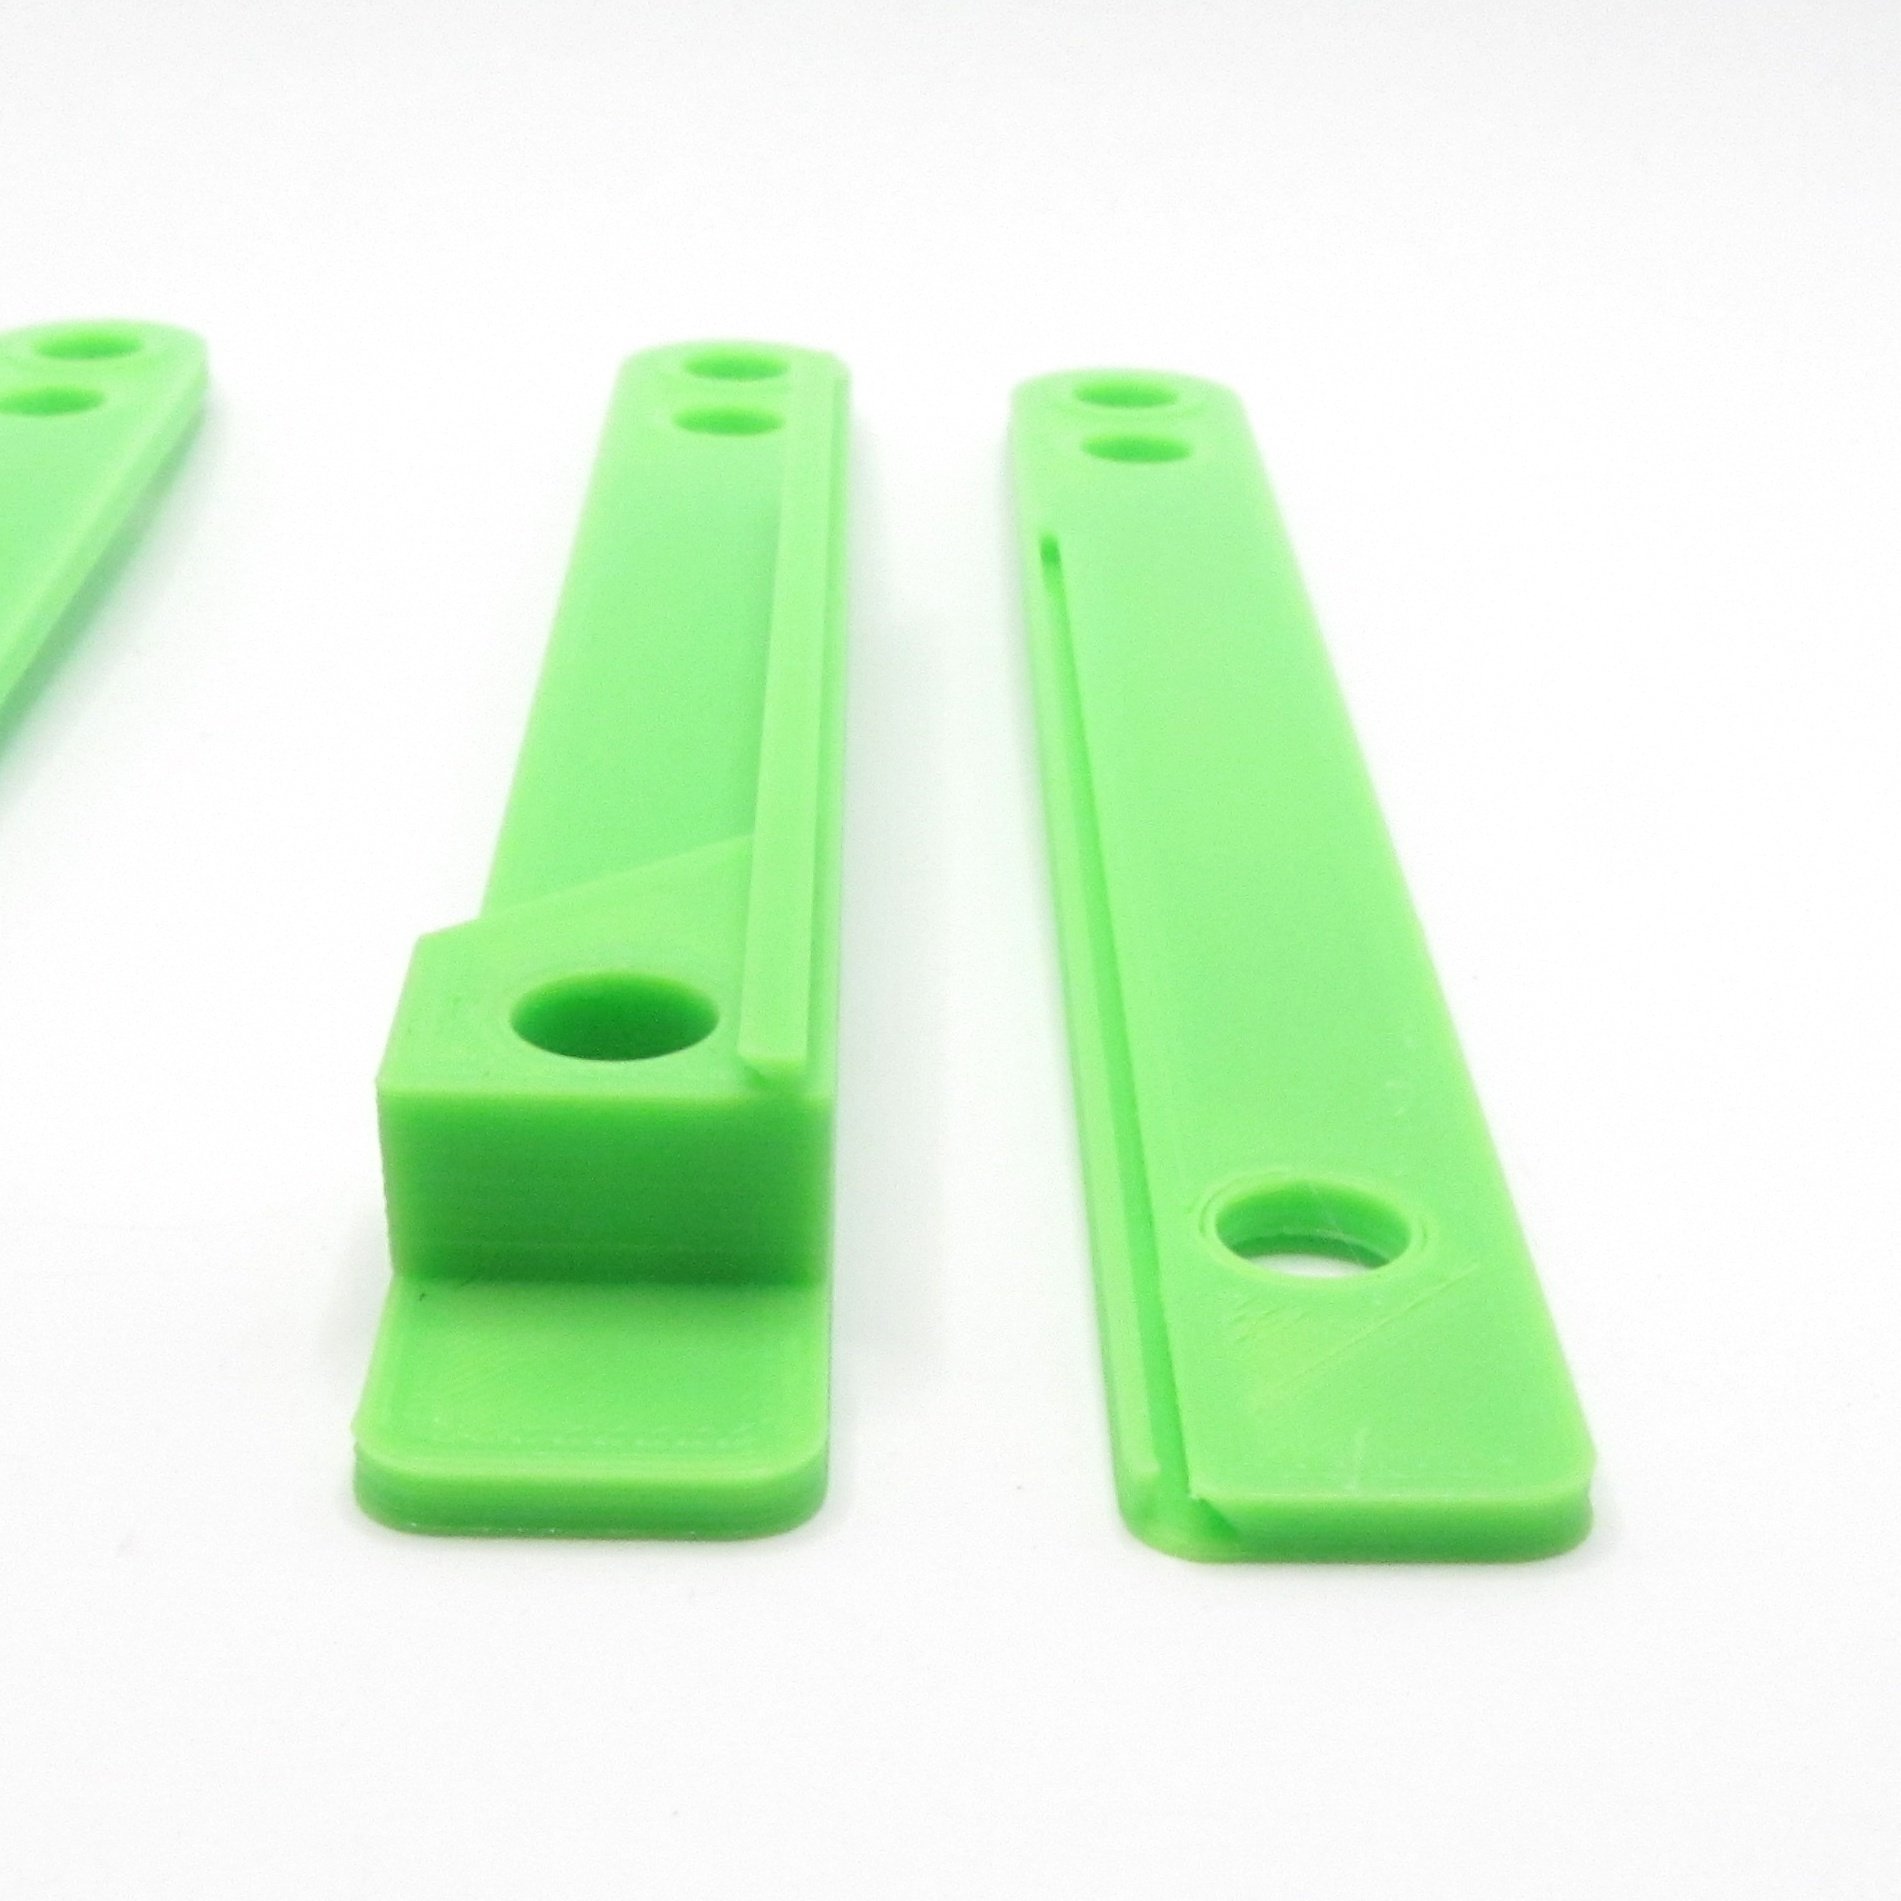
You will also note that there is a groove in the lower liner, and a dovetail in the upper liner. This is how I solved the arbitrary and probably silly self-imposed challenge of not using any supports, because a typical 3D printer cannot print a 90º overhang over thin air. (Yes, I am aware of arc overhangs. That would leave an unsatisfactory surface on the underside of the handle liner, which would cause us additional problems.)
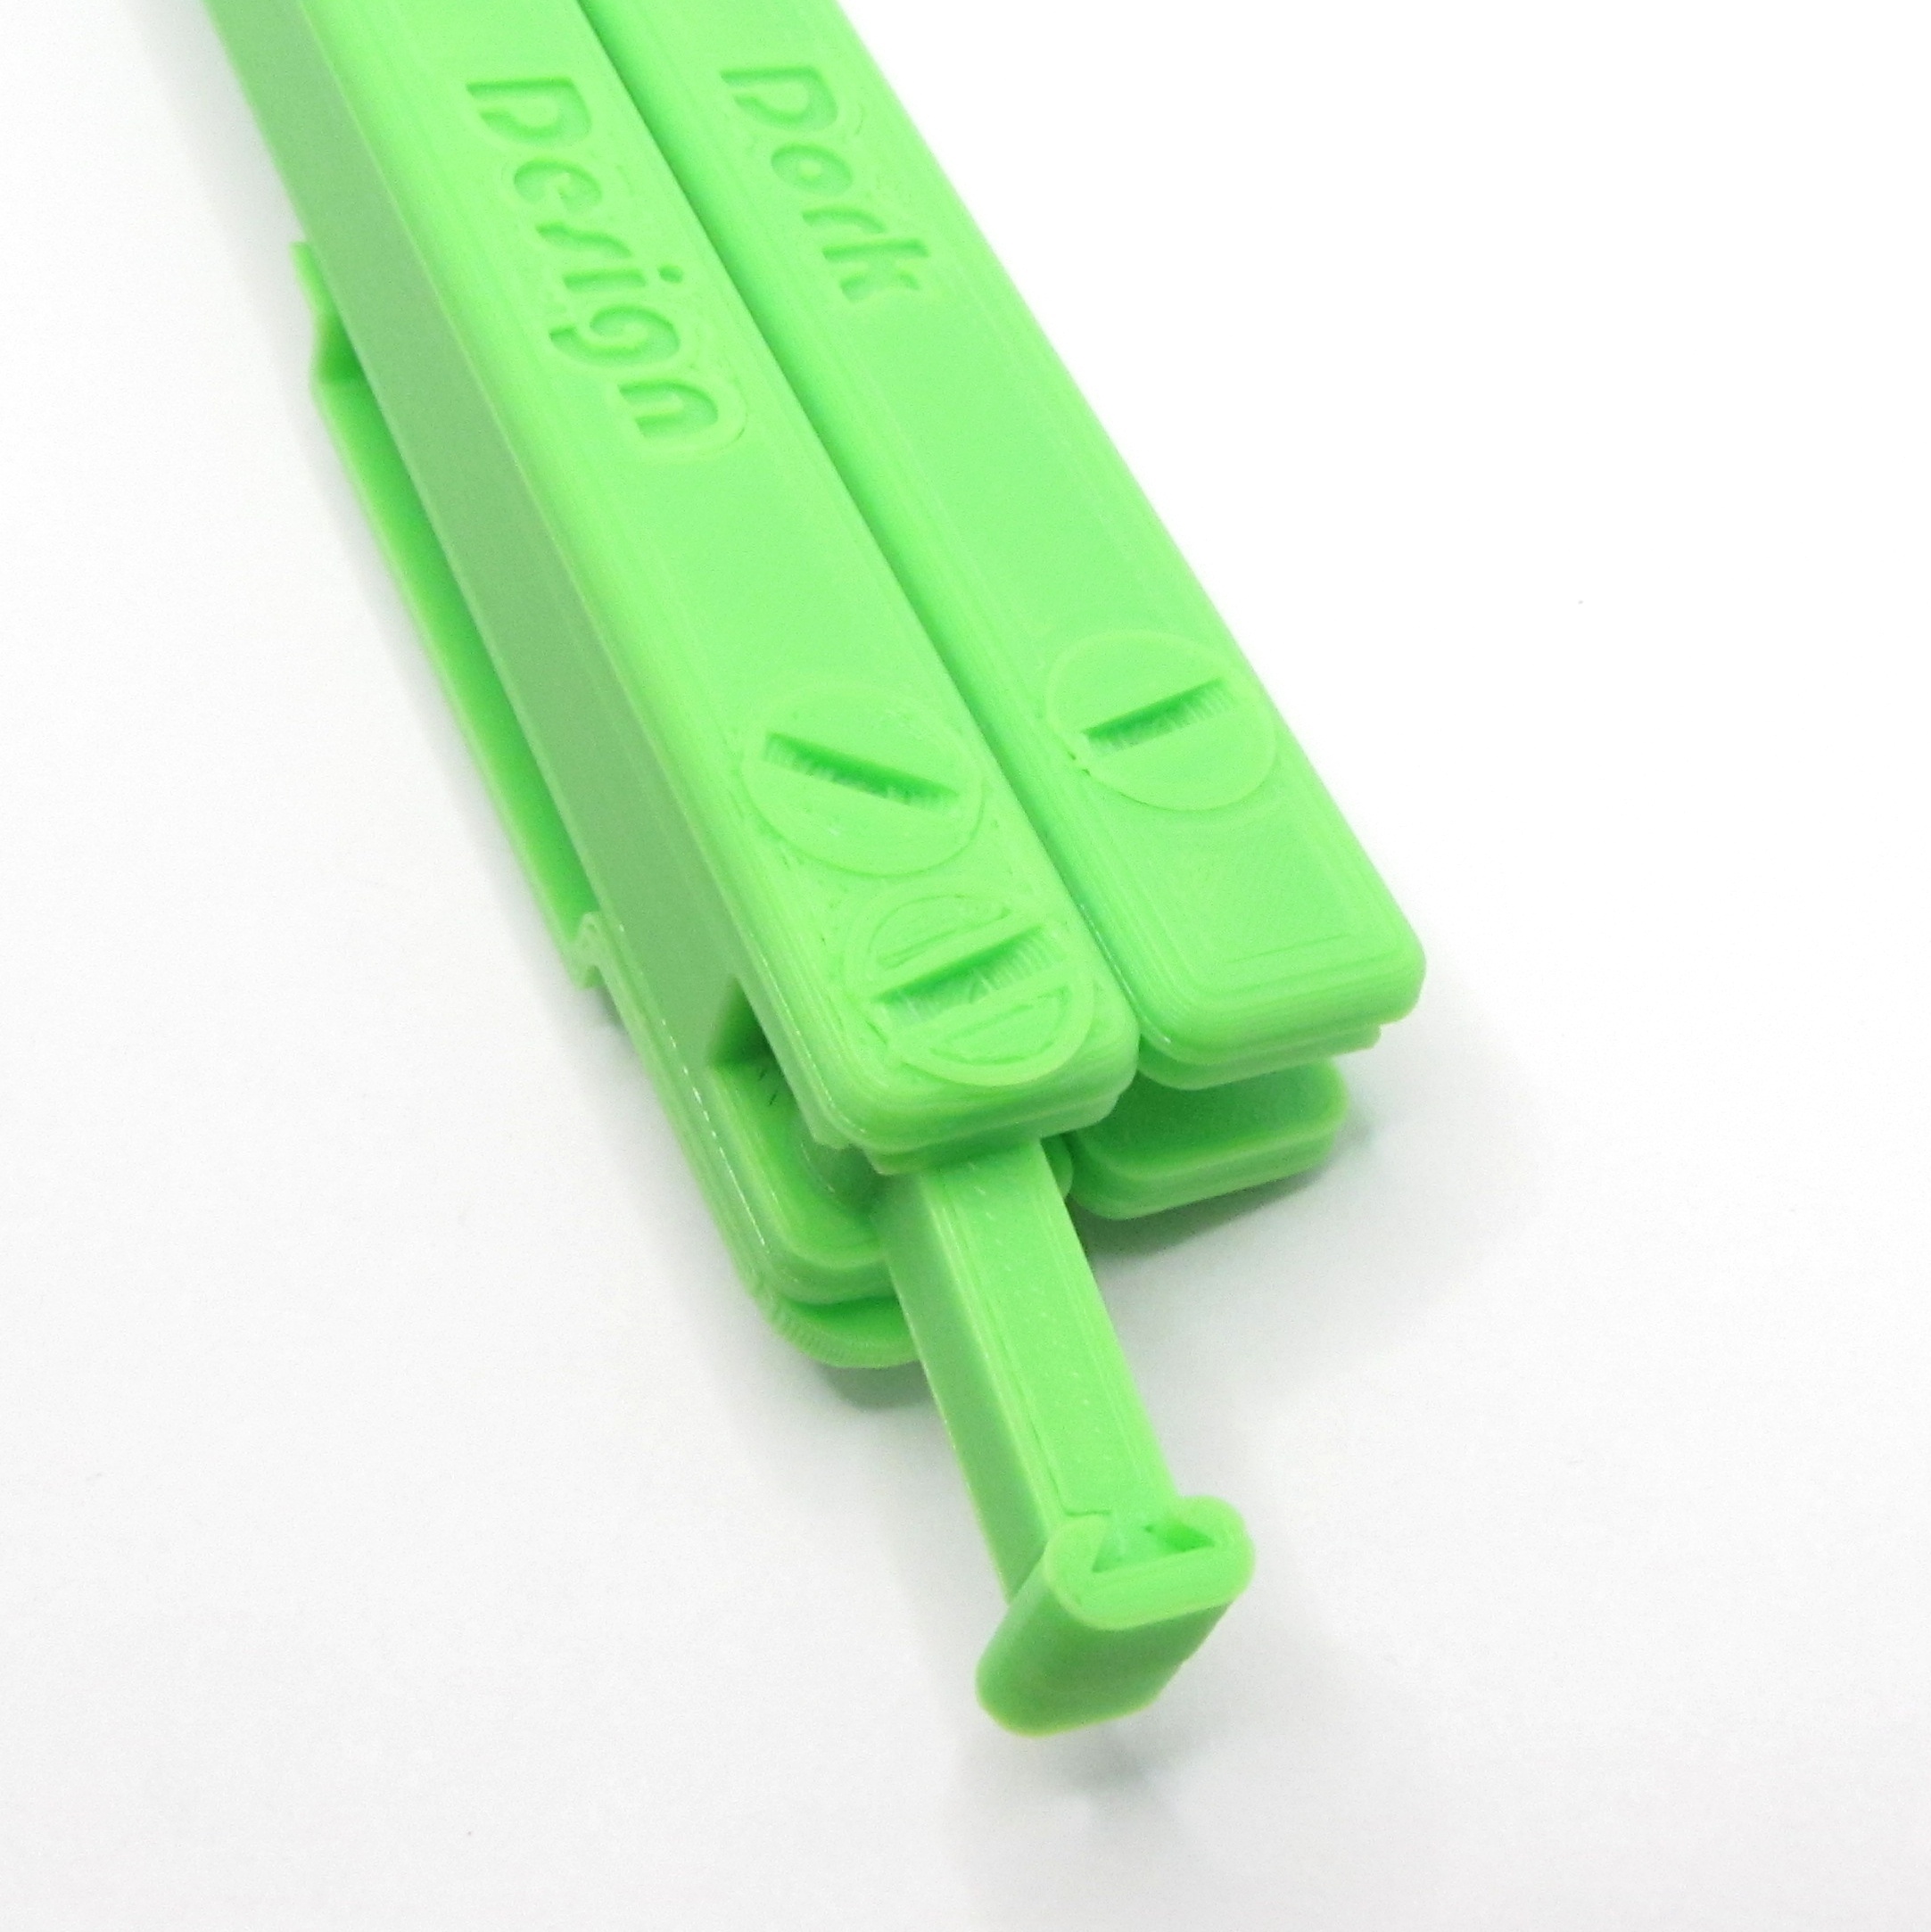
Anyhoo, you will want to slide upper and lower liner halves together like so.
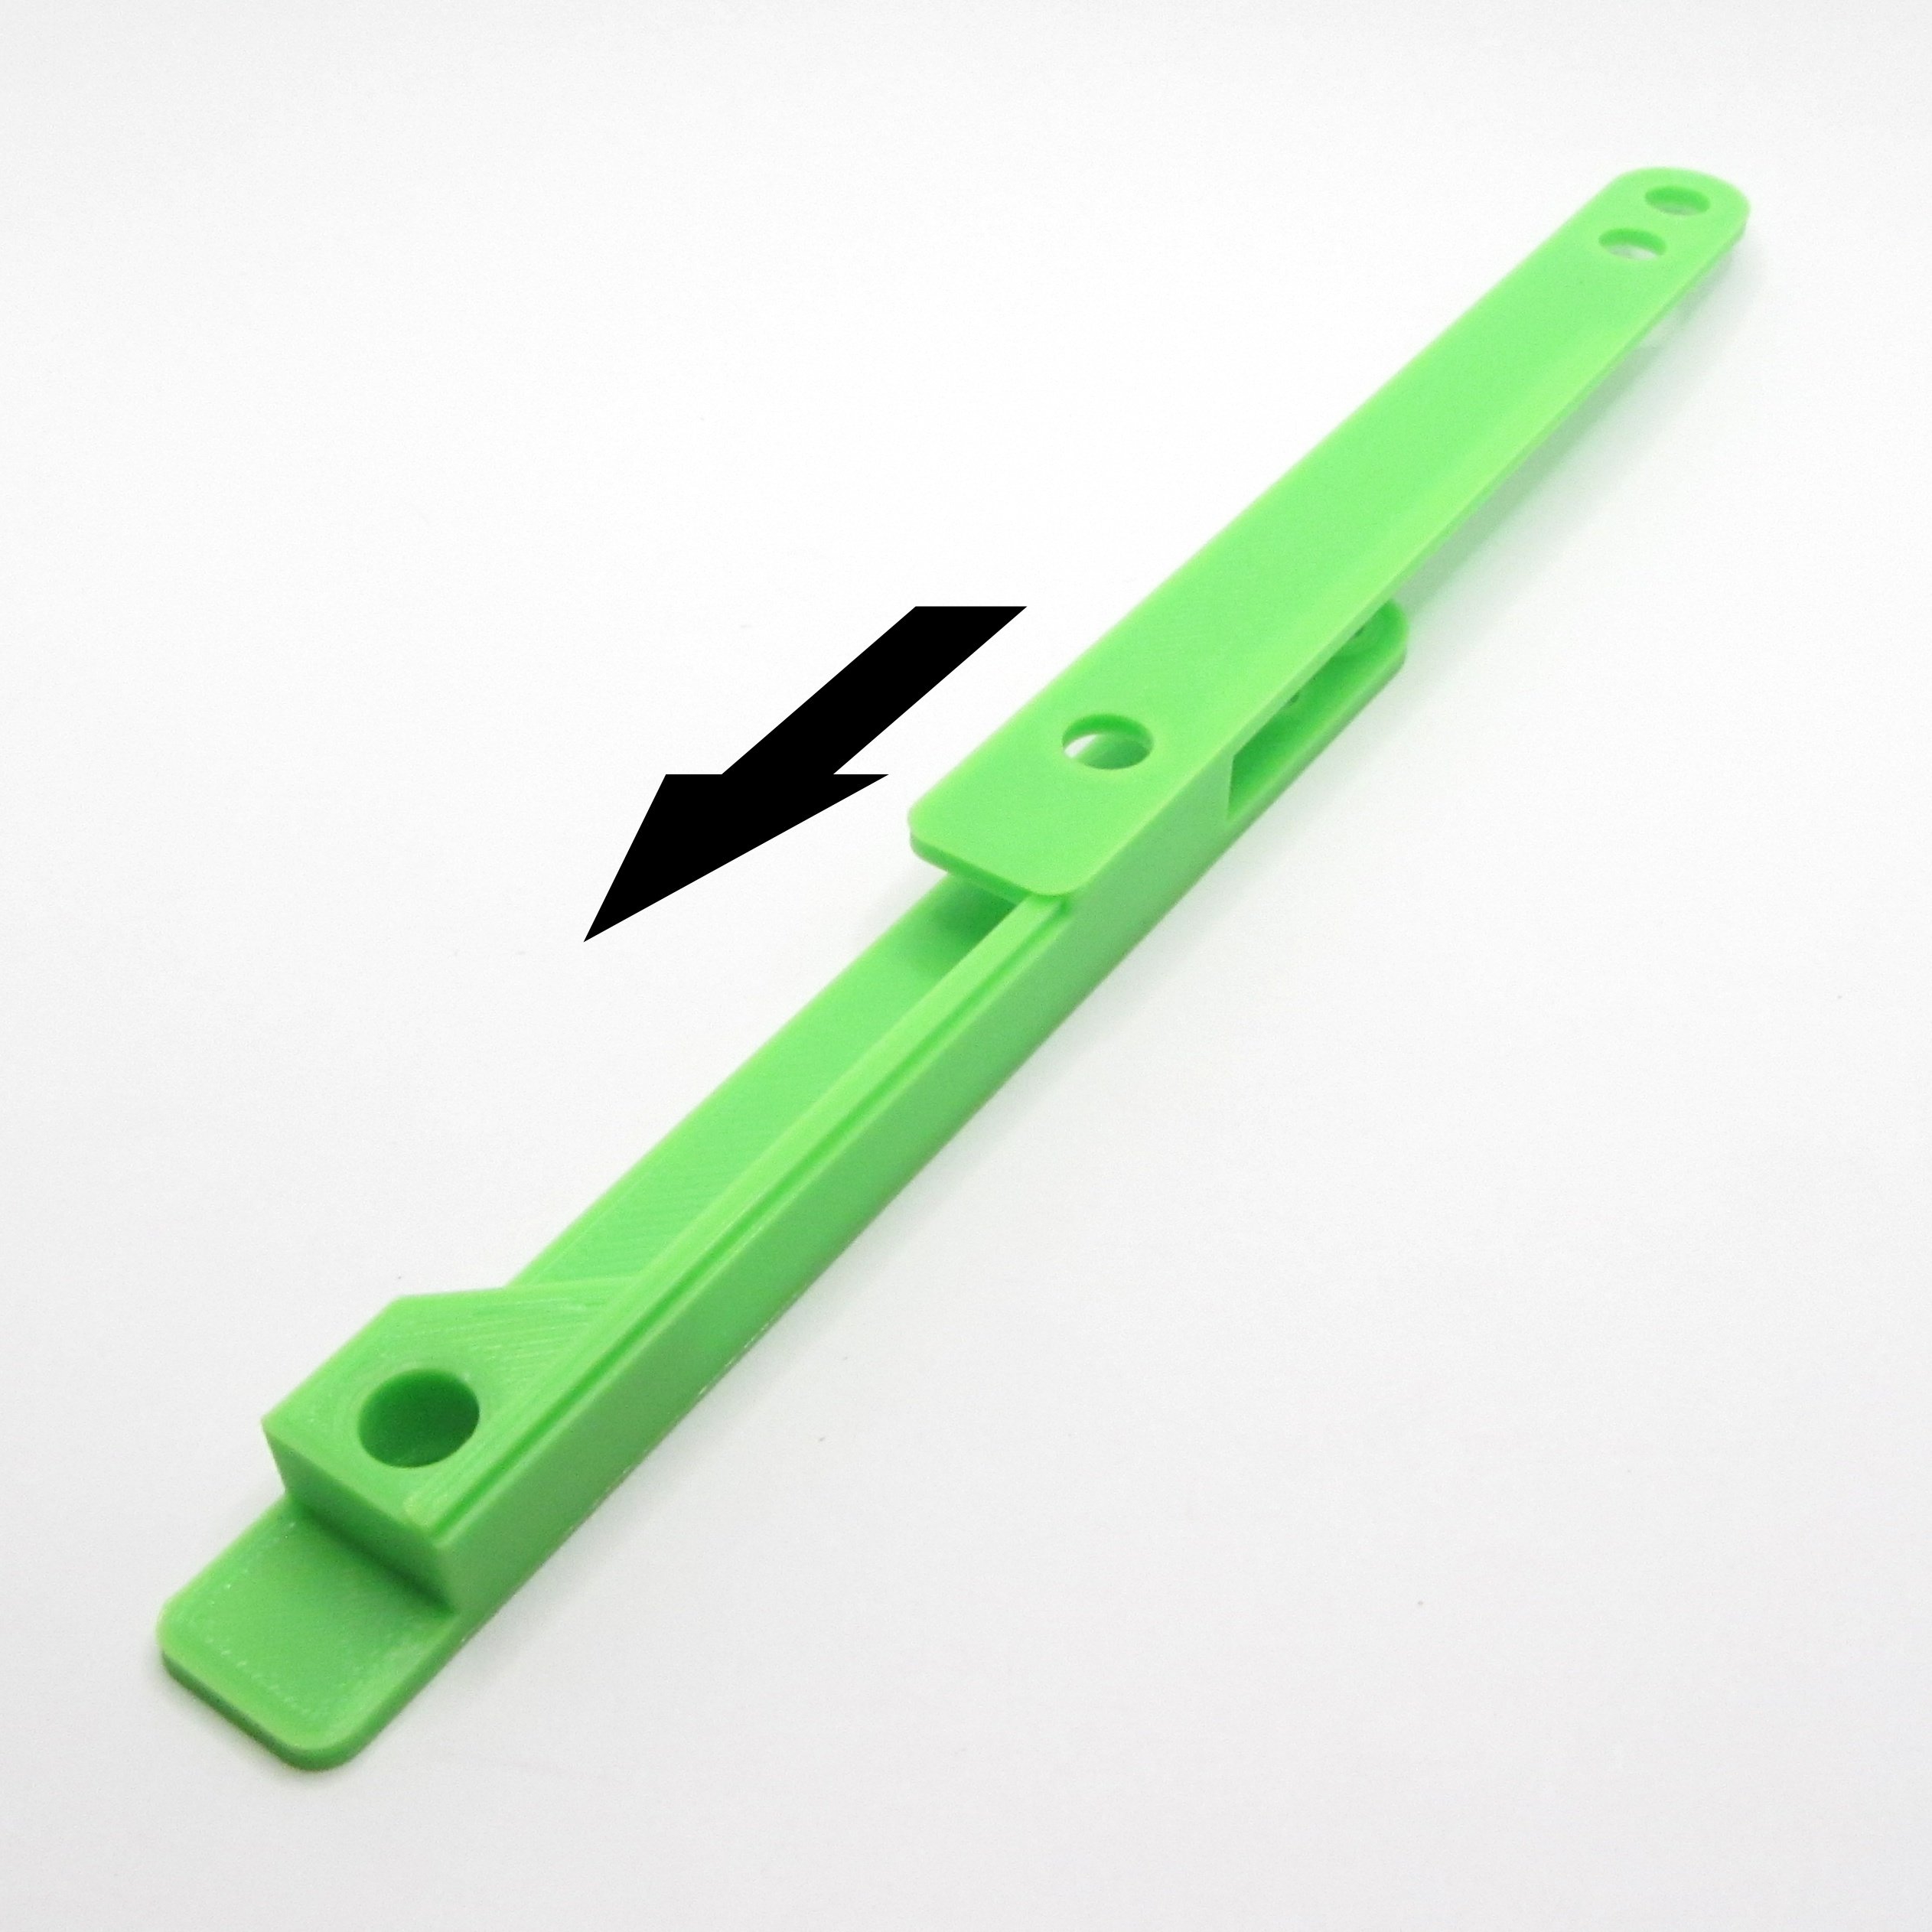
This is where the rubber meets the road vis-a-vis learning if your printer is overextruding, is producing dimensionally accurate parts, and/or is leaving zits or blobs in the corners.
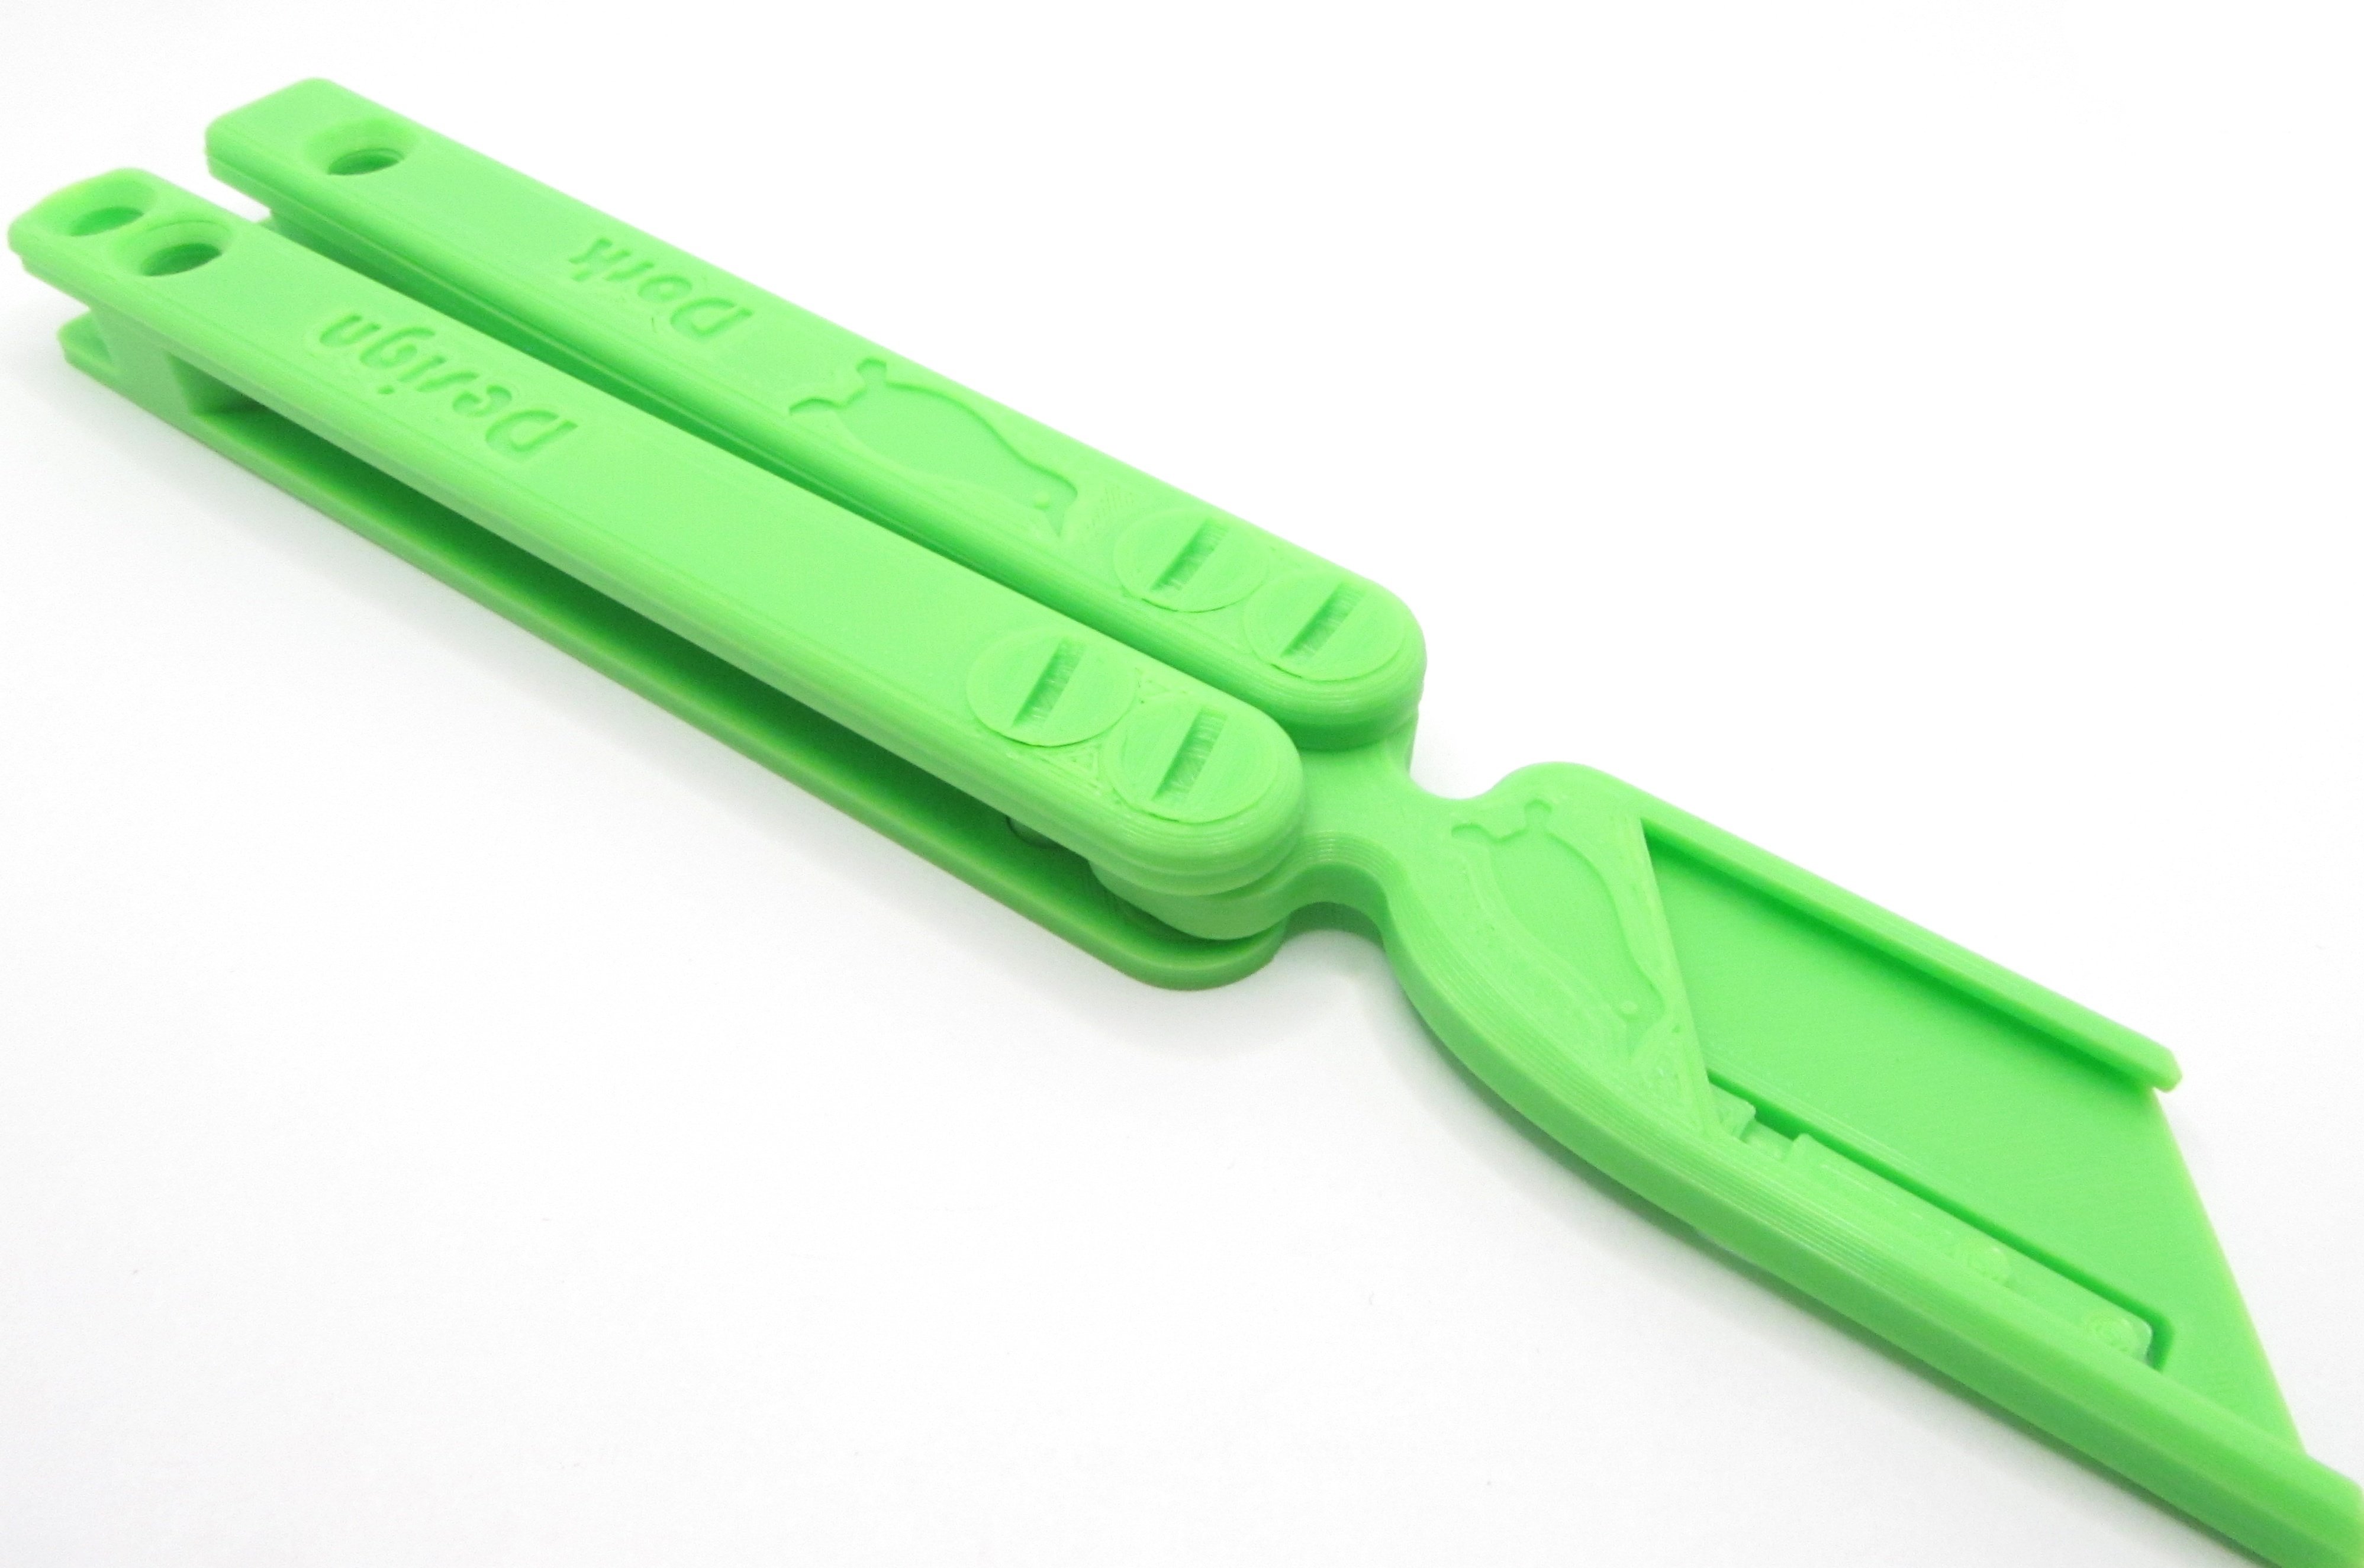
Do both sides and you’ll wind up with two liner assemblies. The groove in the lower liner is exactly the right length to ensure that the screw holes line up. Visually verify that they do so; having all the screw holes aligned will be vitally important to your knife pivoting nicely.
Now, it’s the part that you can get backwards. Fun! As mentioned above, you will want to arrange your knife so that the edge, when closed, slots into the bite handle side. Lay out your handle liners as pictured below, with the open sides facing out, and the edge side of the blade holder towards the bite handle assembly. If you need a guide for which side is the edge side, the beak on the penguin embossed in the blade holder faces the blunt side, and should go towards the safe handle. (Yes, it’s a penguin. Hush.)

You should be able to lay everything together like so. The holes in the blade holder should align with the frontmost holes in the handles.

Now, drop on your chosen handle scales. Place the ones on the opposite side as well.

Install screws in all four holes on the business end of the handles.
This is another fairly precise fit, and if your printer produces any pronounced elephant’s foot you may have to overcome this at first by hole-fucking the cutouts a bit with the shanks of the screws. You could also ream the holes slightly with a drill bit, but that’s cheating. The clearances on the holes on the blade holder are actually a touch wider than the scales and handle liners, to ensure easy pivoting action.
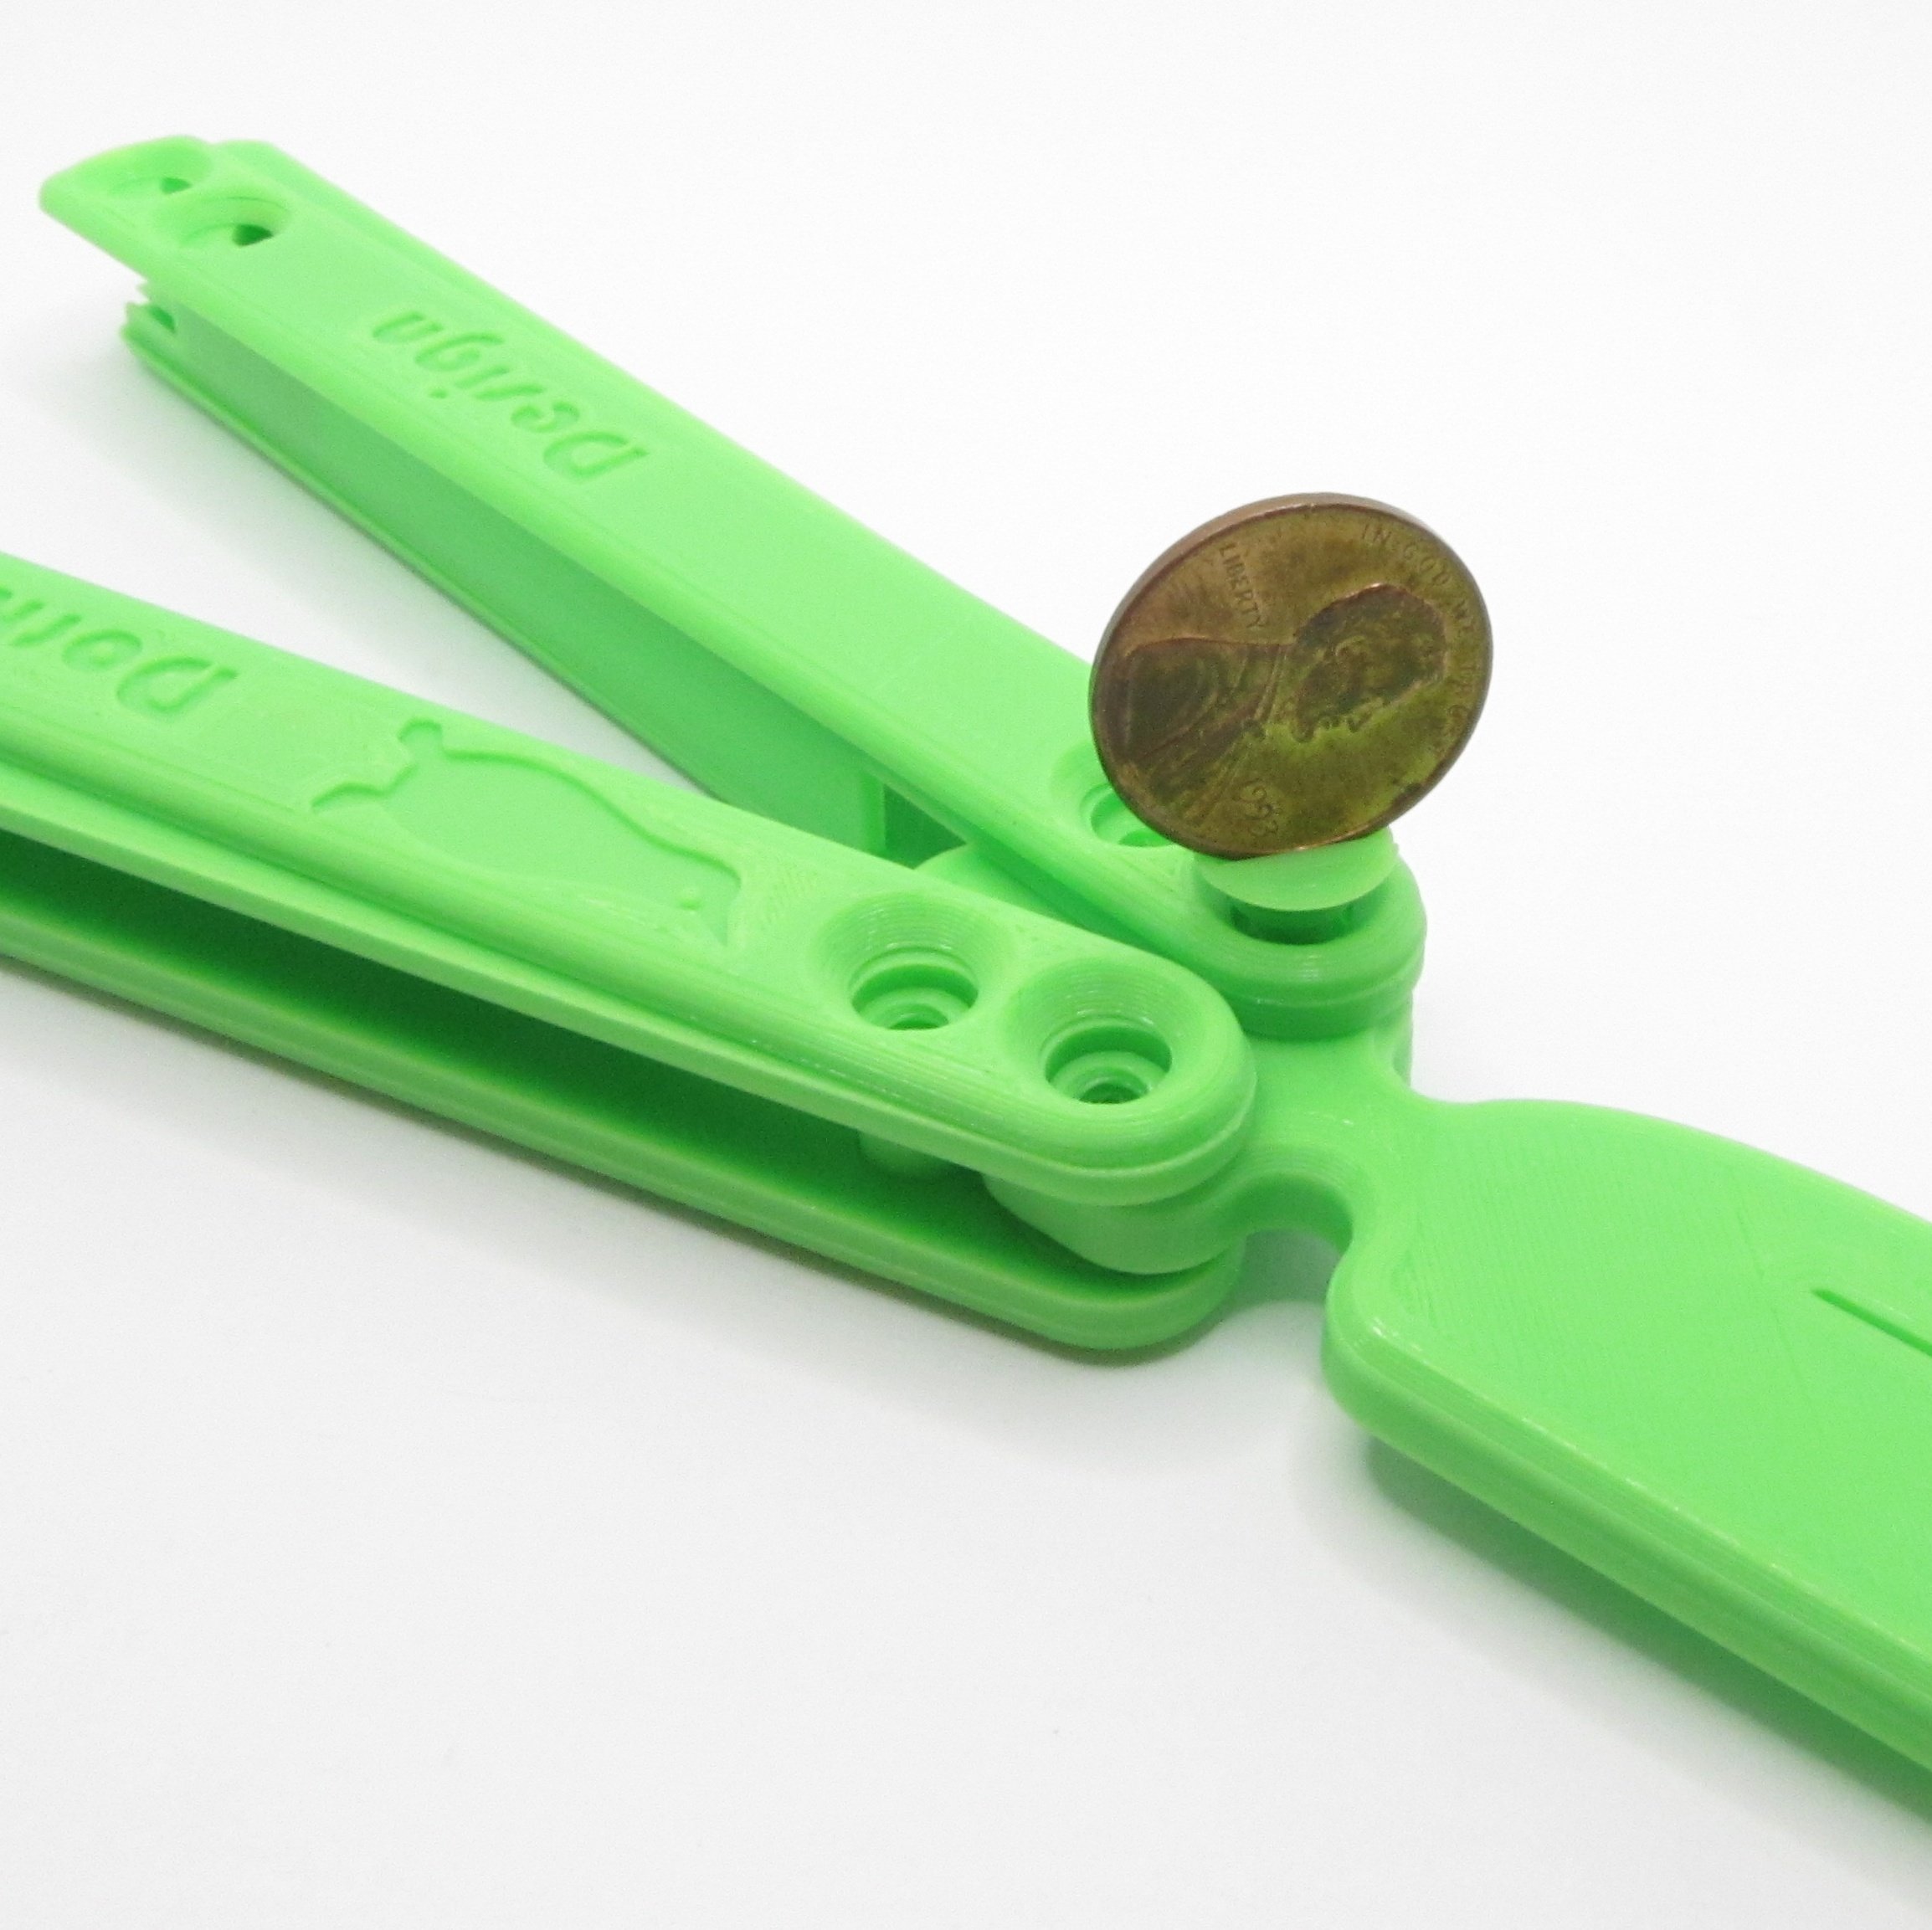
Don’t forget that you can ask for Abe’s help in turning the screws. You don’t have to crank these down super hard. Especially the pivot screws, on the very end – torque those too much and you’ll lock the blade solid, which you don’t want.
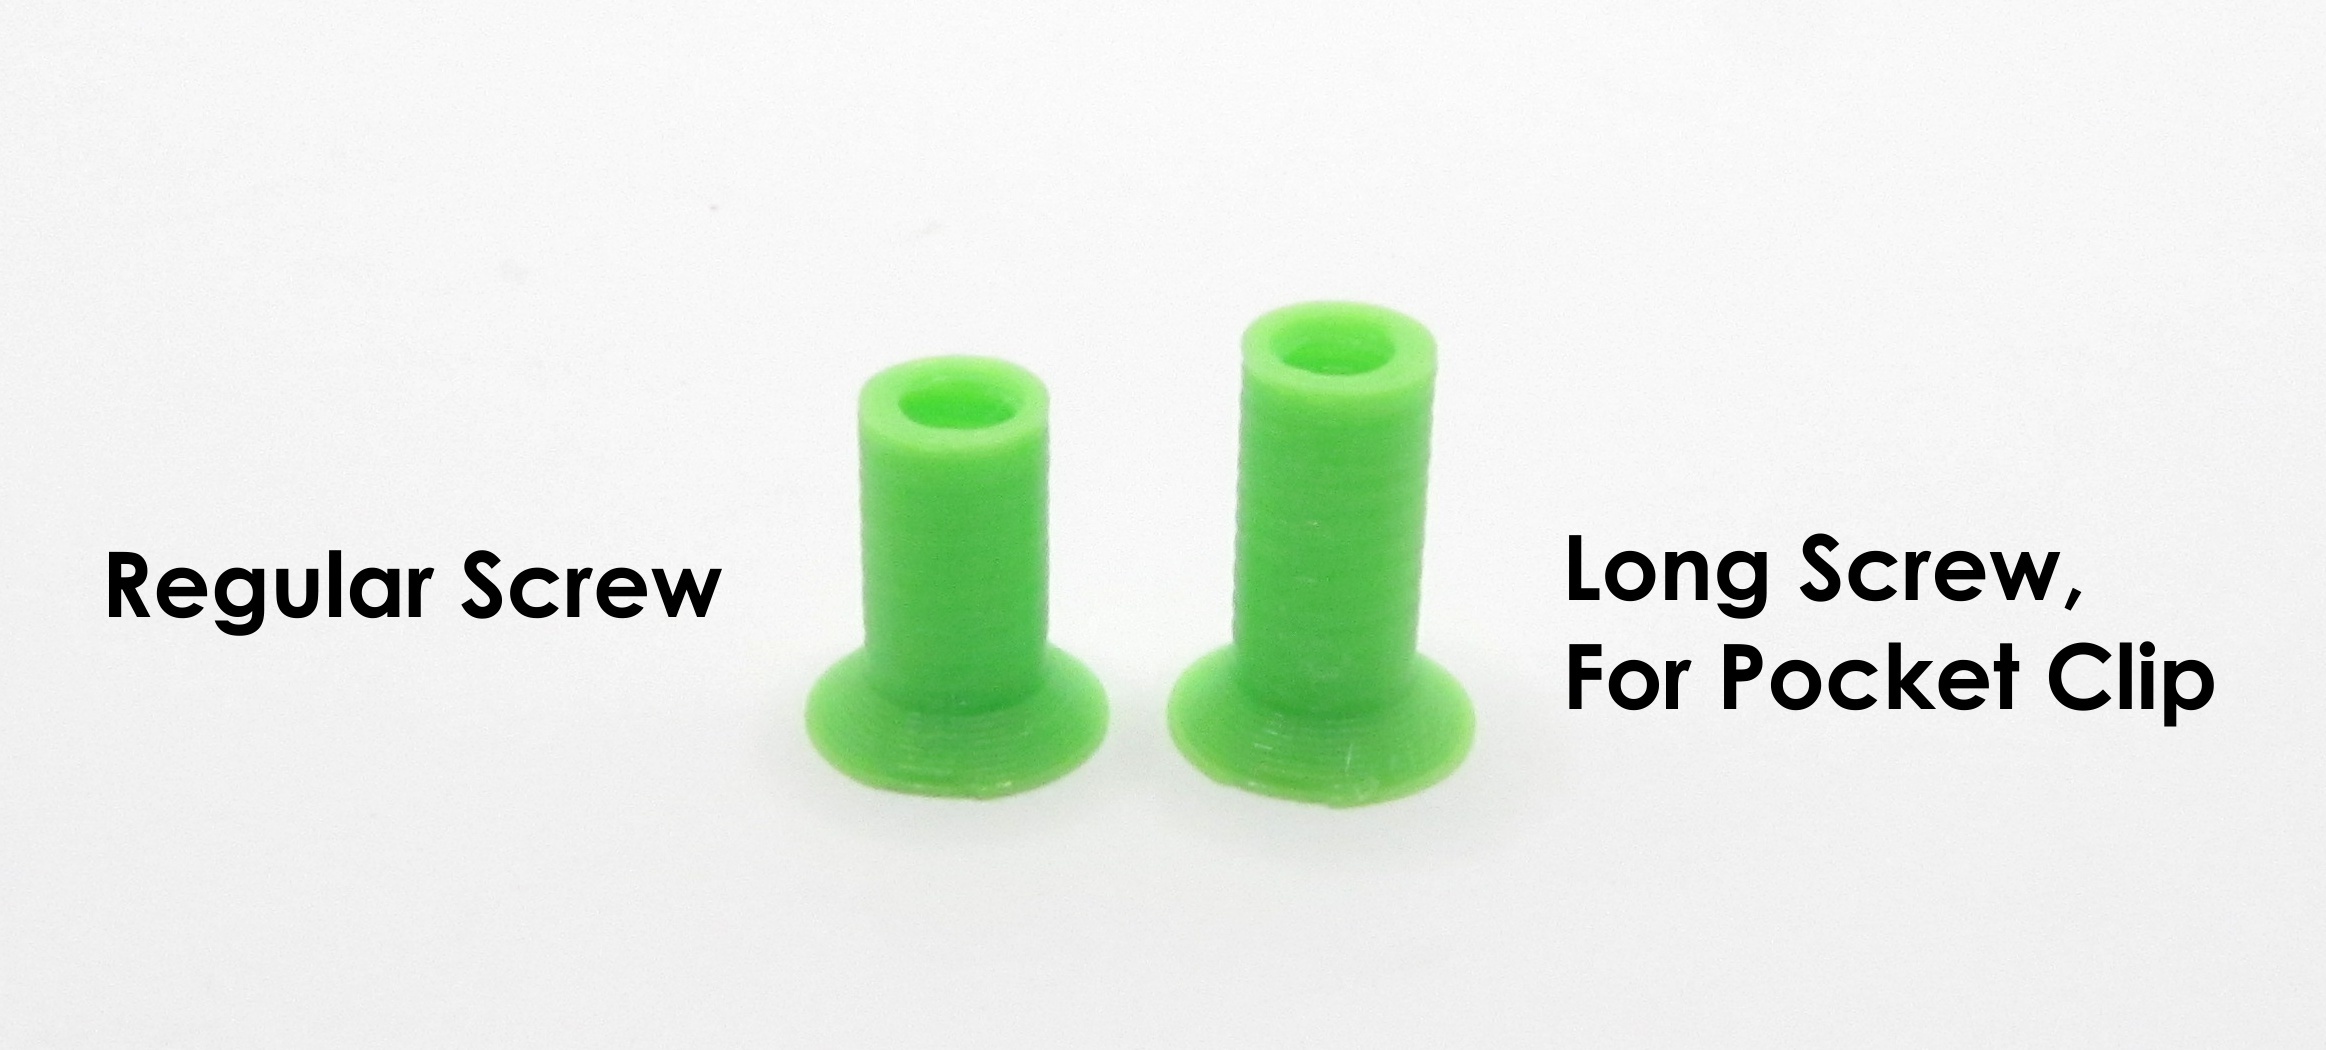
I feel I should point out at this juncture that there are two screw lengths included. The longer ones are meant for attachment of the pocket clip if you’re going to use it. You should be using the shorter ones for everything else.

Now it’s time to assemble the latch. It consists of two pieces, a shank and a head, and this is once again because of my questionable design decision to not require supports. These parts are an interference fit, and while they’re quite tight they will go together. Again, if your printer produces any elephant’s foot you can make your life easier by identifying which faces of the two parts have it and then start by pressing together the faces that don’t.

It helps to have a solid surface, perhaps a Rock Or Something, to press down against. If the edges hurt your delicate fingers you can always use your penny as a press tool, also.
The latch goes in the lone hole at the very tail end of the bite handle.

If you’re going to install the pocket clip, now is the time. Use the longer screws (above) to go through the clip and the entire rest of the sandwich, including through the hole in the latch. If you aren’t going to use the clip, just omit it and use the normal shorter screws here instead.
The last lonely hole also gets a normal short screw.

The blade slots into a track in the blade holder. You will have to press down the locking tab such that the two pegs clear the bottom face of the blade.

It should click into place satisfactorily. If you ever need to remove it for replacement or what have you, poke one of the locking pegs down with the tip of a pen or similar and you should be able to slide the blade out. Press the forward one and slide the blade until it’s on top of the rearward one, then you can release. The surface of the blade will then keep both pegs pressed down until it’s slid clear.
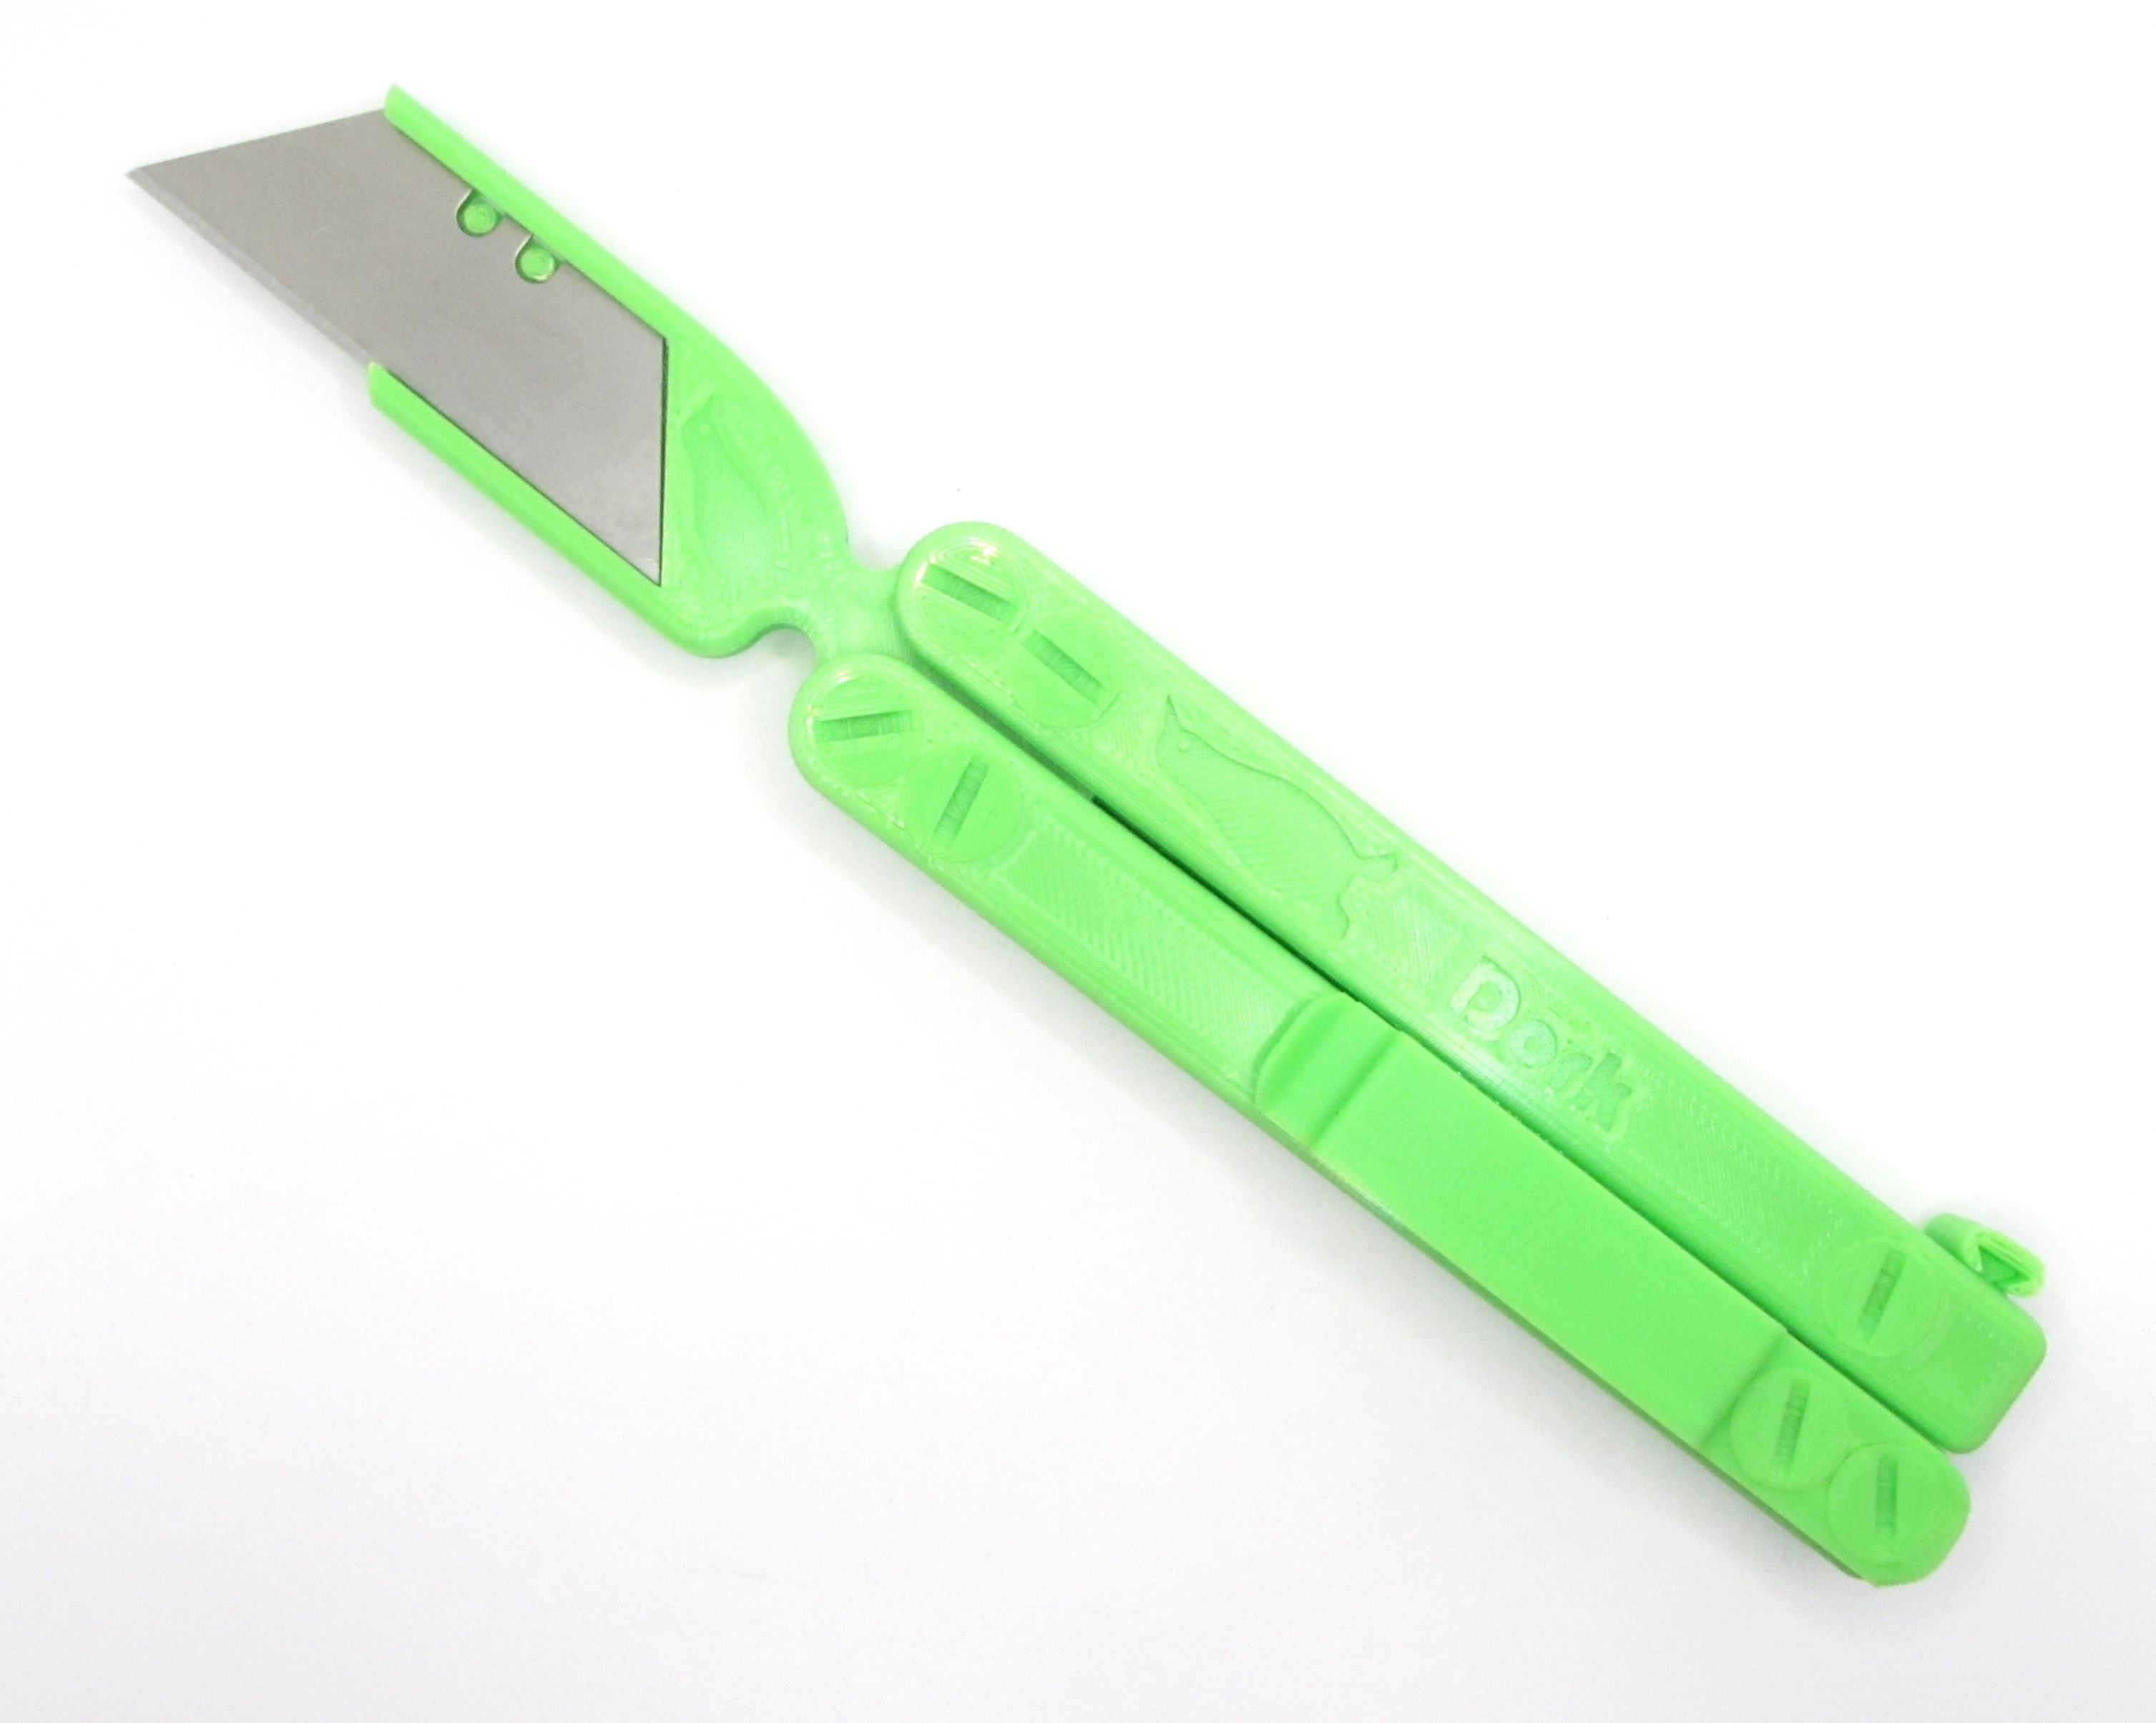
Le fin. You should find that if you press the handles together there is just a slight amount of spring from the flexibility of the plastic. This is what will enable the latch head to clear, and the tension will keep the knife latched either open or closed.
░░░░░░░░░░░░░░░░░░░░░░░░░░░░░░░░░░░░░░░░
Chapter 12, Subsection 57B:
If you made it this far you must really like listening to me type. Look, back in my day everything on the internet was long form text content like this – it wasn’t all stupid overproduced videos. And since I am such an expertificious languagist, this is what you got.
If you make one of these, show it off here!
(No, not named after that kind of harrier. The other kind. )
As we all know the bird was named after the plane so it comes full circle. 😉
I need to finally get a printer, this is the type of project that summons the inspirations. Thx for sharing and I dig that green, man.
Green is the clearly superior color.
Although, this Inland PLA+ is not as vibrant as the “sour apple” Solutech normal PLA I was using a few months ago, which is kind of a bummer. Its mechanical properties are a little better which is why I’m using it.