I was asked by a lemmy user to write up a summary of how stones are cut. This post is my attempt at sharing what I know and how I cut. I do this as a hobby and am by no means an expert, so I’m sure there are techniques and such that I don’t cover.
Designs
You can’t cut a stone without a design of some kind.
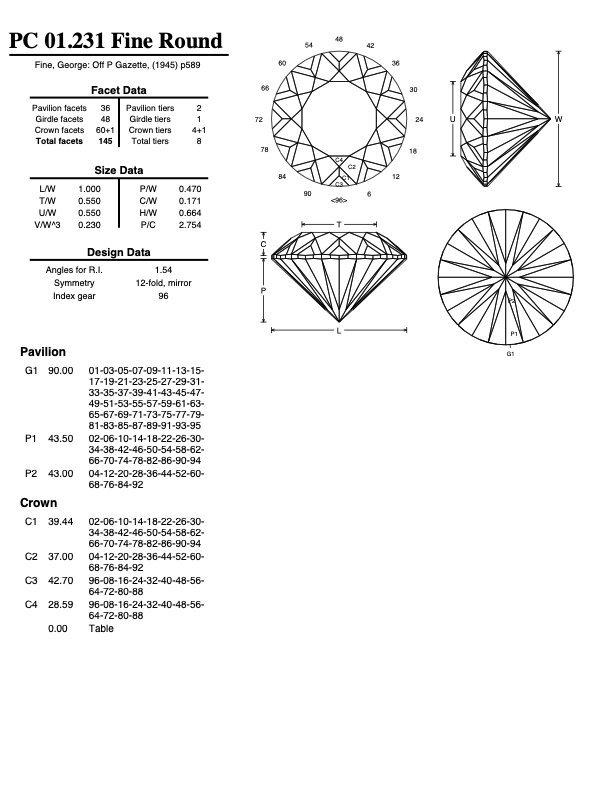
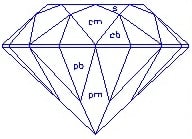
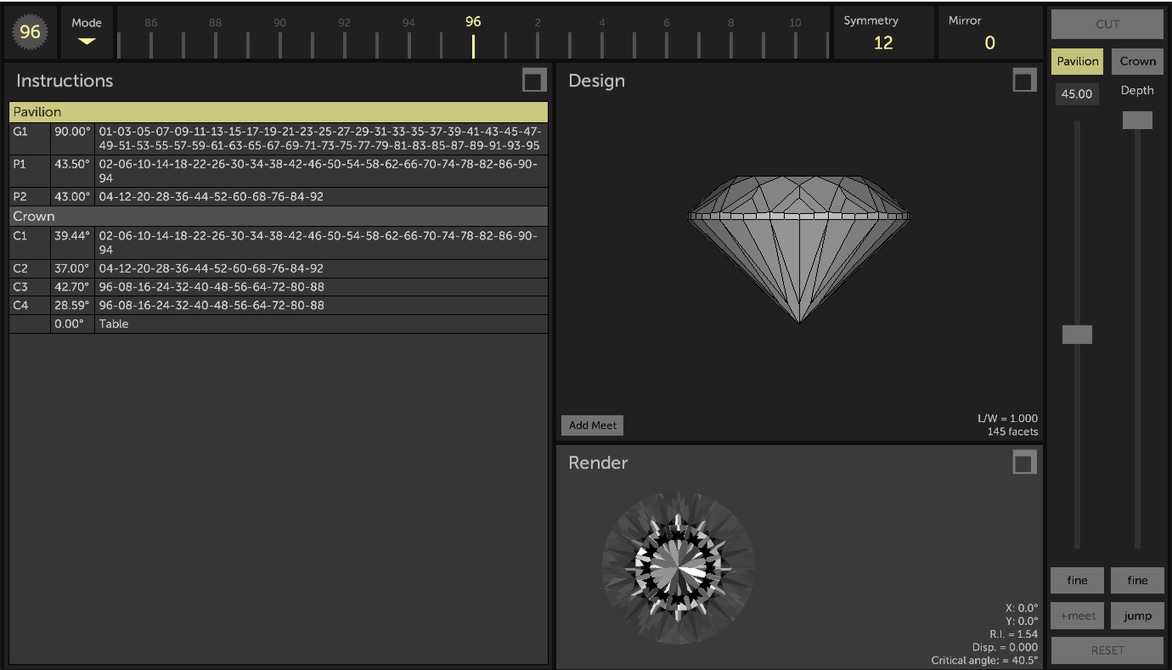
A cut stone is typically divided in two halves: pavilion (bottom) and crown (top). Each half has a set of tiers that that are differentiated by the angle they are cut. In the design above there are three tiers in the pavilion and four tiers in the crown. Within each tier each facet is defined by the index, a number that indicates a position around the circumference of the stone.
The angle for each tier is important to the overall stone’s color and light return due to each type of stone’s R.I. (refractive index) value. The refractive index indicates the deflection light takes when it enters the stone.
In the past many designs were done by hand using math, but these days there is great cad software that allows a cutter to create their own unique designs.
Even with the CAD software, there is still the need to understand a great deal about how light interacts with a stone to achieve that perfect design.
Cutting Machine
There are three major types of cutting machines: mast, hand piece and jam peg. In this post I’m only going to cover the mast type, as that’s what I use.

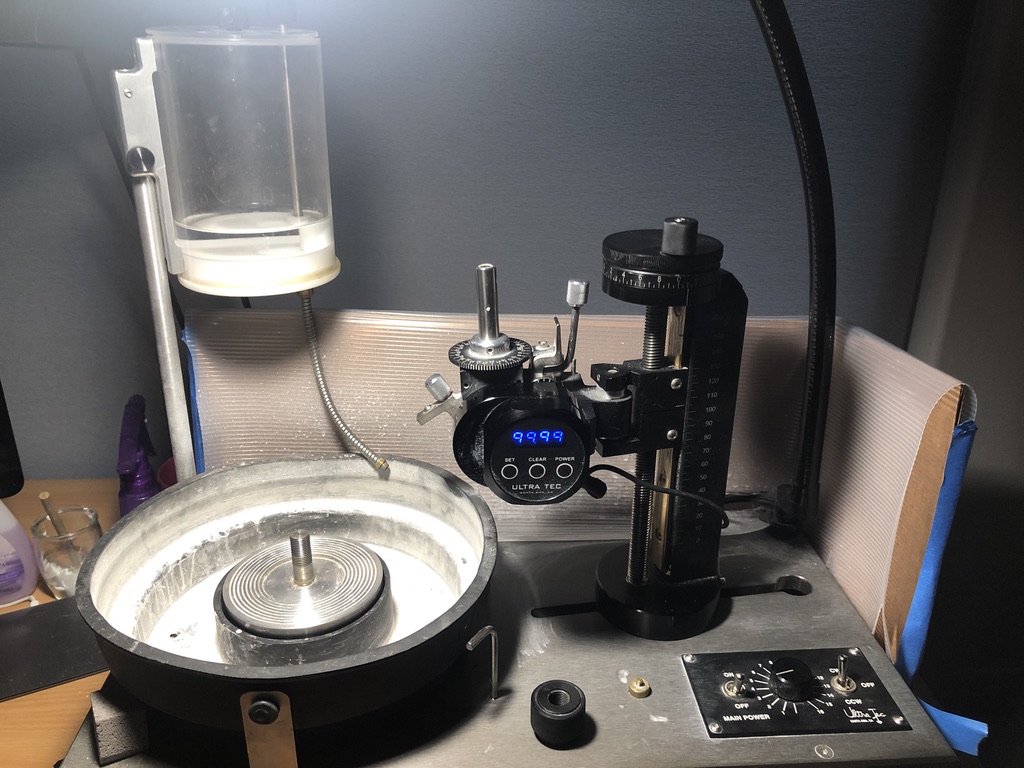
Mast
The mast allows for fine adjustment of the depth of the cut using the knob and wheel at the top. This control moves the cutting head up or down against the cutting surface.
Cutting Head
The cutting head holds the stone and allows for two different positional adjustments.
Index
The index of the stone is the position around the circumference of the stone as defined by the index gear.
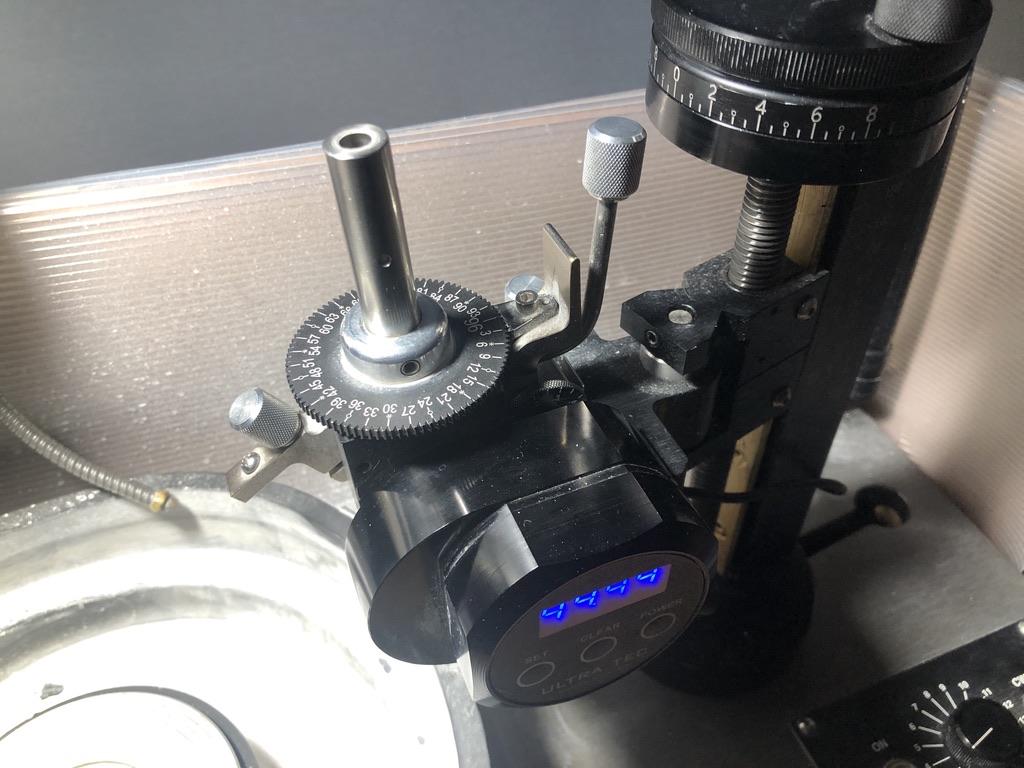
There are additional index gears that can be put on the machine with the highest running 120 index positions.
Angle
The cutting head can be adjusted to specific angles as defined by the design. For this machine, the accuracy of the angle is 0.01 degrees.
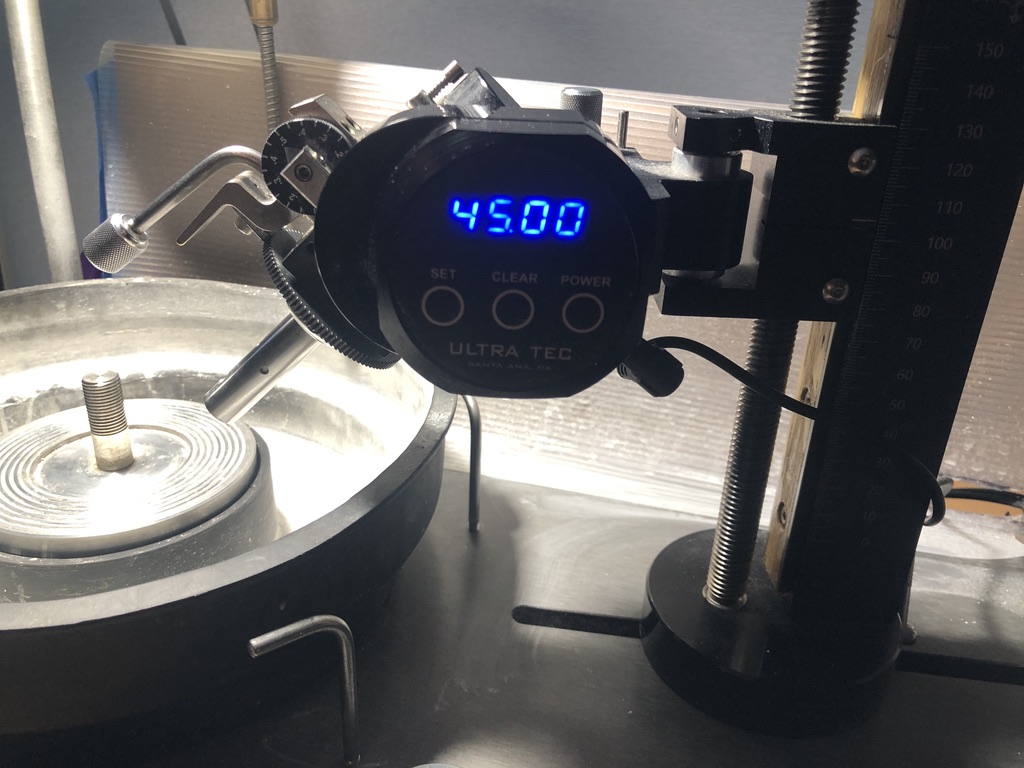
Base
The base of the machine contains the motor, speed controls, splash guard and water drip tank.
Additional Equipment
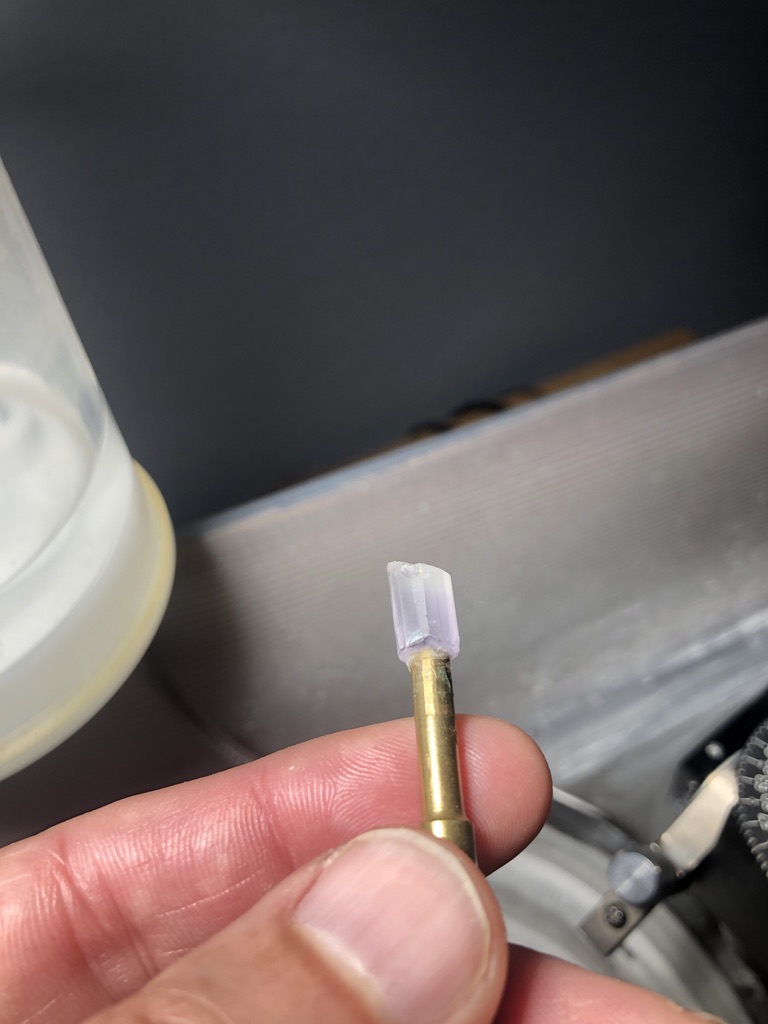
Dops
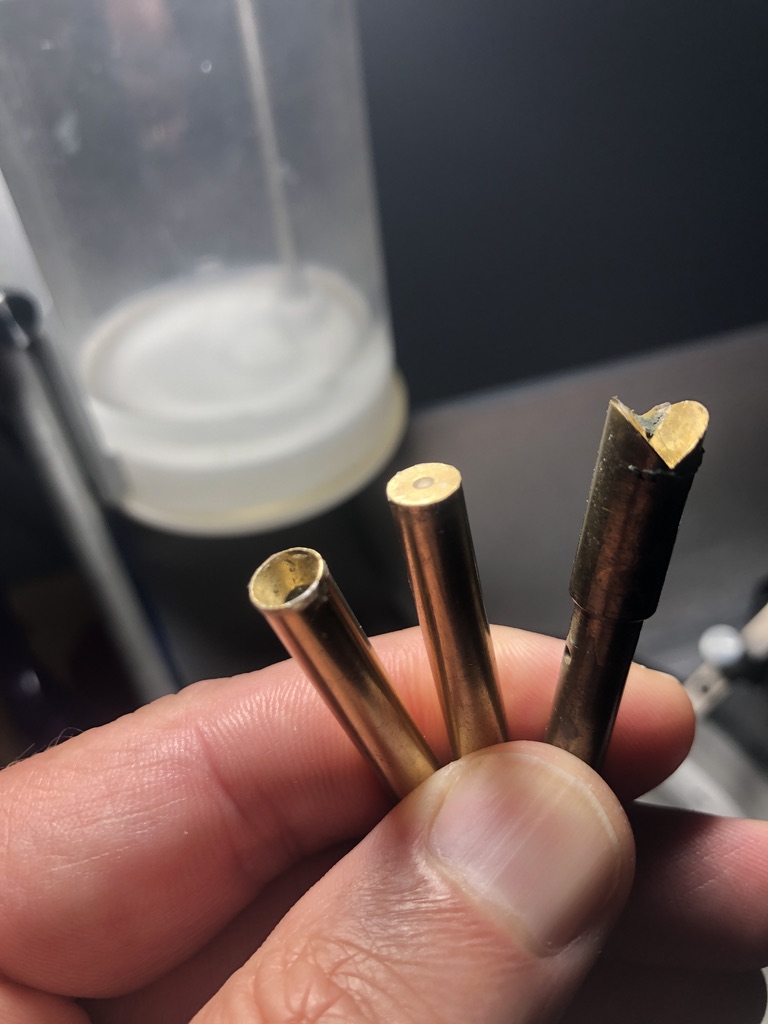
A dop is a brass rod that stone is attached to, either by glue or wax, and fits into the cutting head.
Waxed on stone
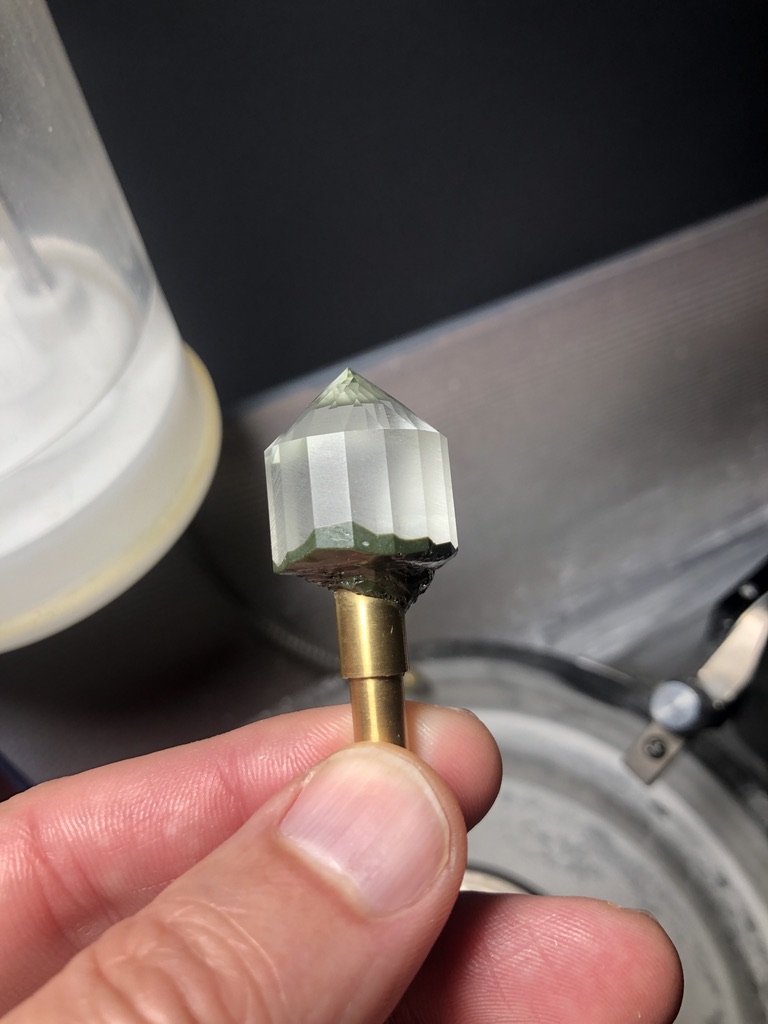
Glued on stone
Laps
A lap is the actual cutting surface that fits onto the spindle on the machine’s base.
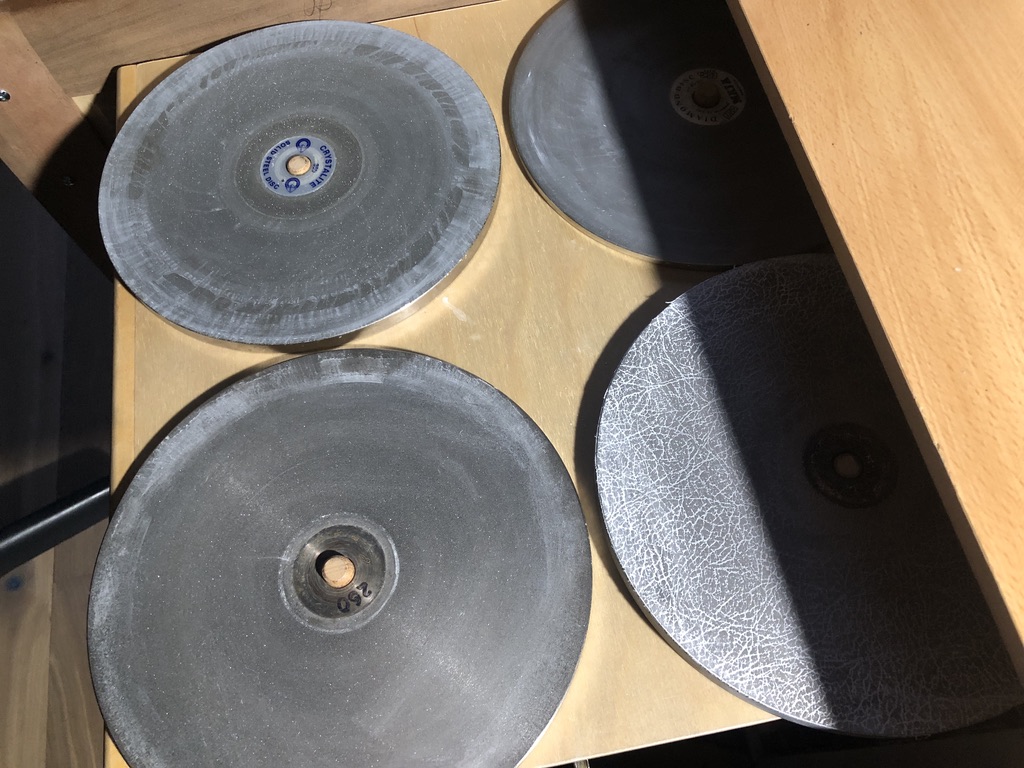
Laps come in a variety of grits: 260, 600, 1200, 3000 (pre-polish) etc. For polish I use a 60,000 grit diamond paste on a tin lap. When working with laps, cross contamination of laps from lower to higher grits can cause scratches when trying to pre-polish or polish, so keeping them clean is important.
The Cutting Process
Rough Stones
First things first, I pick out a piece of rough and look at it closely.
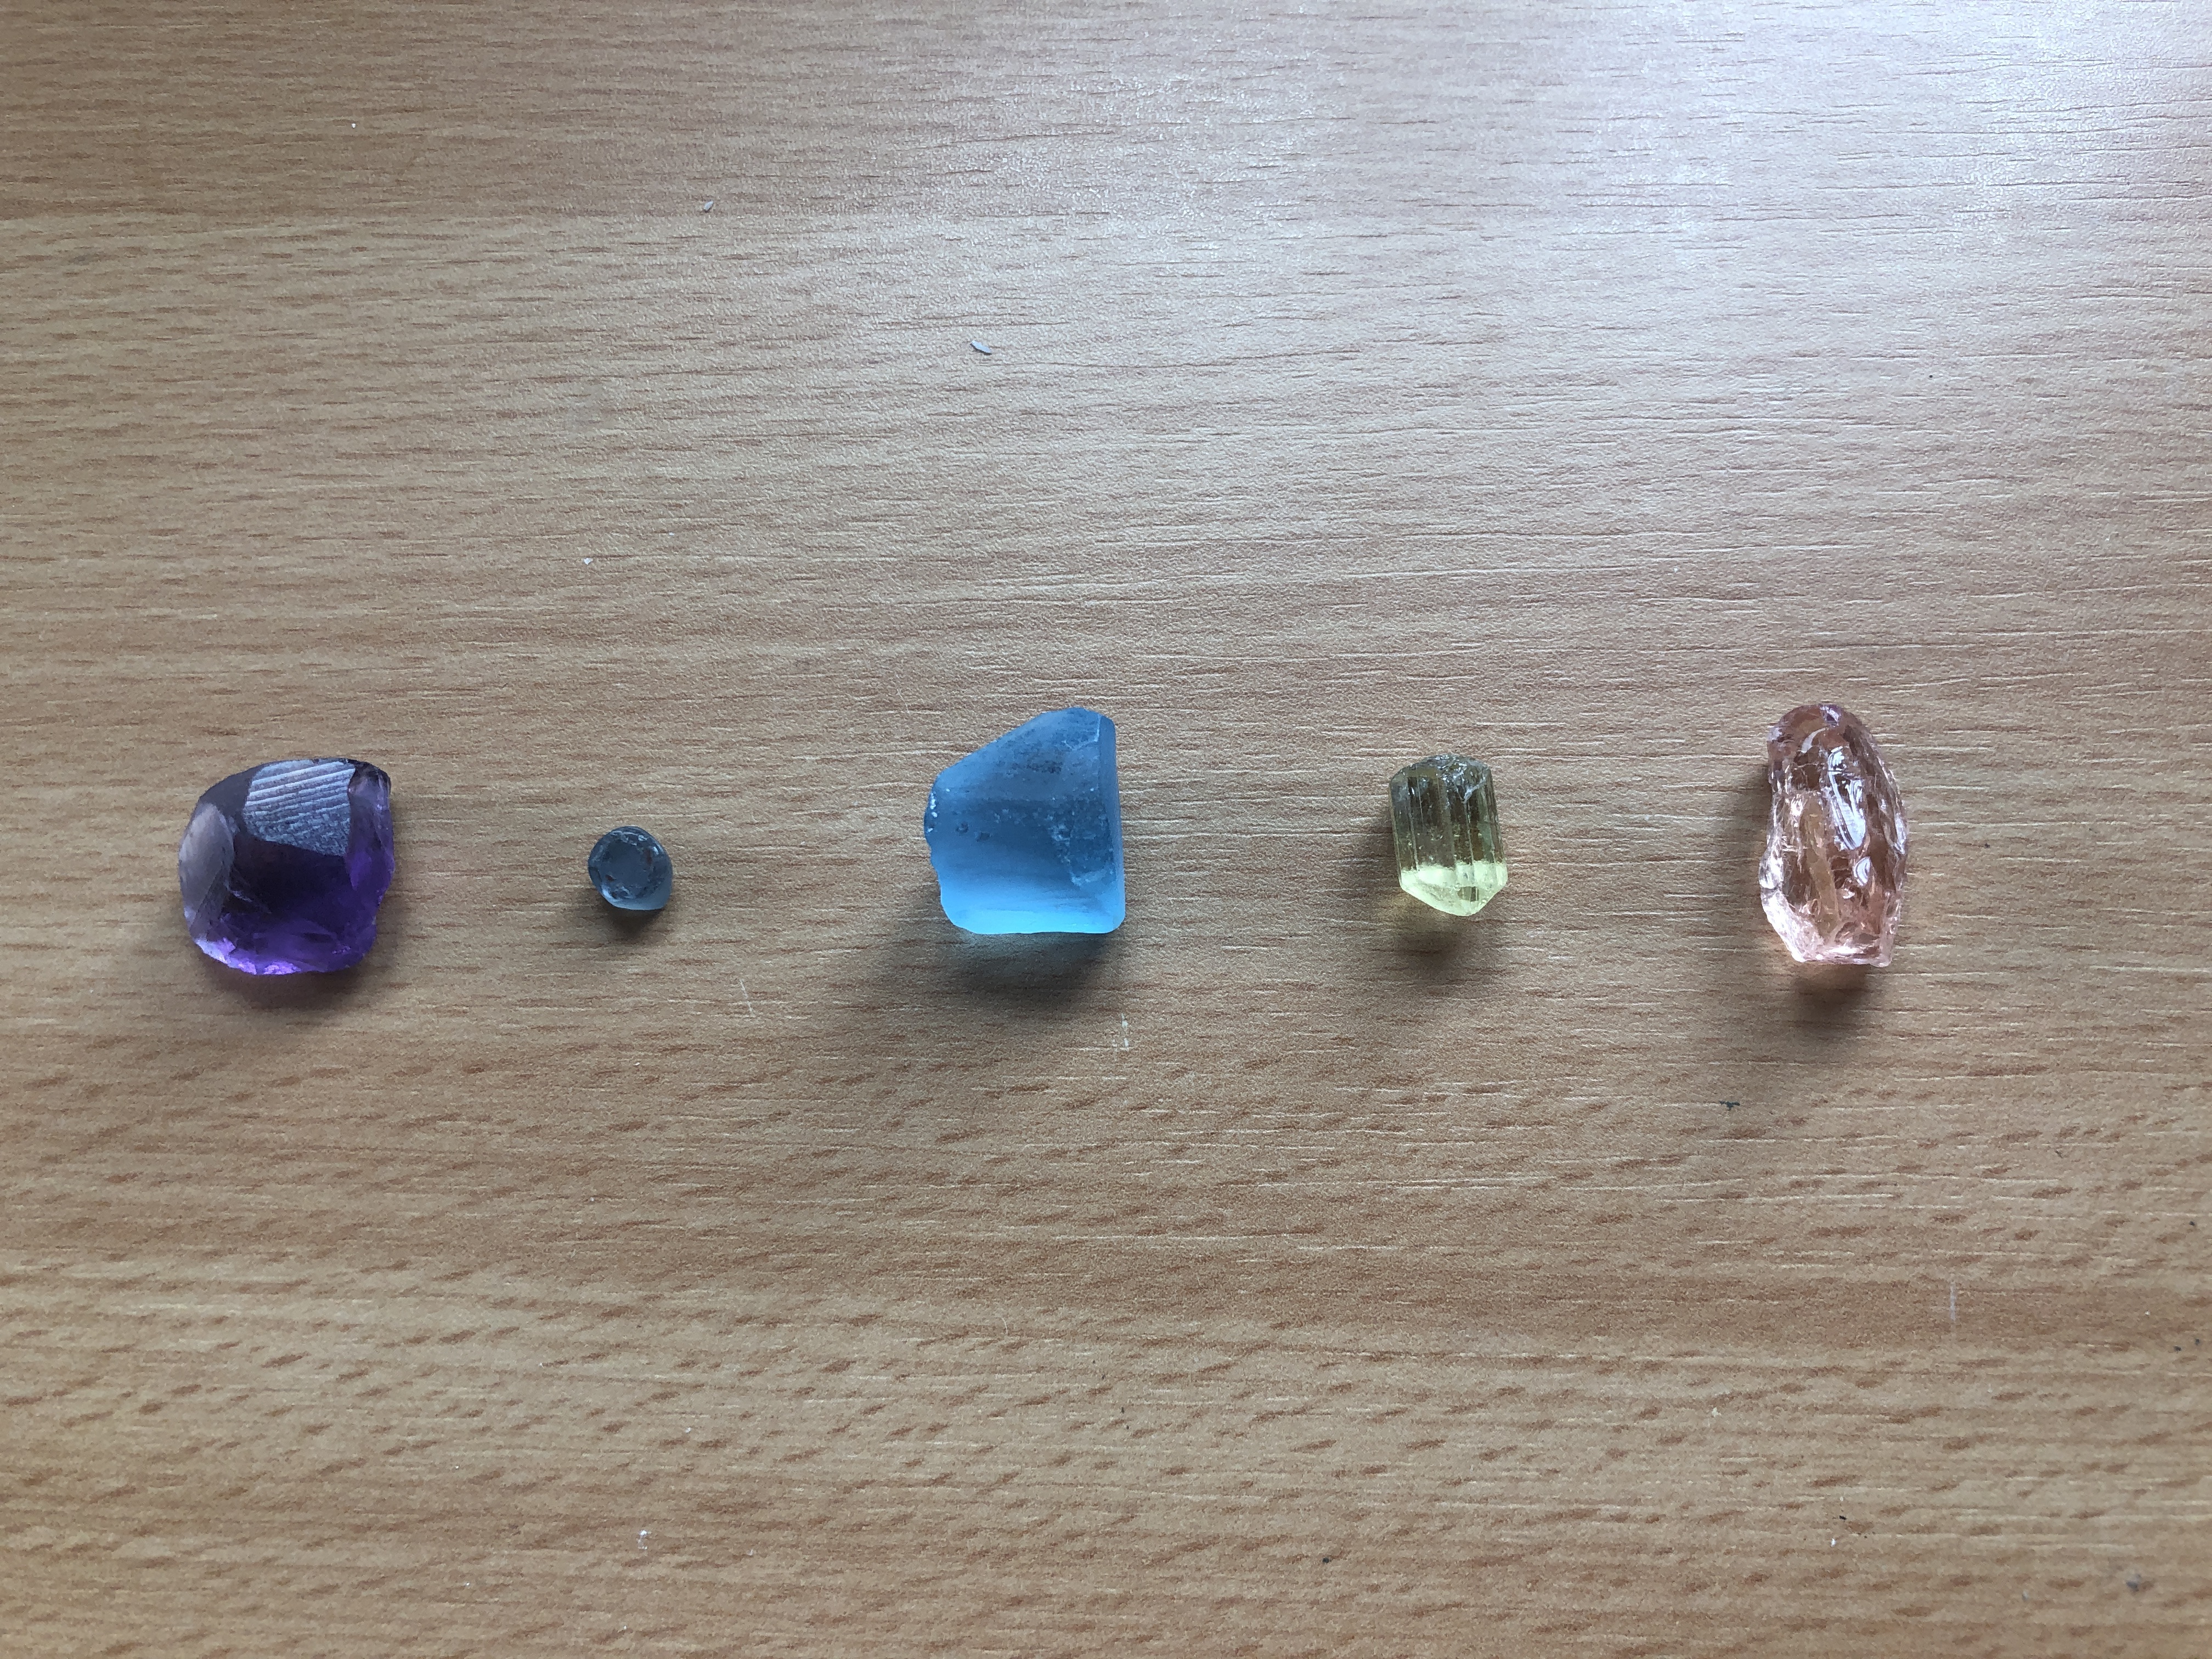
In the above image, the rough from left to right are:
- Amethyst
- Montana Sapphire (Yes Montana has sapphires!)
- Topaz
- Apatite
- Morganite (nice peach color)
What I do is look at the existing shape of the rough as well as any inclusions or fractures within the stone in order to attempt to determine the shape I’ll cut the stone into in order to maximize the yield. Generally a cutter will lose 50% (less likely) to 60% or more of the original stone.
Pre-form or Rough in
This step is all about creating the rough shape of the stone. For example, if I am going to create a round stone I’ll form the stone into a rough cylinder using my hands against the lowest grit lap spinning at a moderate speed. I may also use a saw attachment to slice off a portion if the optimal usage of the original material dictates I can save and use it. Additionally I may hand rough in a general pavilion shape to speed up the cutting process later.
The final step is to flatten one end of the cylinder to act as a starting point for the table (flat top facet on the crown). This serves two purposes:
- Clean point to glue to the dop
- If the stone pops off the dop during cutting it can be realigned vertically using that same surface.
Attaching the Stone to a Dop
What I use for gluing a stone to a dop has changed over the years. I used to use a very hard wax that I would heat up and attach to the dop and stone. I still do this for smaller stones, as it provides me the ability to readjust the stone on the dop until I’m happy with it. For medium and larger stones I use super glue and have gotten pretty good at aligning the stone quickly before the glue hardens.
Cutting the stone
I was going to describe how I would cut the above design, but instead what I’m going to do is start a new stone from scratch. I’ll post a series of posts with images and descriptions of the steps I’m performing to give all of you a good idea of the entire process I use from start to finish.
Very cool, glad you had someone to teach you this amazing art form. And thanks for sharing your creations with us all. Are there low value gems that you practice on before cutting more expensive ones? In your post you talked about refractive index of the gem itself, does that really vary between gem types enough to make certain gems react different to certain designs?
For cuts I’ve never tried before I’ll always practice with a form of quartz (clear, smoky or amethyst).
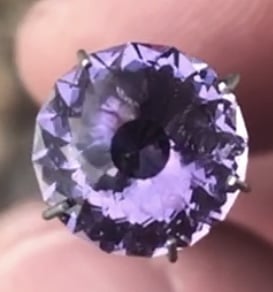
Many of the cuts work well for most stone types, but not all. For example, my “iris” cut which I posted in the community looks great in a number of stone types, but in deeply saturated types like garnet you don’t get the expected light return pattern.
In other types like diamond, CZ with a higher refractive index you get far more light return which washes out the effect.
You can make adjustments to angles and such to try and fix things, which makes the CAD software invaluable.
Huh very interesting. Its cool that there is such highly specialized CAD software for this craft.