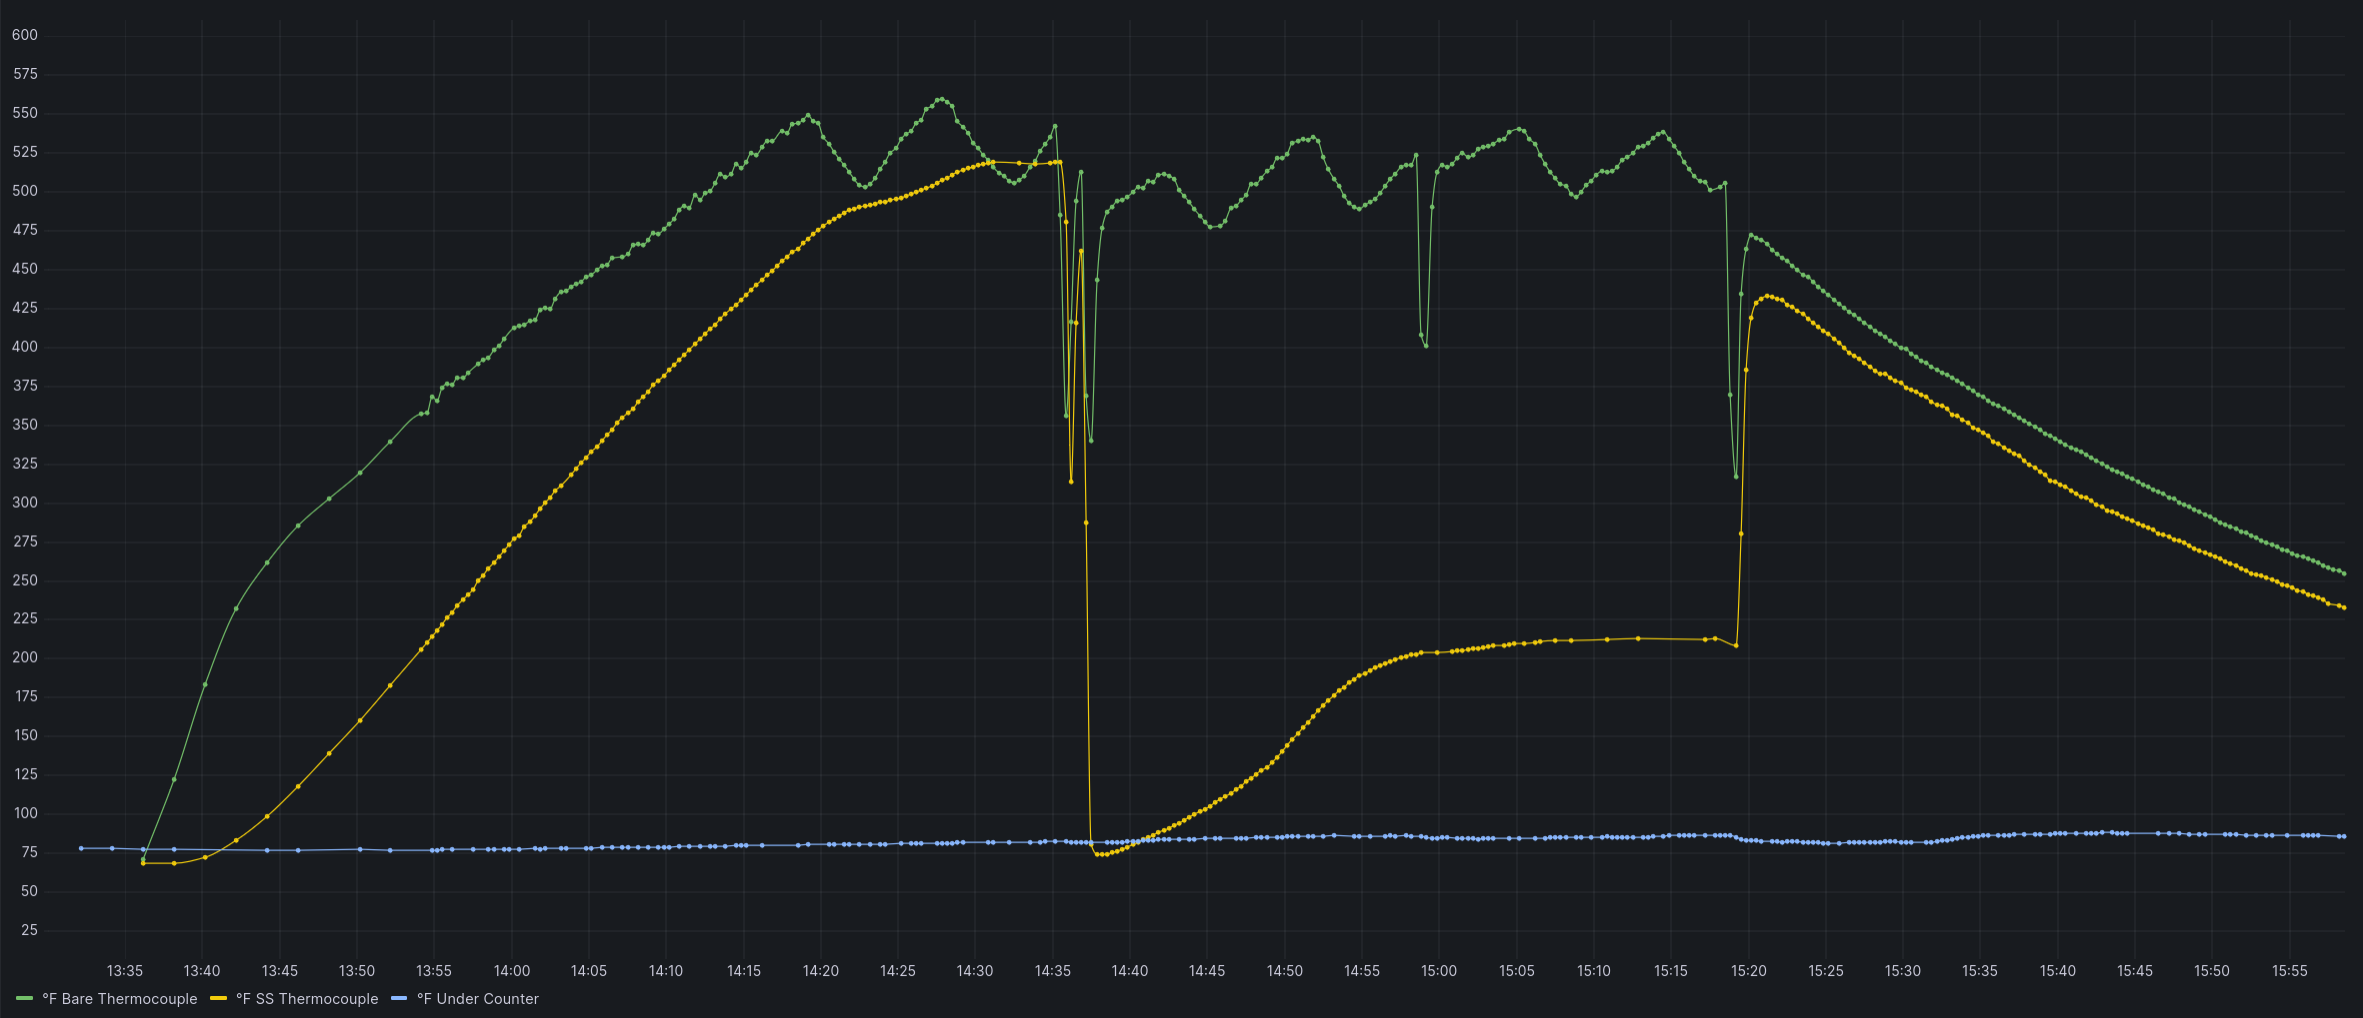
Temperatures recorded in the oven during a dutch oven sourdough bake. 20 minutes at 500F with the dutch oven lid on, 20m at 400F with it open.
Green = oven temperature throughout. Blue = baseline kitchen temperature (thermocouple cold junction temp).
- Before 1st blue line: preheating. Yellow line = inside a cold cast iron dutch oven. Oven was already warm from baking something else.
- 1st blue line to 2nd: baking with lid on. Yellow = probe in the loaf here onward. I was surprised the internal temperature has pretty much maxed out by the end of the first 20 minutes.
- 2nd blue line + 20 minutes: baking with the lid off.
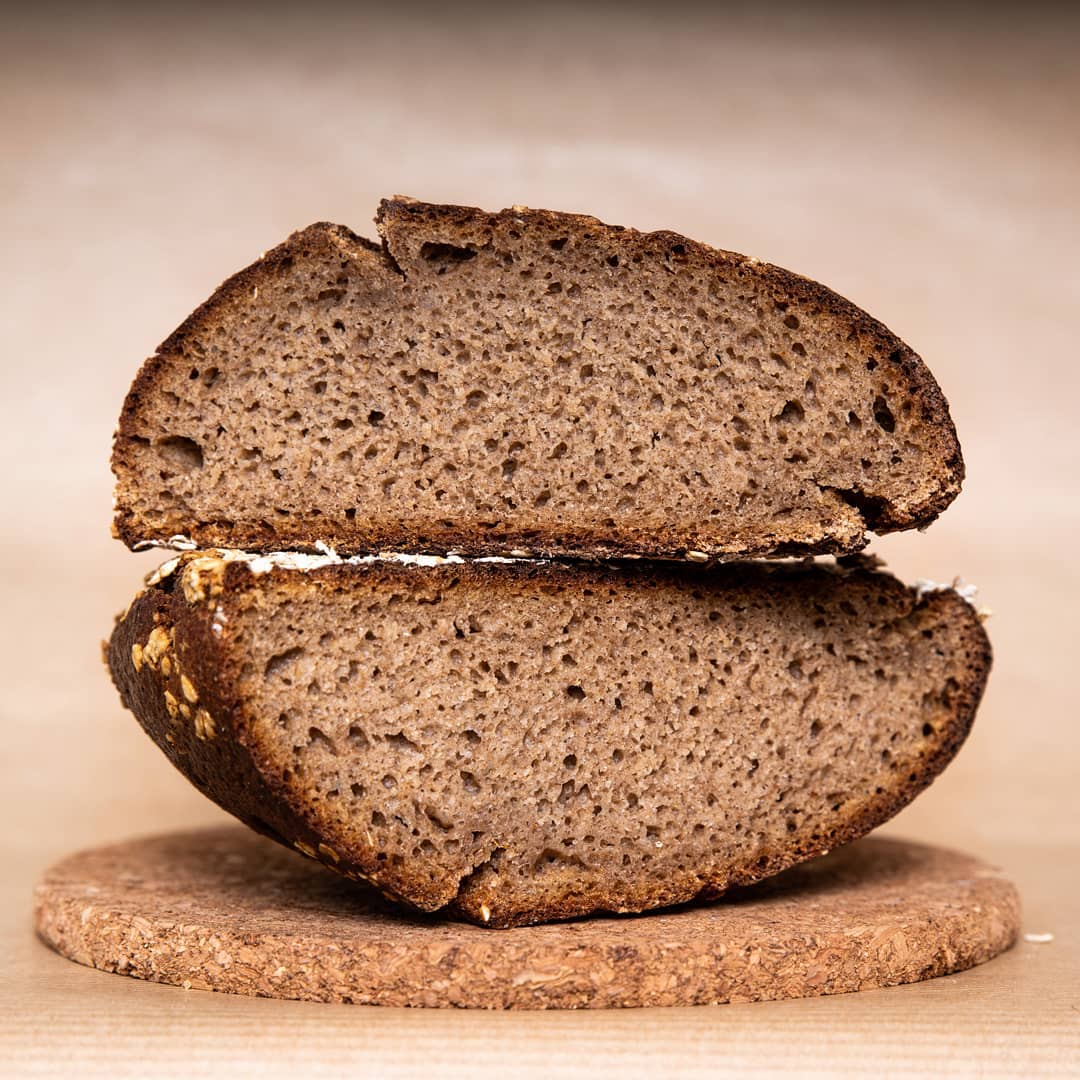
- After 20:27 / green line dropoff: oven open, loaf cooling. I know you’re supposed to cool to “room temperature”, but even at 150F the crumb was pretty stable when I cut the loaf, with no obvious tearing or sticking to the knife.
Compare to the previous bake where I forgot to reduce the oven temperature after the first 20 minutes. The crust was black/inedible, but the interior was still totally fine.

Y’all are nerds and I am here for it
Very cool! I think it would be interesting to see the ambient temp in the Dutch oven during the lid on phase. I’m curious about how different it is from the oven temp. I’m guessing you can only track two probes though.
Thanks! I can always bake more bread though. (-: And the temperatures seem pretty repeatable.
Ooh, while your add it, get a hygrometer to track the humidity in the Dutch oven :)
I expect a report on my desk by close of business Monday.
If you know of an appropriate high temperature humidity sensor I’m listening! I don’t see one though.
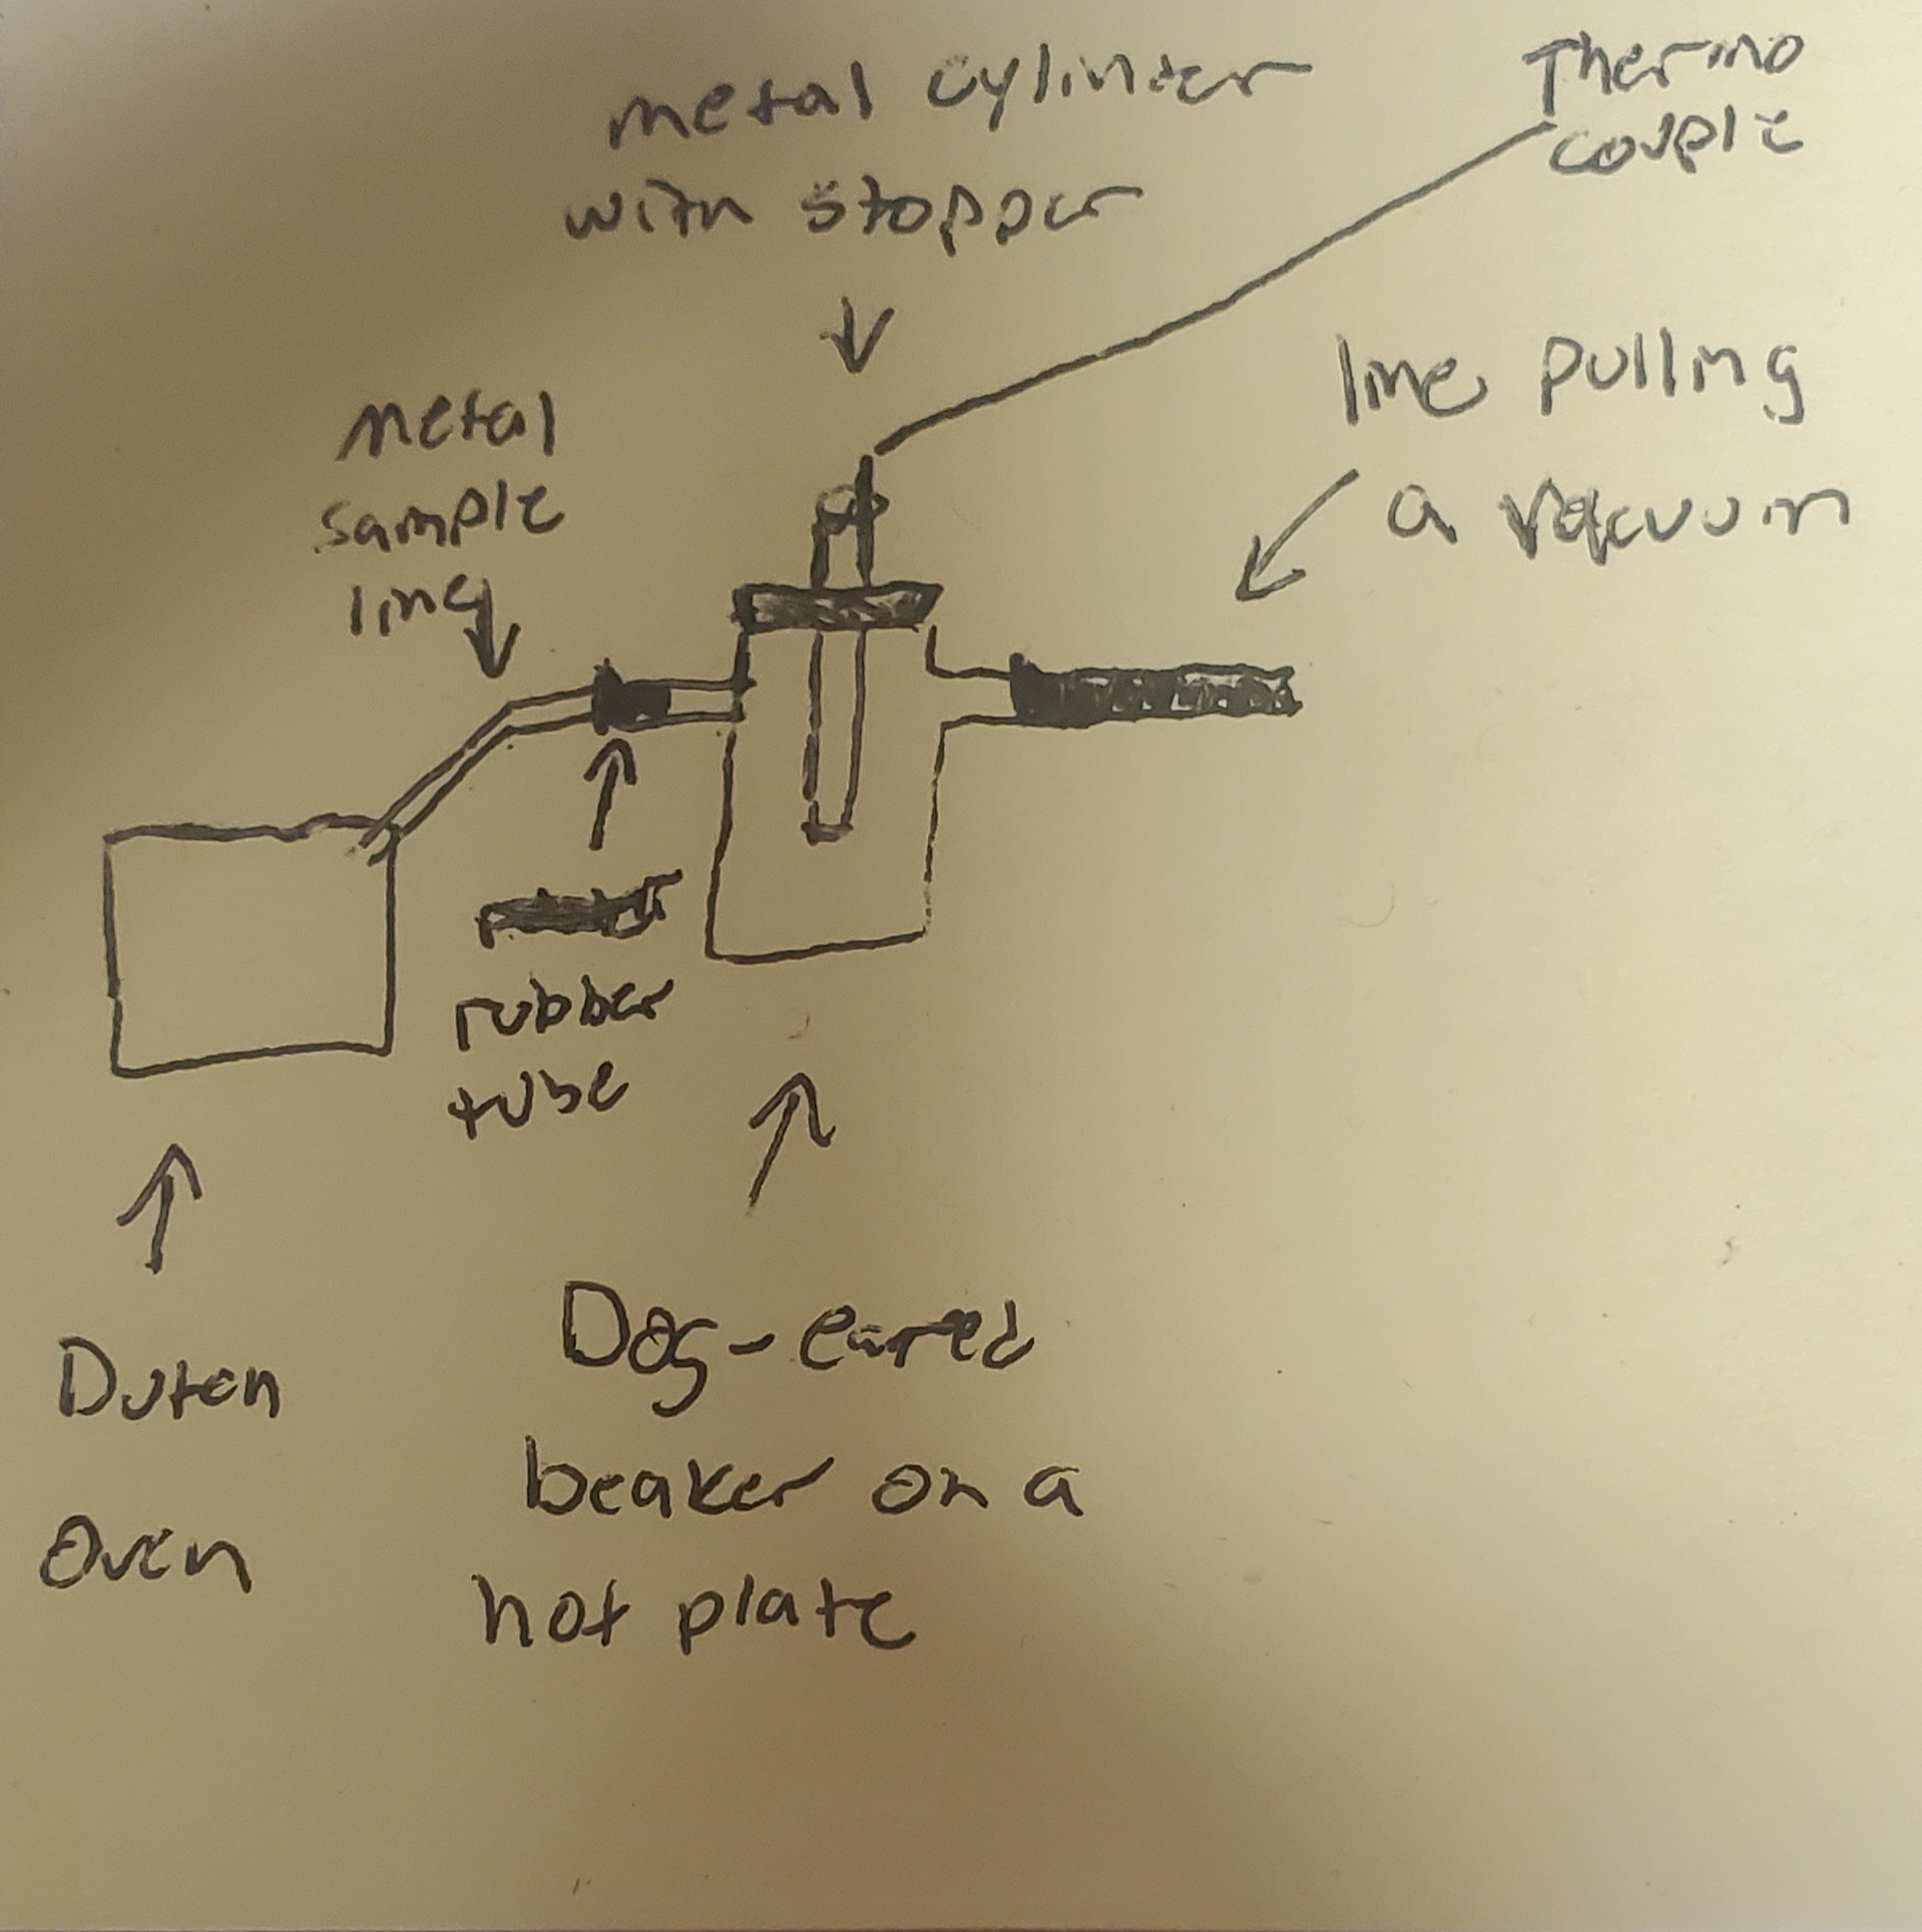
The cheapest way to do it would be to have a sample line connected to the Dutch oven (metal line) that’s attached to a dog-eared beaker (with rubber tubing), with the other ear of the beaker being a line attached to something pulling a vacuum (like those vacuum nozzles in chem class connected to the sink outlet). You then place this beaker on a hotplate that keeps it warm (so you don’t condense on the glass) and you have a stainless steel cylinder with a rubber outer stopper ring thingy (to seal the beaker). You heat some water to say 190 (I doubt your dew Point is above this temp lol) and then add it to the cylinder. Place a thermocouple in the cylinder and blow air lightly into the tube to lower the temperature. When the cylinder fogs, you have the dew Point temperature of the atmosphere from within the Dutch oven.
Source: This is the same process for getting a dew point of your furnace atmosphere in an industrial setting. The concept is known as a “chilled mirror” dew Point. There are continuous devices that can determine this, but the manual method is cheaper/can withstand higher dew points
If you went for a method using a digital hygrometer, you would still want a sampling line that goes from the Dutch oven, to outside the oven because I’m not aware of any hygrometers that would work in intense heat unless they had their own cooling jacket + cooling system for the mirror & sensor
note: I am trying my best to get a picture of this setup, we use them at work, but searching online is mostly returning inline, digital hygrometers
Edit: Okay, I drew it instead on a sticky note. When the cooling water in the tube makes it fog, that temp on the thermocouple is your dew Point

Did another bake, recorded the in-dutch-oven temperature.
What kind of temp probe are you using? I’ve used a leave in thermometer to track bread before, but I didn’t get good results cause the part of the probe outside of the loaf was able to conduct enough heat down the probe to give artificially high readings when compared to an instant read. It works well for meat since the density/moisture content is high enough to counteract that effect.
I’m using a type-k thermocouple with a stainless steel tip from Adafruit with a MAX31855 thermocouple amplifier read by a Tasmota device. The stainless steel tip is pretty short (1") so I just pushed it entirely into the loaf. It got a little gunk on the fiberglass braid but that seems to burn off harmlessly. I don’t know if I’m getting much heat conducted into the bread; there was some char around the probe where it was in the bread but I think that’s due to past gunk on the stainless steel since the ~200F being reported by the thermocouple shouldn’t be charring anything.
Yeah, that sounds like it would get a better read than I got. My probe was pretty long, so there was a lot of stainless steel sticking out of the loaf.


