Putting together my first kit, and all similar beginner tip/trick Reddit threads are dead to me 😤 So I’d love to get one going here! Any tips/tricks you have to help out??
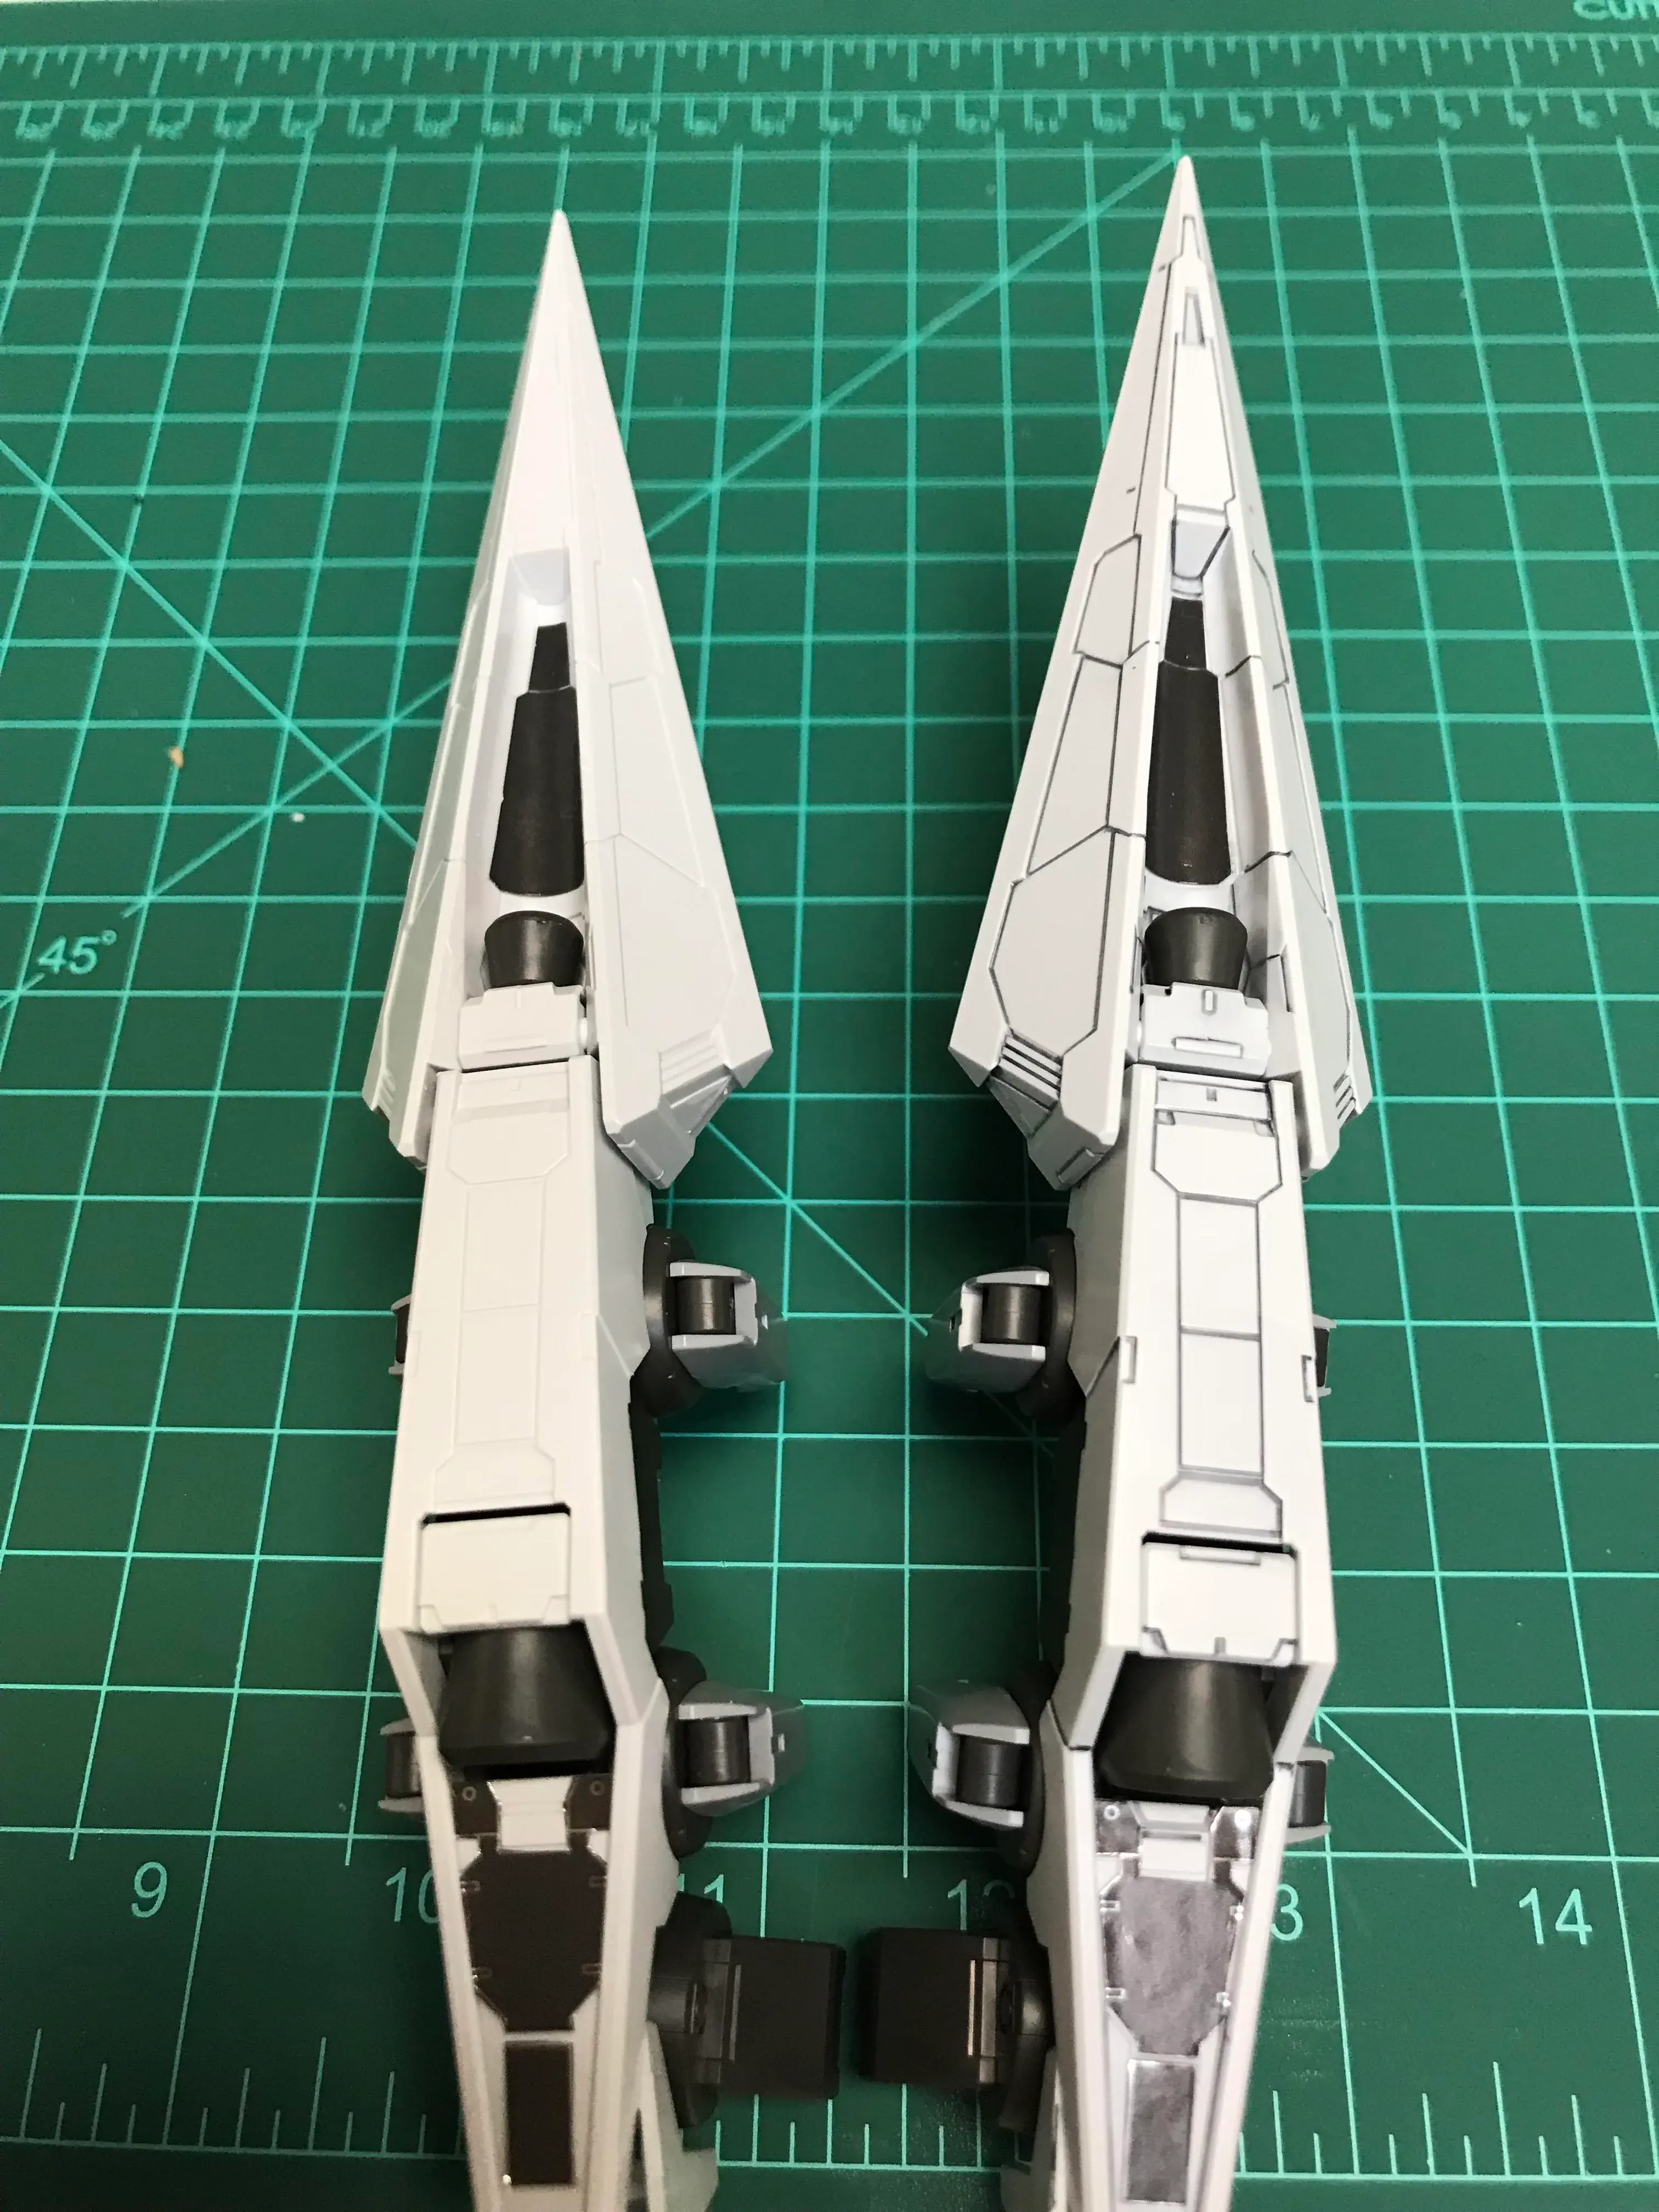
A fine-line sharpie is a great beginner’s tool for panel lining! It’s a very basic trick to really make a kit pop and a great starting point for going beyond a straight build. They have dedicated paints and markers for this but a fine-line sharpie works. Go over the details engraved into the parts with it, and wipe away excess with some rubbing alcohol on a towel.
Good luck!
Video I recommend : https://www.youtube.com/watch?v=WOmZbU1i90E
Example of panel lining comparison :

Oh wow this is such a great example! That looks so good! Thank you for the tip 😊
Older instructions might not mention it, but best practice for cutting is to cut a couple millimeters away from the part to remove it from the runner, then go back and cut off the leftover nubs. This allows for cleaner cuts since you don’t have to try to fit your nippers around the inside of the runner searching for the best angle.
If you’re going to buy anything for getting into gunpla, I think a really sharp pair of sprue cutters / nippers is the way to go. As you’ll quickly find out, cutting the little tabs off of parts can leave blemishes behind that you’ll want to minimize - especially if you aren’t going to paint or do any other finishing.
The godhand nippers are a bit expensive, but they work really well: https://www.amazon.com/GodHand-Ultimate-Nipper-SPN-120-GH-SPN-120-dp-B09T2K1RZY/dp/B09T2K1RZY
There’s also the “aluminum foil trick” to help sharpen whatever cutters you have on hand - fold some foil into a sheet of around 0.5cm thick and cut through it with the nippers. It’ll refresh the edge on the nippers for a while.
Never used single blade God hands before but from what I understand it’s recommended to not use it for cutting off runners and use a cheaper pair of nippers for that, but afterwards for close cuts? But, to avoid hard plastics like clear ones since it can break them?
Wanted to make sure for beginners which I am. I also saw people saying it can rust if not oiled or something?
Yeah, good clarification on the god hands. That is how I use mine, for the second cut.
Never had mine rust, though I keep them in a reasonably dry place.
I bought the Bandai “Entry Nipper” at the game store 😅 They’ve done the job, but something sharper would be nice! The aluminum foil trick is very good to know ✍
When cutting the sprue, should I cut as close to the piece as possible, or leave a bit of a nub and use a razor blade to remove it?
Depends on the part - I generally try and leave nubs on and then go back at them again with the sharpest thing I’ve got to make a clean cut. The Bandai nippers should be plenty sharp for both of those steps, I wouldn’t bother with a razor blade unless you really want to.
Okay for my little tip to contribute here, is that you can use foam blocks of fingernail polish/buffers to give a final polish after you sand down the nub marks, for a smoother finish that resembles more the original texture of the plastic. Those simple and cheap ones that have multiple colored sides, those work great.
Other than that, it’s nice to diversify your methods of removing nubs. I have a rough nipper to cut parts off the runner, a single-bladed chinese nipper (much cheaper than a God Hand) to clip off the nub, then I either do the final step with a hobby blade or a DSPIAE glass file, then sand down the surface with sandpaper grits 800-2000. If even after all of that there’s still a white stress mark visible on the plastic, you can put on a tiny touch of color with a sharpie or Gundam Marker to hide it.Also keep some 99% Isopropyl alcohol handy when you go do panel lining, it’s good for cleaning out excess ink.
Remember that a wooden toothpick works as a painting tool for small details. You can also wrap a little bit of paper towel around the end of a toothpick and dip it in rubbing alcohol to make a reasonably precise tool for cleaning up excess paint.
I’ve found this helpful for cleaning up panel lines.
I’m a beginner but I got some nippers, x-acto knife, multiple grits of sandpaper when I did my first snap build.
I relied on videos like this for just removing the pieces from the runners and making the nub marks less apparent. I basically cut the runners but left the nubs. Then used an x-acto to cut it closer to try and avoid stress marks and then sanded at the end to make it smooth.
https://www.youtube.com/watch?v=tTGqWeT5mU8
Later on I went back to my snap builds and tried panel lining. I tried Gundam markers and found black is pretty good but gray markers don’t come out looking clean. So I got Gundam pour markers (warning don’t use on ABS parts since it can cause pieces to crack) and that was a much cleaner experience.
For that I found this video helpful
https://www.youtube.com/watch?v=WOmZbU1i90E
There’s more advanced stuff I haven’t done like panel washing, painting, and so on. But, for a first build I’d take it easy. I still am and haven’t even gotten into top coating or water and dry decals yet.
You’ve probably made this by now, right? 🤨 *I don’t have any good tips because I still have noticeable nub marks on my kits, loool


