Salutations from a complete novice. What’s your recommendations to get started?
Note: A FLGS in town actually has a mini-painting workstation that you can use for $5/session, or as part of their monthly subscription for playing TTRPGs onsite. Since I play PF2E there several times a week I have that subscription. So I have a place to paint that’s already kitted out with just about anything you could need for mini-painting. (I think they charge extra if you want to add stuff like grass, sand, etc. to the mini, but the primer, paints, sealers, etc. are all included.)
I have two awesome minis arriving soon that are unpainted, so I’m looking for online sites/videos that start from “I know nothing” and work up from there.
Thanks in advance for any and all guidance you can provide!
I’m relatively new, and I’ve gotten a lot better over the course of a couple months.
My top tips:
- The journey is the destination.
It’s trite, but true. You aren’t painting for anyone else. Paint a model then move on, improvement is slow and perfection is unattainable.
- No matter how “bad” you think your paint job is it looks better than a bare mini.
If you doubt me, just slap some paints on a mini and put it on a table with a handful of unpainted minis. You’ll see how much better the painted one looks and how many more details you can see.
- Don’t worry about mistakes.
No one will see that tiny bit of blue on wrong spot. Realistically you’ll only really see the top and back of the mini.
- Highlight one more time than you think you need.
When you get to the point of “should I push this orange more yellow” or “is pure white too much here”? The answer is always one more highlight.
- Try new things.
You’ll see different painting techniques, try them, worst case you don’t like it, in which case look at tips 1-3
- Equipment you want
A #1, #0 and #00 brush. You can do fine with just a #1, the other two are bonuses.
Brush soap. It saves your brushes.
A wet pallet.
Paint, but specially a cheap artists white and black in addition to any mini paints. If you want to go crazy a mixing white is good too.
That’s it. Remember it’s fun and looks way cooler than an grey blob on the table. You’ll get better with practice.
Thin your paints.
If the LGS station offers a wet palette make sure to use it or have someone explain it to you if it feels confusing.
Nowadays we have tons of fairly specialised chemistry at our hands, often designed specially for miniatures. If you have this option ask around about contrast paints and their analogs from other companies as they sometimes make painting much easier.
Most of the time it is possible to strip paint from a miniature if you’re unhappy with a result. It usually means cleaning the entire mini, but keep in mind that a “reset button” exists and ab unsatisfactorily painted mini is not wasted.
If you want to try to paint a detailed face either start painting with face or even better don’t attach head if the mini is not pre-assembled. Makes it easier to clean up and manouver around.
Heya…this sub crossed my feed at an interesting time. do you have a recommendation on a set of paint of whats available on walmart or hobby lobby? where I live I like to buy in store if possible
Here is a video that compares cheap craft paint from Walmart to miniature paint.
Awesome thanks!!!
Thin your paints.
Two thin coats.
Oh wow, I am the anti-speedpaint user here. SpeedPaint has some applications but it’s better I think to learn the fundamentals with traditional paints, and then use the knowledge and foundation to strategically use speedpaints. I have seen many people start with speedpaints and never progress beyond using them in a very basic way. They are also way expensive for what they are.
Speedpaints are in a way similar to washes in that they have their uses, but you’ll have a lot of voices telling you to just throw them on a model and call it a day. I think that’s like teaching somebody how to build a raft and then letting them drift off into the ocean. It’s very partial advice that doesn’t work without a little more. Learning how to work with traditional paints gives a stronger foundation from which to branch off.
When using washes, there are two main ways to apply: All over or lining/pinwashing. Simple idea. All over you get a big brush and spread the wash over the whole area or even whole model. Lining is more delicate as you trace lines or pull wash into recesses. Both are useful, but I have found that many people, especially new painters will only do all over washing. It’s tempting since it is fast, however it darkens and muddies the whole area. Sometimes you want that, other times you don’t. The result is you either leave the model dark, and possibly not great looking, or you do a touch up and repaint the raised areas- which can be very time consuming. Think about that backend work when you are tempted to put wash all over a model and decide if it’s worth it.
YouTube-wise I think the Duncan Rhodes Painting Academy is the channel for beginners.
An early tip would be patience. When you you use wash or SpeedPaint, or even a layer of traditional paint that’s going a bit slow, you don’t want to accidentally brush over it while it’s still wet, and ruin your progress. Something that helps with this in wargaming is getting comfortable doing a squad at a time. You can rotate which model you are doing to reduce your downtime while you wait.
Brush care is very important. Clean out with water often, change out the brush water entirely if you used metallic paints, and at the end of a session some brush cleaner like Masters Cleaner & Preserver can very much extend the life of brushes.
Keep old semi-retired brushes around to do more junky work like stippling or rough drybrushing.
I still use a dry palette (yes really) and when I mix water into my paint I use a dropper bottle or pipette of very clean water, which helps reduce contamination and give control of exactly how much I add.
Layering and underpainting is important and saves a lot of headache. While it is possible to paint yellow directly over a black prime, trust me you don’t want to do it. You want intermediate colors. Check YouTube for precise details on colors choices, but be aware.
I am wary of using true black or true white as a main color. As a primer layer, they are fine, but if you are painting black or white armor you don’t actually want to mainly use black and white. Black can’t be shaded, so for “black” armor making it mainly a dark grey allows for shading the recesses which allows the model to have visible definition. White paint is difficult to work with and almost always has poor coverage. A light grey that is edged or highlighted with pure white will look like white while being much easier to apply.
Once you start painting in a way you like, keep a painting journal. Either physical or a word document that records what paints you used and any special way you applied them. This is a help to your future self when you want to reuse a technique or paint an army consistently.
This is great advice, thank you. I’m just breaking out of my speed paint phase I think but it’s slow going when the immediate results look worse than before!
I followed a painting guide on Patreon recently and I was surprised at how many layers went on to the model. Prime and grey/white drybrush yes, but then a colour layer and then some more white, and then another set of colour and highlights, and then more white in place over that, and then more layers.
The end result looked better but it was way harder work. I’m gonna keep pushing myself beyond speed paints but they are a useful fallback to get a model that is ‘quite good’ in pretty short order.
It’s a good idea to learn to use regular paints, but don’t throw away your contrast or speedpaints. My favorite way to do leather is to paint the area in the highlight color, then use a dark (black or brown) contrast paint on top to make it look like leather.
I don’t like SpeedPaint as much as regular, but SpeedPaint absolutely gave me the confidence to want to try more.
I think that even when done well SpeedPaint just doesn’t look as nice, but it makes a decent looking model.
I currently am learning and improving, and I dislike metallic paints too, but I’m not quite confident enough to try NMM, yet.
When it comes to metallic paints, I almost always underpaint, usually a black for steel/silver, and a brown or orange for gold. Applying the metallic paint on top of these layers allows for more control and definition of shapes than just using a wash. The underpaint and strong recess colors help shake that fake plastic look.
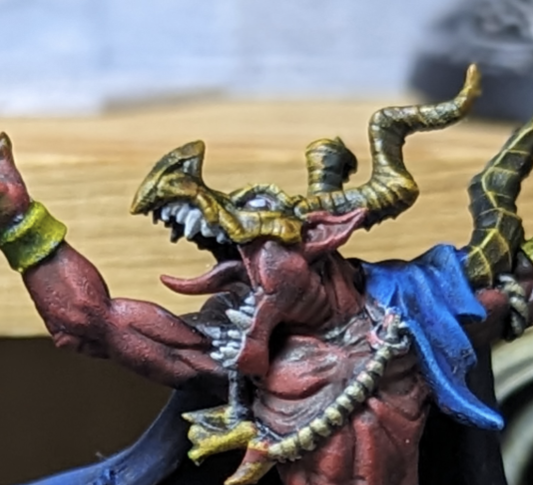
For NMM, there are degrees of intricacy. Most people think of the super flashy competition grade NMM, but for things like weapons, painting them black, then grey, then highlighted light grey or light blue is all it takes. Not much different than normal highlighting. It’s especially easy with firearms, which have more boxy shapes. Here’s two example of my own NMM, which was very simply done.
Gold is a little harder to make actually look like gold, but I prefer shiny yellow to gold for things like armor trim anyway.
For metallic paints I really have come to like the Vallejo Mecha metallics line.
Go to the Warhammer store if you’re brand new and have no one to introduce you to basic concepts. the Warhammer employees will give you a mini, and sit there and teach you how to paint it, from start to finish. They will provide the paint the brush the water pot, and the mini, all for free.
If you don’t buy anything from them, that’s fine, just thank them and walk out with your mini.
This is how I got started last year, and it opened the door to a wider world. Youtube videos and amazing painters who use interesting techniques have taken up my 2023 time as well. Gravitate towards painters who do not paint warhammer exclusively, they tend to have good opinions, and give great guidance outside of what Games Workshop would have you believe.
If you get stuck in a rut, don’t feel down, just take a break, and think about something else.
Yay, another fellow Pf2e painter. Welcome!
Since you already got that subscription thing I’d just practice there and see what works for you. People tend to have different preferences in techniques, paints, materials, brushes, tools etc.
my two favourite beginner painting guides (as I get asked this regularly) currently are
https://piped.video/watch?v=S7-At4qVC84 https://piped.video/watch?v=v-BlVYFxfRA
Hey I am currently also looking out for Tipps to begin with. Especially for Warhammer Kill Team.
Question to the more mature painters. How do you select your paints? I see tutorials with like 20-30 different paints and although I understand why they are used, the paint recommendation of Warhammer includes like 4-5 colours. This seems more reasonable to me.
Do i need a set of base colours or do I just need primer and the one “base” colour given in the recommendation?
And the last question is, if I can’t even choose colours, is this the right hobby for me?
It takes a while to get to know the tools and paints, so don’t be too hard on yourself. Most people have difficulty picking colors when first starting. That said here are a few tips:
- color theory is going to be your friend. Read an article or watch a video on it. When starting out and owning fewer paints you can mix colors to get the color you want. For example, mix blue + yellow to get green. Mix Red + Purple to get magenta.
- look up a picture of a color wheel, and the idea of complementary, analogous etc colors. This can help you pick colors that work well together.
- look at art or miniatures that you like the look of and steal/copy from them. This will let you focus on the execution without worrying if the idea is good
- make mistakes! I still pick bad colors or mess up after 9 years. Try not to get discouraged from failure.
Lastly, not all projects need to be finished to the same standard. Don’t be afraid to put something aside you’re just not having fun with.
For everyone as godless lost as me. The recommendation on the colour schemes are for all the models in a set. You can see the colours on the citadel colour app. As far as I understood you need all of them for the recommended colorway.
I’ve got a few tips
Be thorough with your primer, it will make the world of difference in how well your paint sticks to the model
A little bit of paint goes a long ways
Clean the brushes promptly when done, especially if you use a brush for dry brushing
And most importantly: nobody’s first paint job looks like a Rembrandt painting, don’t be too hard on yourself on your first minis.
Welcome! Others have posted some great tips so I’ll only throw in a few.
As a beginner I’d recommend just using contrast paints for now, particularly if you have access to a to of them at your FLGS. Contrast paints (or speed paints, different brands call them different things) are basically pre-thinned and my experience is that they’re a great way to get used to how paint is meant to move on a model and how to fill in spaces. There are a ton of “slapchop” videos on Facebook which is a painting approach that uses speed paints.
Once you’re happy with this you can move on to thinning and mixing your own colours, and throwing in stuff like edge highlights.
Also - don’t throw away or strip your first mini once it’s done! Keep it and compare back to it as you improve.
I’ll agree that contrast/speed paints are good jumping on point.
And I say never strip a model. See your progress, enjoy how far you’ve come.
You’re probably done with your 2 minis by now but the painting journey never ends so I’ll share my personal experience as a novice too. I will second everything that others said and will not repeat all the great advise. I’ll only add the 4 tools that really improved my painting (alongside with paintbrushes and wet palette):
- A pair of magnifying glass: something around 2.75x is usually the recommended default magnification power
- A cheap though quality airbrush: GSI Creos PS-270 (I let you check the reviews)
- A paintbrush cleaner: the one from “The Masters”
- A good light: it’s important to have one between 5000K and 6000K because white light equals less color distortion
No need to go crazy and spend hundreds of dollars on equipment to achieve good results, especially for beginners.
As far as techniques, I’ve learnt a lot from squidmar’s and ninjon’s videos. Look at them, feel impressed, try it, and feel proud of yourself :)