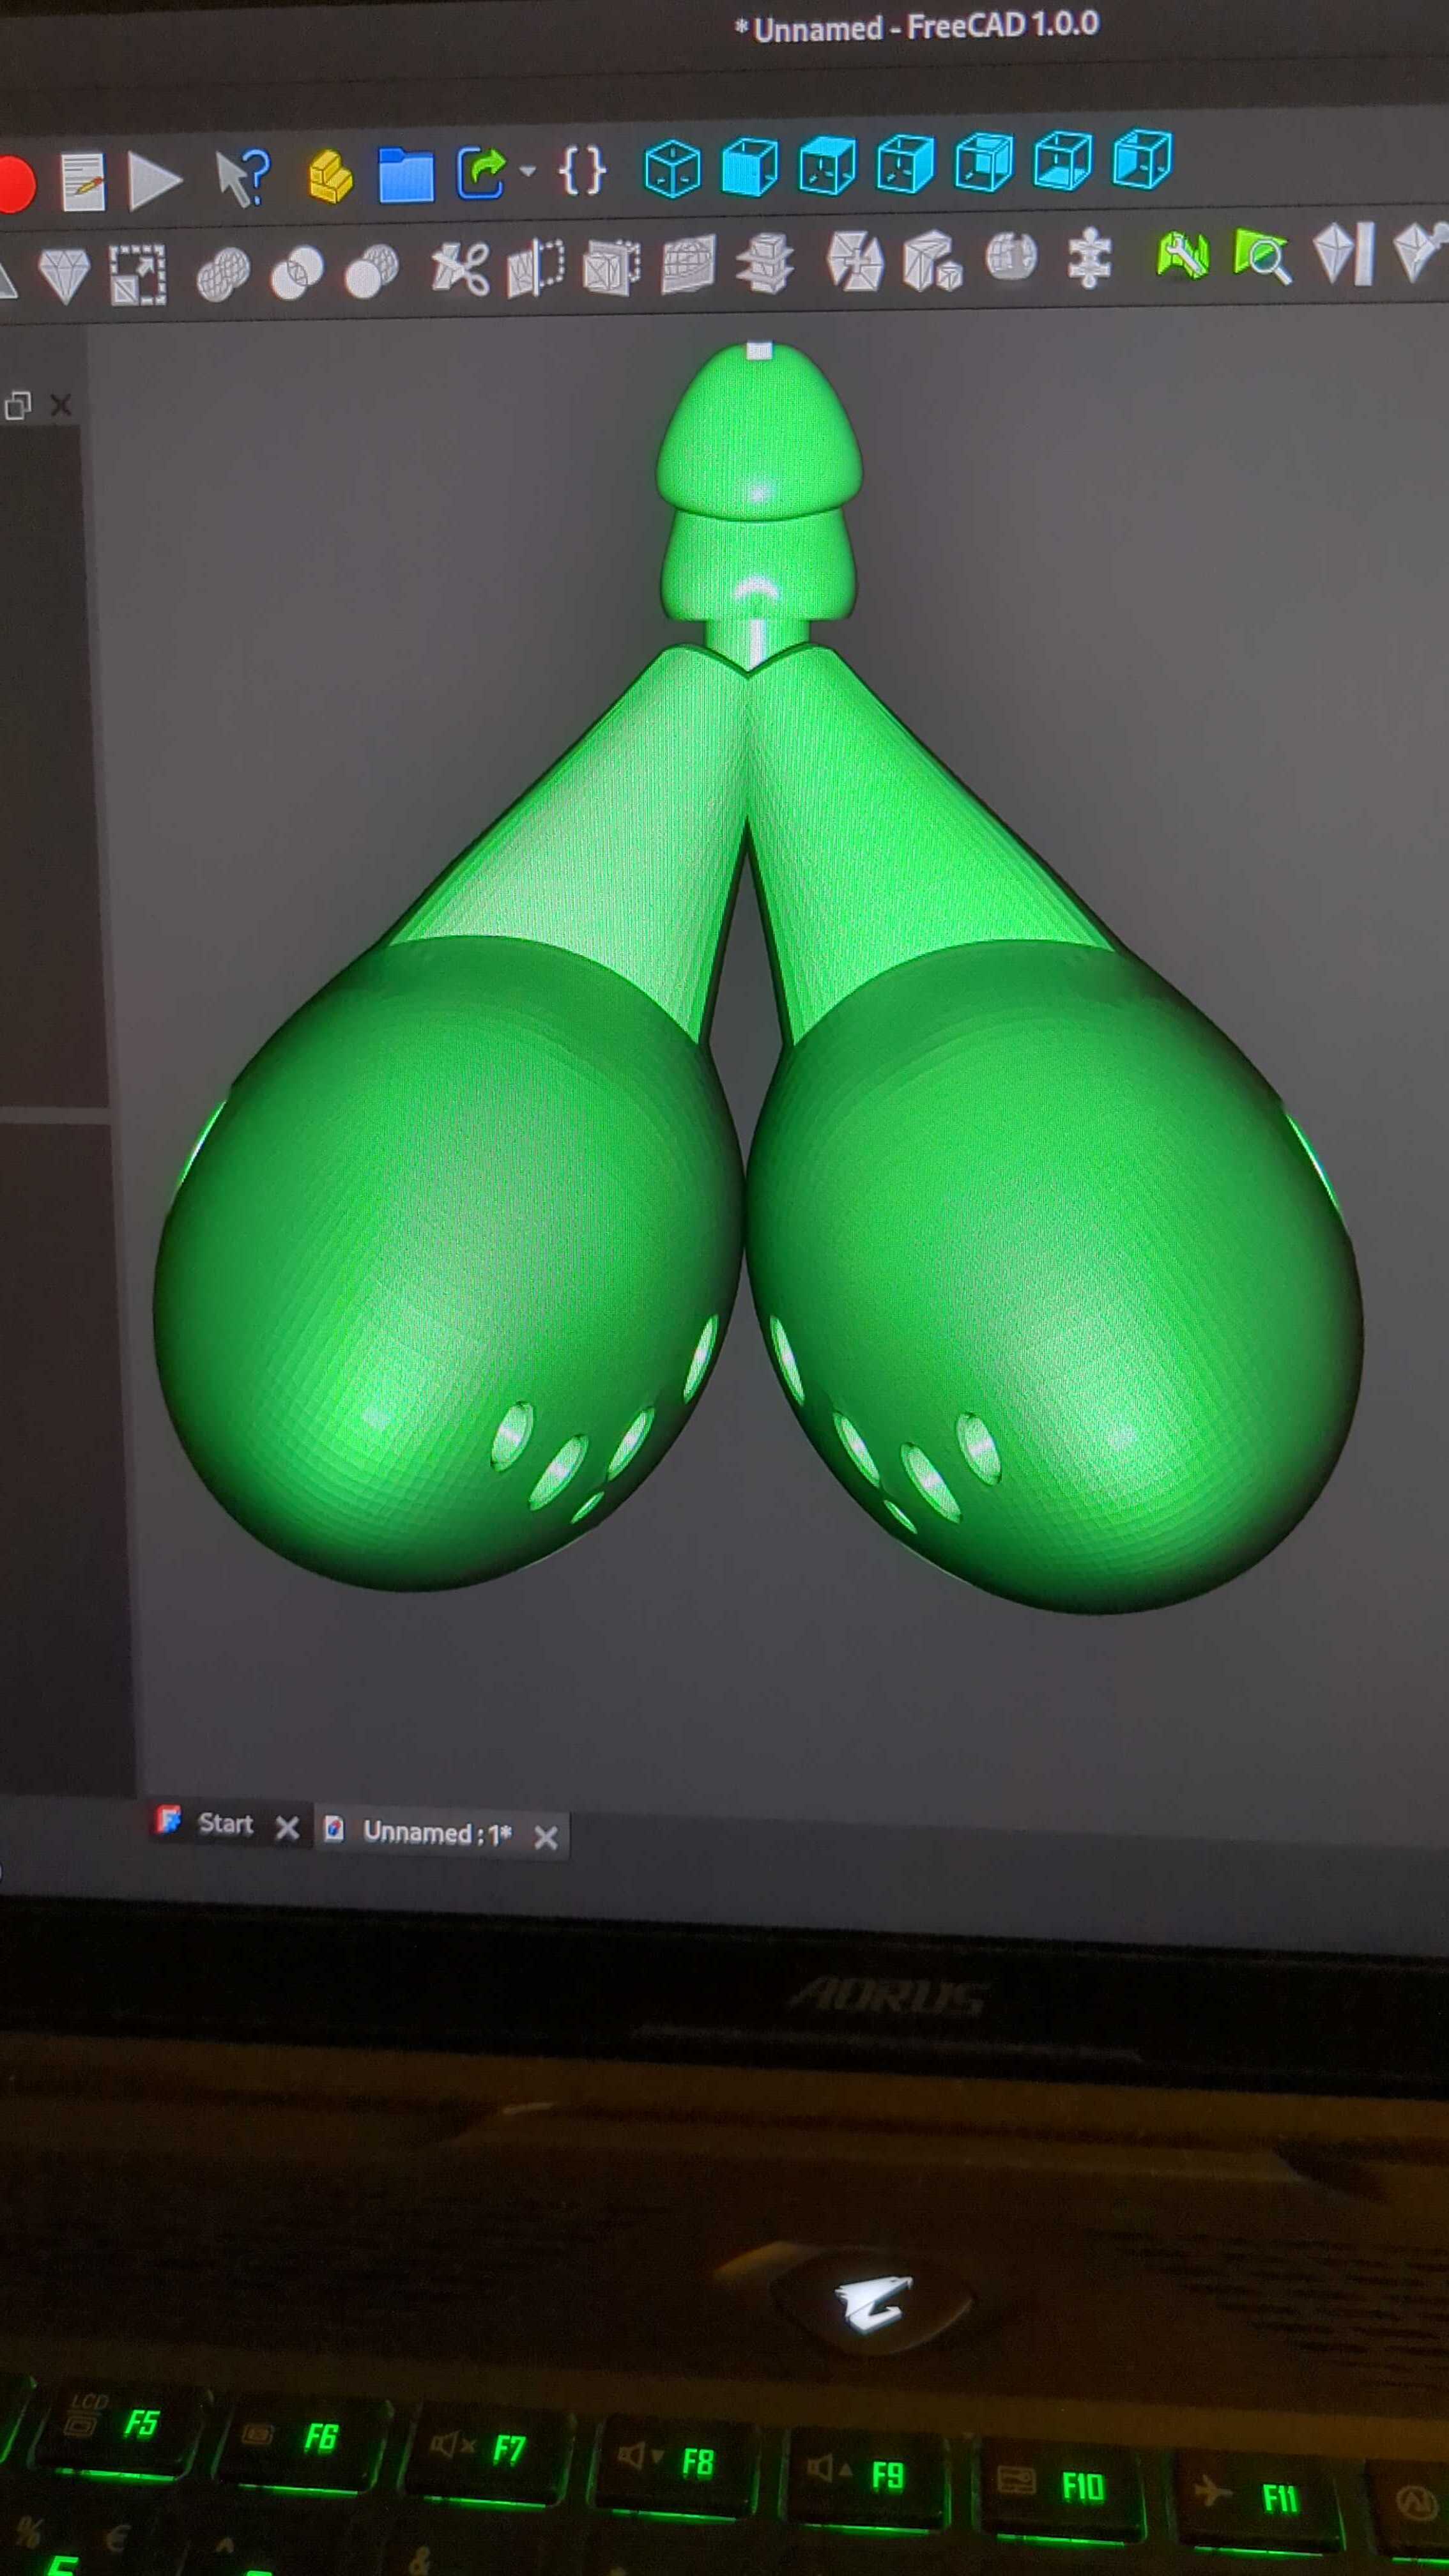
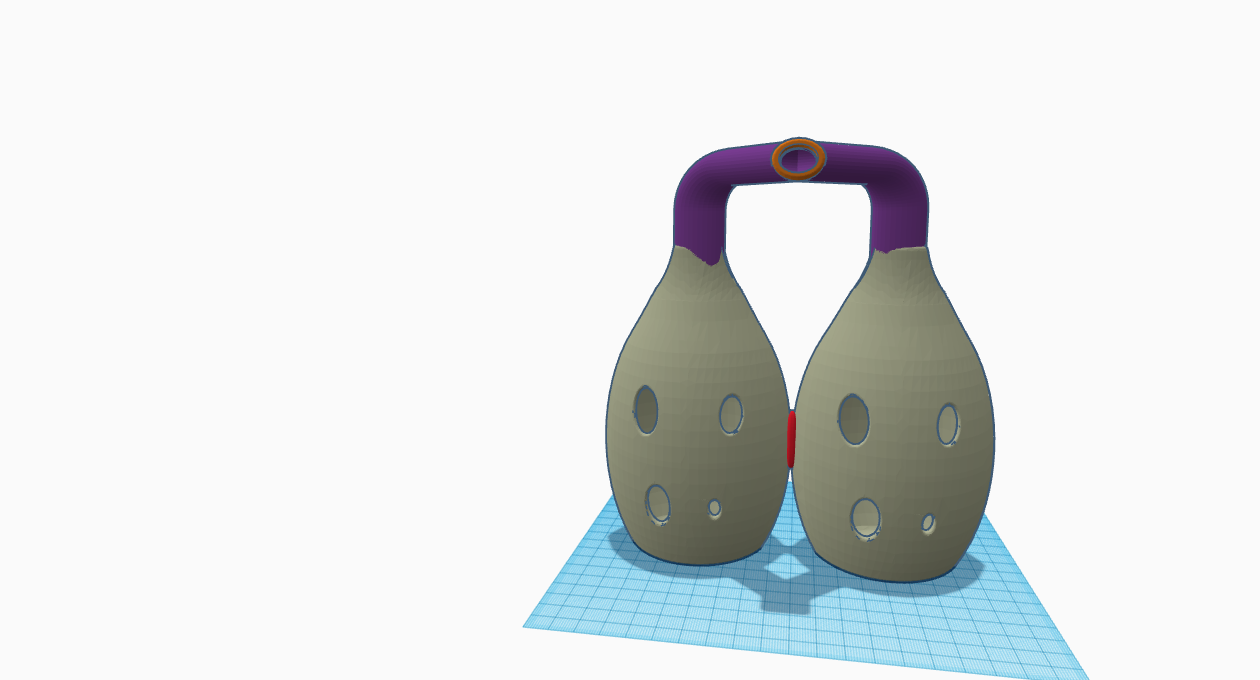
I want to duplicate an ocarina and stick them together and move and connect the two ocarina’s together with a centralized mouthpiece. Can I pay somebody to make a file for me to print at home? Thanks!
Where are your sources. I’m super picky about web stuff I visit and am not very connected to the world at large but am quite capable with CAD.
I don’t do a ton of sculpting, but like I’m procrastinating rn with FreeCAD in front of me after spending all day designing and prototyping my own electrical connectors for a project.
Haven’t chosen a specific file yet, but there are a bunch of ocarinas on thingiverse. I’d want to take an ocarina STL, enlarge it a bit so it’s a lower tone, duplicate it and put the duplicate next to it mirrored, then a shared mouthpiece in the middle on top. Let me know if you wanna talk more about it. Thanks!

Jokes aside, it doesn’t look straight forward, no pun intended (yes that is derp penis model for the mouthpiece… sry;nsry)
The air path for that whistle looks very important. Messing with that will require a lot of tuning. Plus doubling the path means you need double the lung capacity to produce the same airflow. I’m pretty sure that what you want will not work, or will entail designing a whole new instrument. I am not entirely sure how wind instruments resonate but typically the location of a sound box is important. Moving the whistle will alter the resonate effects. The way I oriented them is the only way that can retain the whistle passage, but that blocks access to the smaller holes, but I didn’t take a ton of time or put a lot of thought into this. It was just a have a beer and look at it moment.
Also from the thingiverse files people have uploaded, there are some files people have modded where they talk about changing sizes and some holes not working. I don’t expect that to be straight forward to change either.
Haha! Funny looking model. I’ve seen it done, but to your point I’m sure it takes a lot of tweaking and time. I’ll look into it some more and see if I can figure it out. Thanks!
BTW, in FreeCAD, you start a project, then you use
File > Importto bring in the STL. It is better if you can find a STEP file because these files contain the actual geometry instead of a mesh, but I didn’t see one in a quick search. The real difference is due to π and how computers need to round infinite numbers. A mesh is ultimately removing the required rounding uncertainty that π causes… If you care about the details…Once you have the STL in FreeCAD, there is a pull down menu for workbenches. Find the
Partworkbench. This WB is like Tinkercad or like playing with wooden building blocks as a kid. Once you are in the Part WB, highlight the STL file, then use the pull down top menu bar labeled “Part” and select the option to convert a mesh to a part.This does not recreate π, so it does not recreate everything like the original. It is still a mess of triangles in this case, but it is a solid part at this point and not a container like a mesh. It still won’t be perfect and the usefulness overall is debatable.
I’ve learned the hard way. I will only use a converted file like this for the most simple one or two step operations. This is what I was looking at doing for you if it seemed doable, but I don’t think that is the case. My rule is to recreate the geometry properly in a Part Design Body in FreeCAD using sketch based design techniques. I don’t actually use the converted part for anything more than a background visual guide.
The way I would remake this is complex for a beginner. The main challenge is the whistle itself. I would need a lot of trial and error of actually printing the thing and tuning it. I couldn’t make something that works otherwise. I don’t think anyone else can do this either.
I don’t mind helping you learn how to make something like this, but there are a lot of little concepts you need to grasp with CAD that can be challenging to wrap your head around all at once. I’m good at explaining abstract concepts, but your level of abstracted thinking will determine how well you can follow along with how I explain things. In a nutshell, I can tell you the major steps to take along the design process and answer your questions while explaining the reasons why you need to do things a certain way in context. I know how to design things properly for functional parts, but I barely know sculpting. Sculpting could make this shape much faster, but the results would not be quite the same.
It is up to you. I don’t mind either way.
Thanks for the help! Yeah I don’t really have the time for a deep dive into CAD right now. I have done some very basic edits to an STL file before, but what I want now is beyond my skill.
Did you say there’s a way to sketch a 3D model? I have a drawing pad. Is there a CAD program you recommend to do that with? I don’t mind doing the trial and error printing on my end, even though my printer is painfully slow.
The proper way to model is with sketches this involves mapping out 2D geometry on a plane and then performing operations on these sketches to make them into a 3D object.
All of our printers are pretty slow. That is not the issue. I do lots of unit tests where I print isolated sections of a print just to test whatever I need. Based on my intuition alone, I would need a couple of weeks to make something like this and I would probably need at least 3-4 iterations of a design where I’m printing the whole thing and doing tests, learning, and then starting over from scratch if I wanted to make something that really works.
do you know how i can move the holes around on the ocarinas on this file i remixed? i’m using tinkercad but can use something else.

Are you trying to create an object with one mouthpiece and twice as many holes? I think I understand what you want to happen… one mouth but two unique sounds? But this is a musical instrument… if you want it to be playable and not sound like shit, you’re asking an extremely complicated task of internet strangers. It would be like asking a stranger to make a brand new musical instrument nearly from scratch
Looking to take an existing ocarina STL, duplicating it and sticking next to the other like a mirror image, then having a single mouthpiece that sends air to both bodies.
Could also mean two separate ocarinas connected only at the mouthpiece, like with a double flute. If you’re starting with an existing ocarina 3d model, this should actually be pretty trivial.
Yeah this. Thanks
Yeah that seems very doable
Thanks I thought so. At least to make the model. Idk about getting to actually sound good. That’s gonna take some trial and error.
Presumably you have a printer? I’m quite certain you can find a working ocarina on thingiverse. From that point I’d wager most of your sound quality is going to come from your printer settings, smoother is better.
If you’re getting into 3d printing I’d suggest at least a little practice with modeling, and this seems like an excellent opportunity.
Find an ocarina model if you don’t have one (I recommend searching Thingiverse, I’m sure you can find a dozen functional models). It sounds like you’re trying to finger each one with one hand so you can play both together, so you’ll want a model designed to be fingered with one hand.
Pint it out a couple times tweaking the settings until the sound is acceptable. Then, import that model into TinkerCAD, it’s a very beginner-friendly browser-based modeling application.
Duplicate the model, mirror it, and then rotate and move it until they’re arranged as if you were holding one in each hand separately with the fipples in your mouth with some gap between the bodies. Then, create two symmetrical block shaped “holes” just barely cutting into each fipple. Merge each hole with its corresponding object, cutting out two small pieces, which should allow you to slide the models together until the fipples touch along that slice. Merge the objects, print and test.
hey hey. tinkercad is cool cuz it has lots of prebuilt shapes. do you know if/how i can move the holes around on the ocarina in tinkercad?

TinkerCAD basically works by generating objects and object-shaped holes that you can merge to create the final design. If you had designed the ocarina from scratch in TinkerCAD, you could move the object-shaped holes around before merging.
Since you’re importing the model, TinkerCAD treats it as one pre built shape. The best you can do is generate new objects to fill the holes, and generate new holes that you can put where you want. However, since this is a musical instrument, moving the holes can change the effect they have on pitch.
I found at least one ocarina model designed to be played with one hand, with appropriate hole placement. I’d recommend starting with that, rather than moving the holes yourself. Unless of course you know enough about ocarina design to keep the thing tuned properly, in which case just fill the holes and generate new ones.
I’ll check out TikerCAD, thanks!


