
I’ve been looking to switch the bowden extruder for a direct drive type on my Anycubic Kobra Max. I’ve always hated the blobbing and stringing due to the bowden mechanism. After having received an LDO Orbiter v2.0 today and a bit of tinkering, I now have what I was after :).

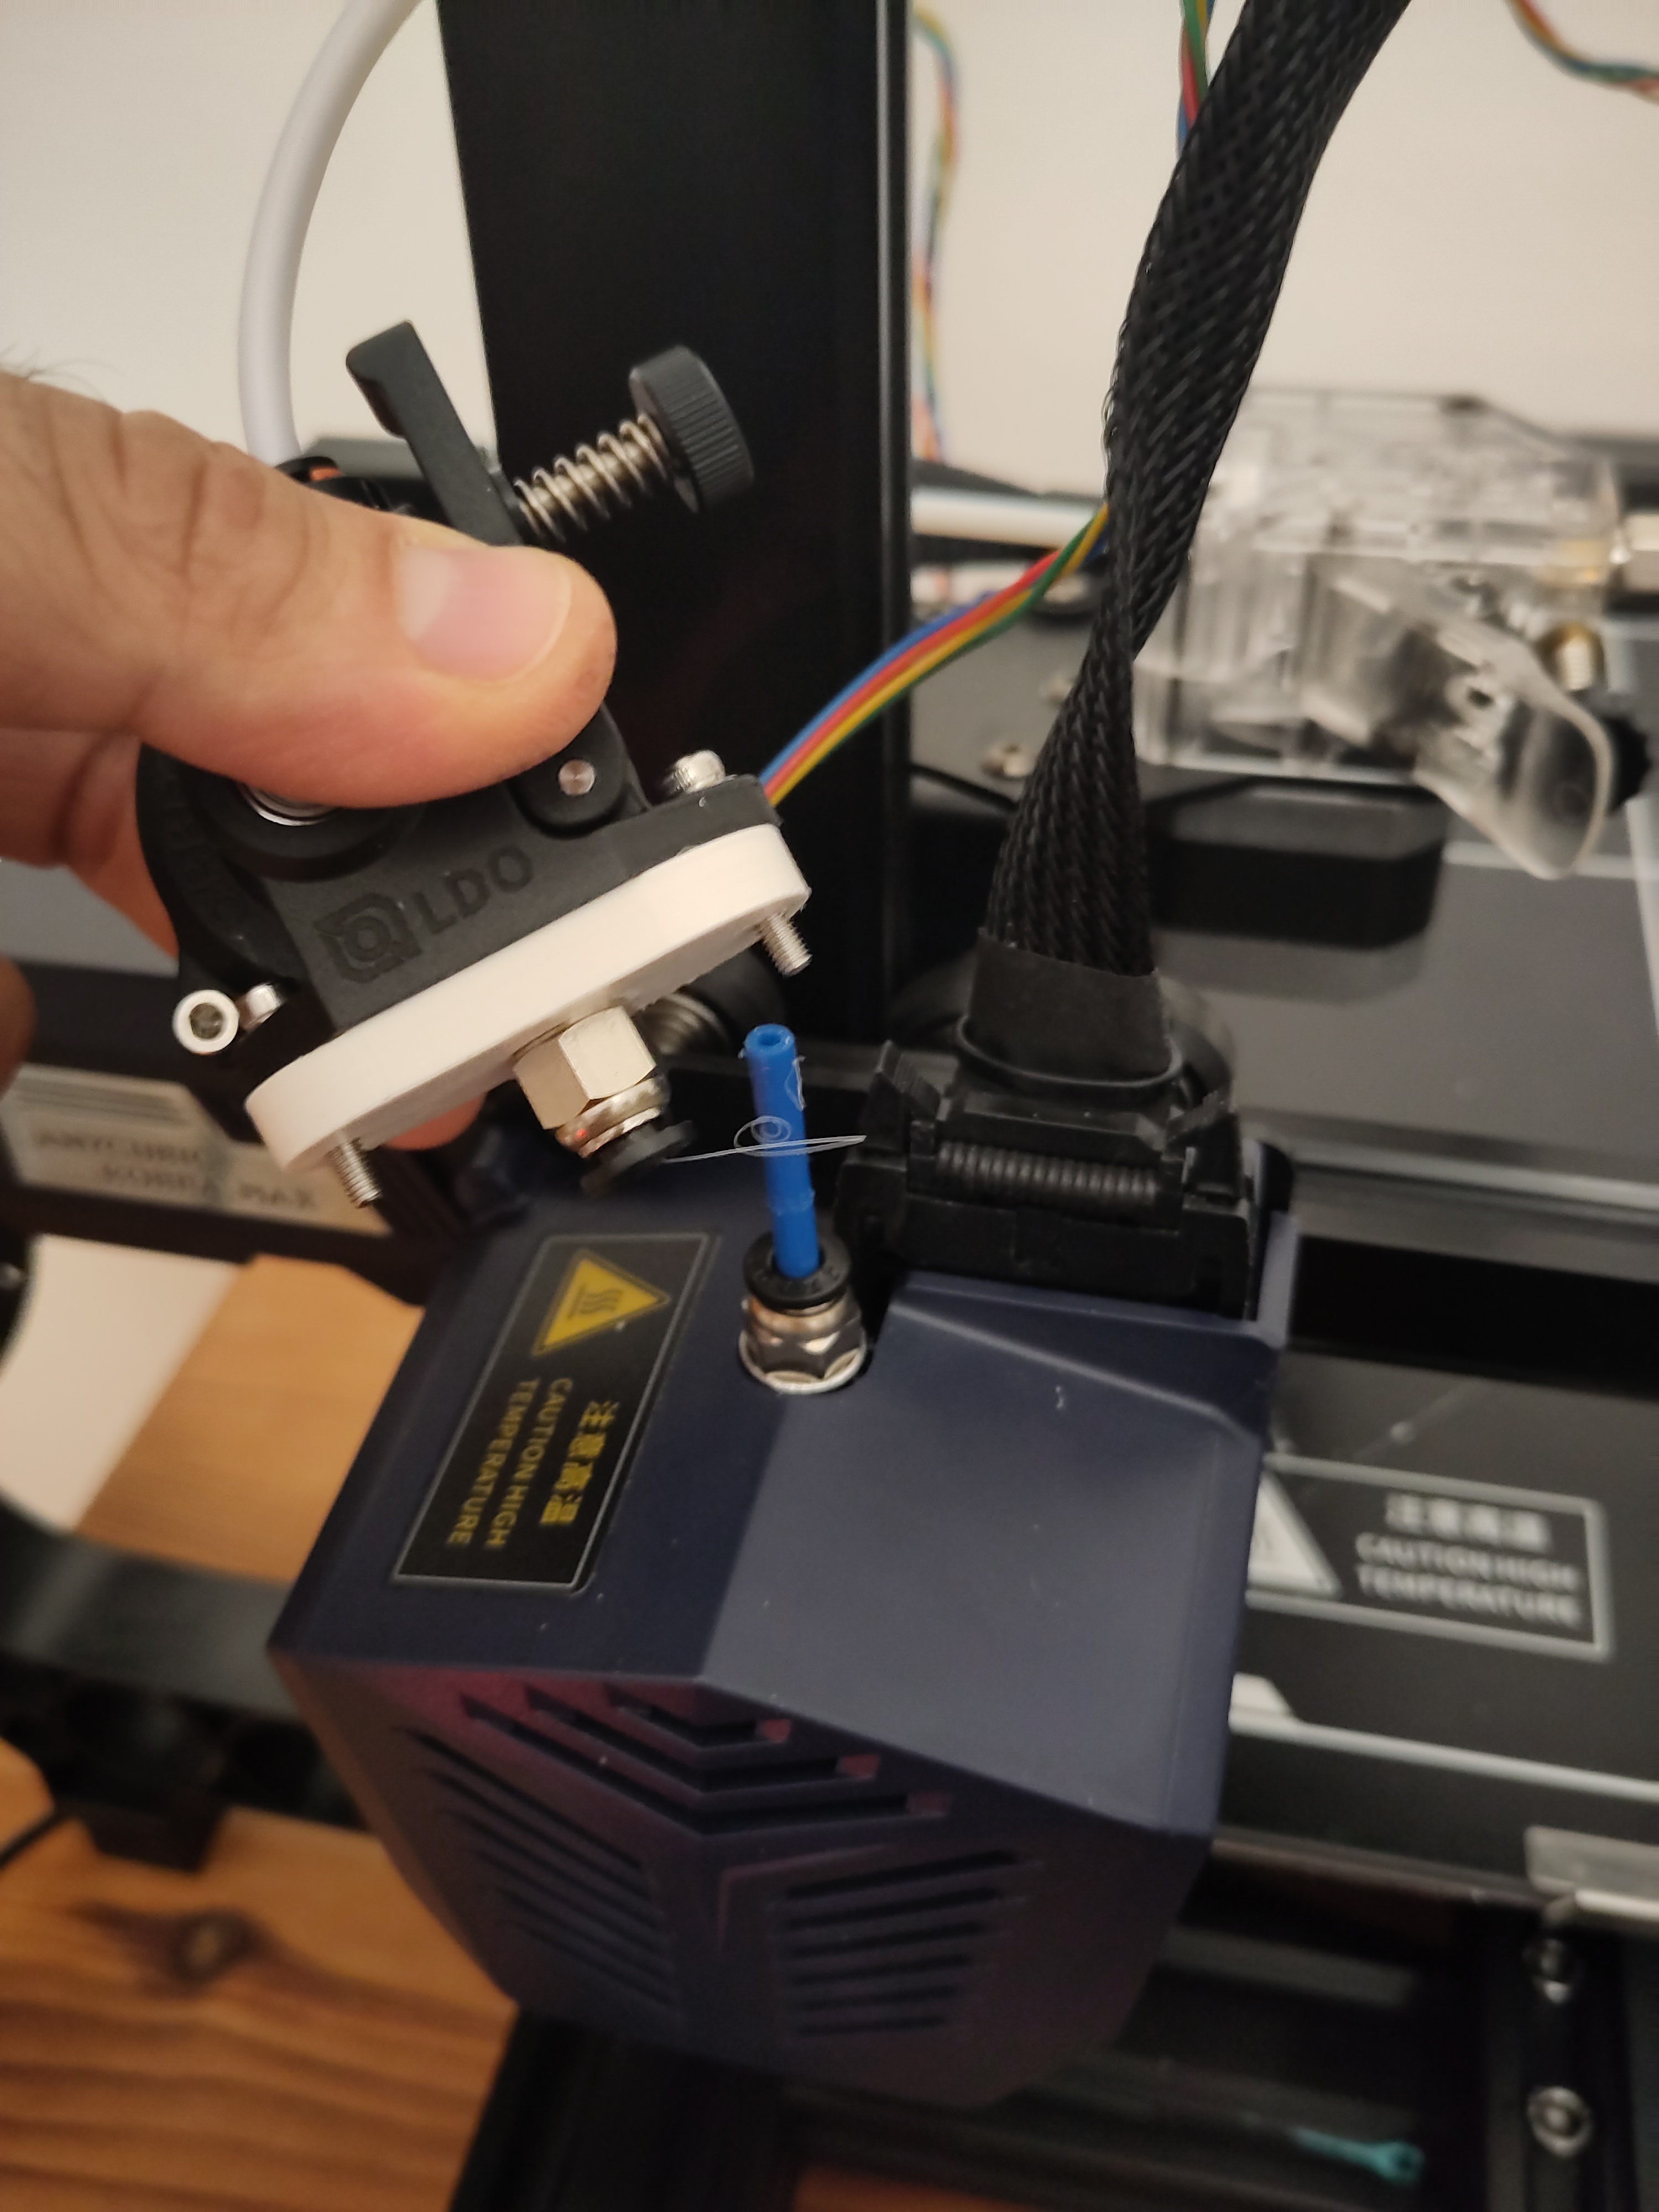
The easiest way to install the new extruder was to simply attach it on top of the existing hotend via a small bowden tube and a coupler. I had to design a little adapter flange that attaches to the extruder and accepts a tube coupler. The extruder now dangles in the air. For now this didn’t seem to cause any trouble. In the future I might install it using a fixed bracket though.


While I was at it, I also added some additional insulation to the bed (300x300mm in size, so I had to cut a bit). I’m not sure if it really helps a lot but the bed now heats up from 20° to 60° in 3:40 instead of in 4:00. The printer also seems to consume 100mA less (very inaccurate mental averaging of power meter).


Bonus:
First functional part printed with new setup, rectifying some of the original parts issues.

Up next: Get a second Orbiter and have it feed a mixing hotend. My goal is to make nice Lampshades.
Nice move! I think you have it correctly mounted though, I wouldn’t put it on a bracket. I used a conversion bracket for direct drive on my Max and I kept getting pulsing issues.
I think they were due to the filament pushing down the hotend slightly when starting to extrude because the hotend is mounted on the compliant strain gauge mount. With your method, it stays isolated and doesn’t push down more on the strain gauge mount when the extrusion starts.
Please give me an update if you can if you run into any other problems!
https://www.reddit.com/r/anycubic/comments/10a6ao8/kobra_max_all_metal_hotend_direct_drive_upgrade/ seems like the way to go but including bowden couplers.
Hah, good to hear from you. I spent some hours yesterday designing a replacement print head housing where I could mount the Orbiter on top. While doing it it occurred to me that what you describe could actually be a problem. I have three options now:
What do you think?
I personally like the strain gauge as a leveling mechanism, particularly since I added a magnetic build plate. I like the idea of #2, I wonder if you could use a M10 male to make adapter like this: https://www.ebay.com/itm/404101432925?chn=ps&norover=1&mkevt=1&mkrid=711-117182-37290-0&mkcid=2&mkscid=101&itemid=404101432925&targetid=1529314447630&device=m&mktype=pla&googleloc=1014257&poi=&campaignid=20398926916&mkgroupid=148892907822&rlsatarget=pla-1529314447630&abcId=9317285&merchantid=759262499&gclid=CjwKCAjwvrOpBhBdEiwAR58-3GcDoYiTk2pI6UQYjkseFyjCi99dch8PZQjWqWdVfneK6-DX-6hiiRoCuc0QAvD_BwE
And just connect your adapter plate to the hotend (or tap the orbiter? Idk)
You might need a little printed spacer and a short Bowden tube inside that.
Other little nice things/learnings for the printer I have done other than the spring steel sheet:
If you want an all metal hotend you can replace the heartbreak with a slice engineering copperhead heartbreak (use a G2 type)
If you want color change capabilities, to have finer z adjust, and to have a larger mesh, i recommend trying the following custom firmware (IF YOU ARE CONFIDENT WITH THIS KIND OF STUFF)
https://github.com/wabbitguy/Kobra_Max
Thanks a lot for your nice input. I’ll look into attaching the plate to either directly to the top of the hotend or onto the mounting fork. I’ll maybe get a copperhead heatbreak. It looks like it can reduce the amount of molten material and thus reduce the need for retraction. I already have the Zombie3D modded firmware but I plan on using a BTT Manta M8P that I have lying around. I’m just waiting for a crimping tool to be shipped so I can make some nice adapter cables between the Manta and the Kobra.
What’s the benefit of the spring steel PEI sheet? I guess it’s definitely nicer to remove objects and maybe it creates a nicer texture on the bottom. Anything else? Does it heat up quicker?
Mostly just for removal! I print a lot of giant pots for my houseplants and I’m impatient.
Let me know how the Manta goes, I have a duet wifi I was considering using for this that is currently on an old project. Has someone made a wiring diagram for the harness or are you just redoing all of the wiring? Last I looked I couldn’t find a Pinout diagram for either the harness or the board.
Huh, makes sense I guess. I print lampshades that usually remove easily due to the small surface and for small parts I often just use a tiny hammer to get them off.
As for the wiring, I was considering keeping all the existing cabling which I well made and just create adaptors from the connectors that went into the old board to the Manta. The board and connectors are labelled IIRC and in doubt my multimeter will have to be used.