

I wanted to build a split Ergo from scratch, with a slightly more aggressive stagger than the Lily58 style board I had previously built. I also wanted to have a stabilized 2U spacebar and some RGB. The part that was most time-consuming was definitely designing the case in CAD and getting the switches and stabilizers to fit properly. Fortunately, it’s all pretty well documented so there wasn’t too much trial and error involved. Overall, it turned out pretty well!
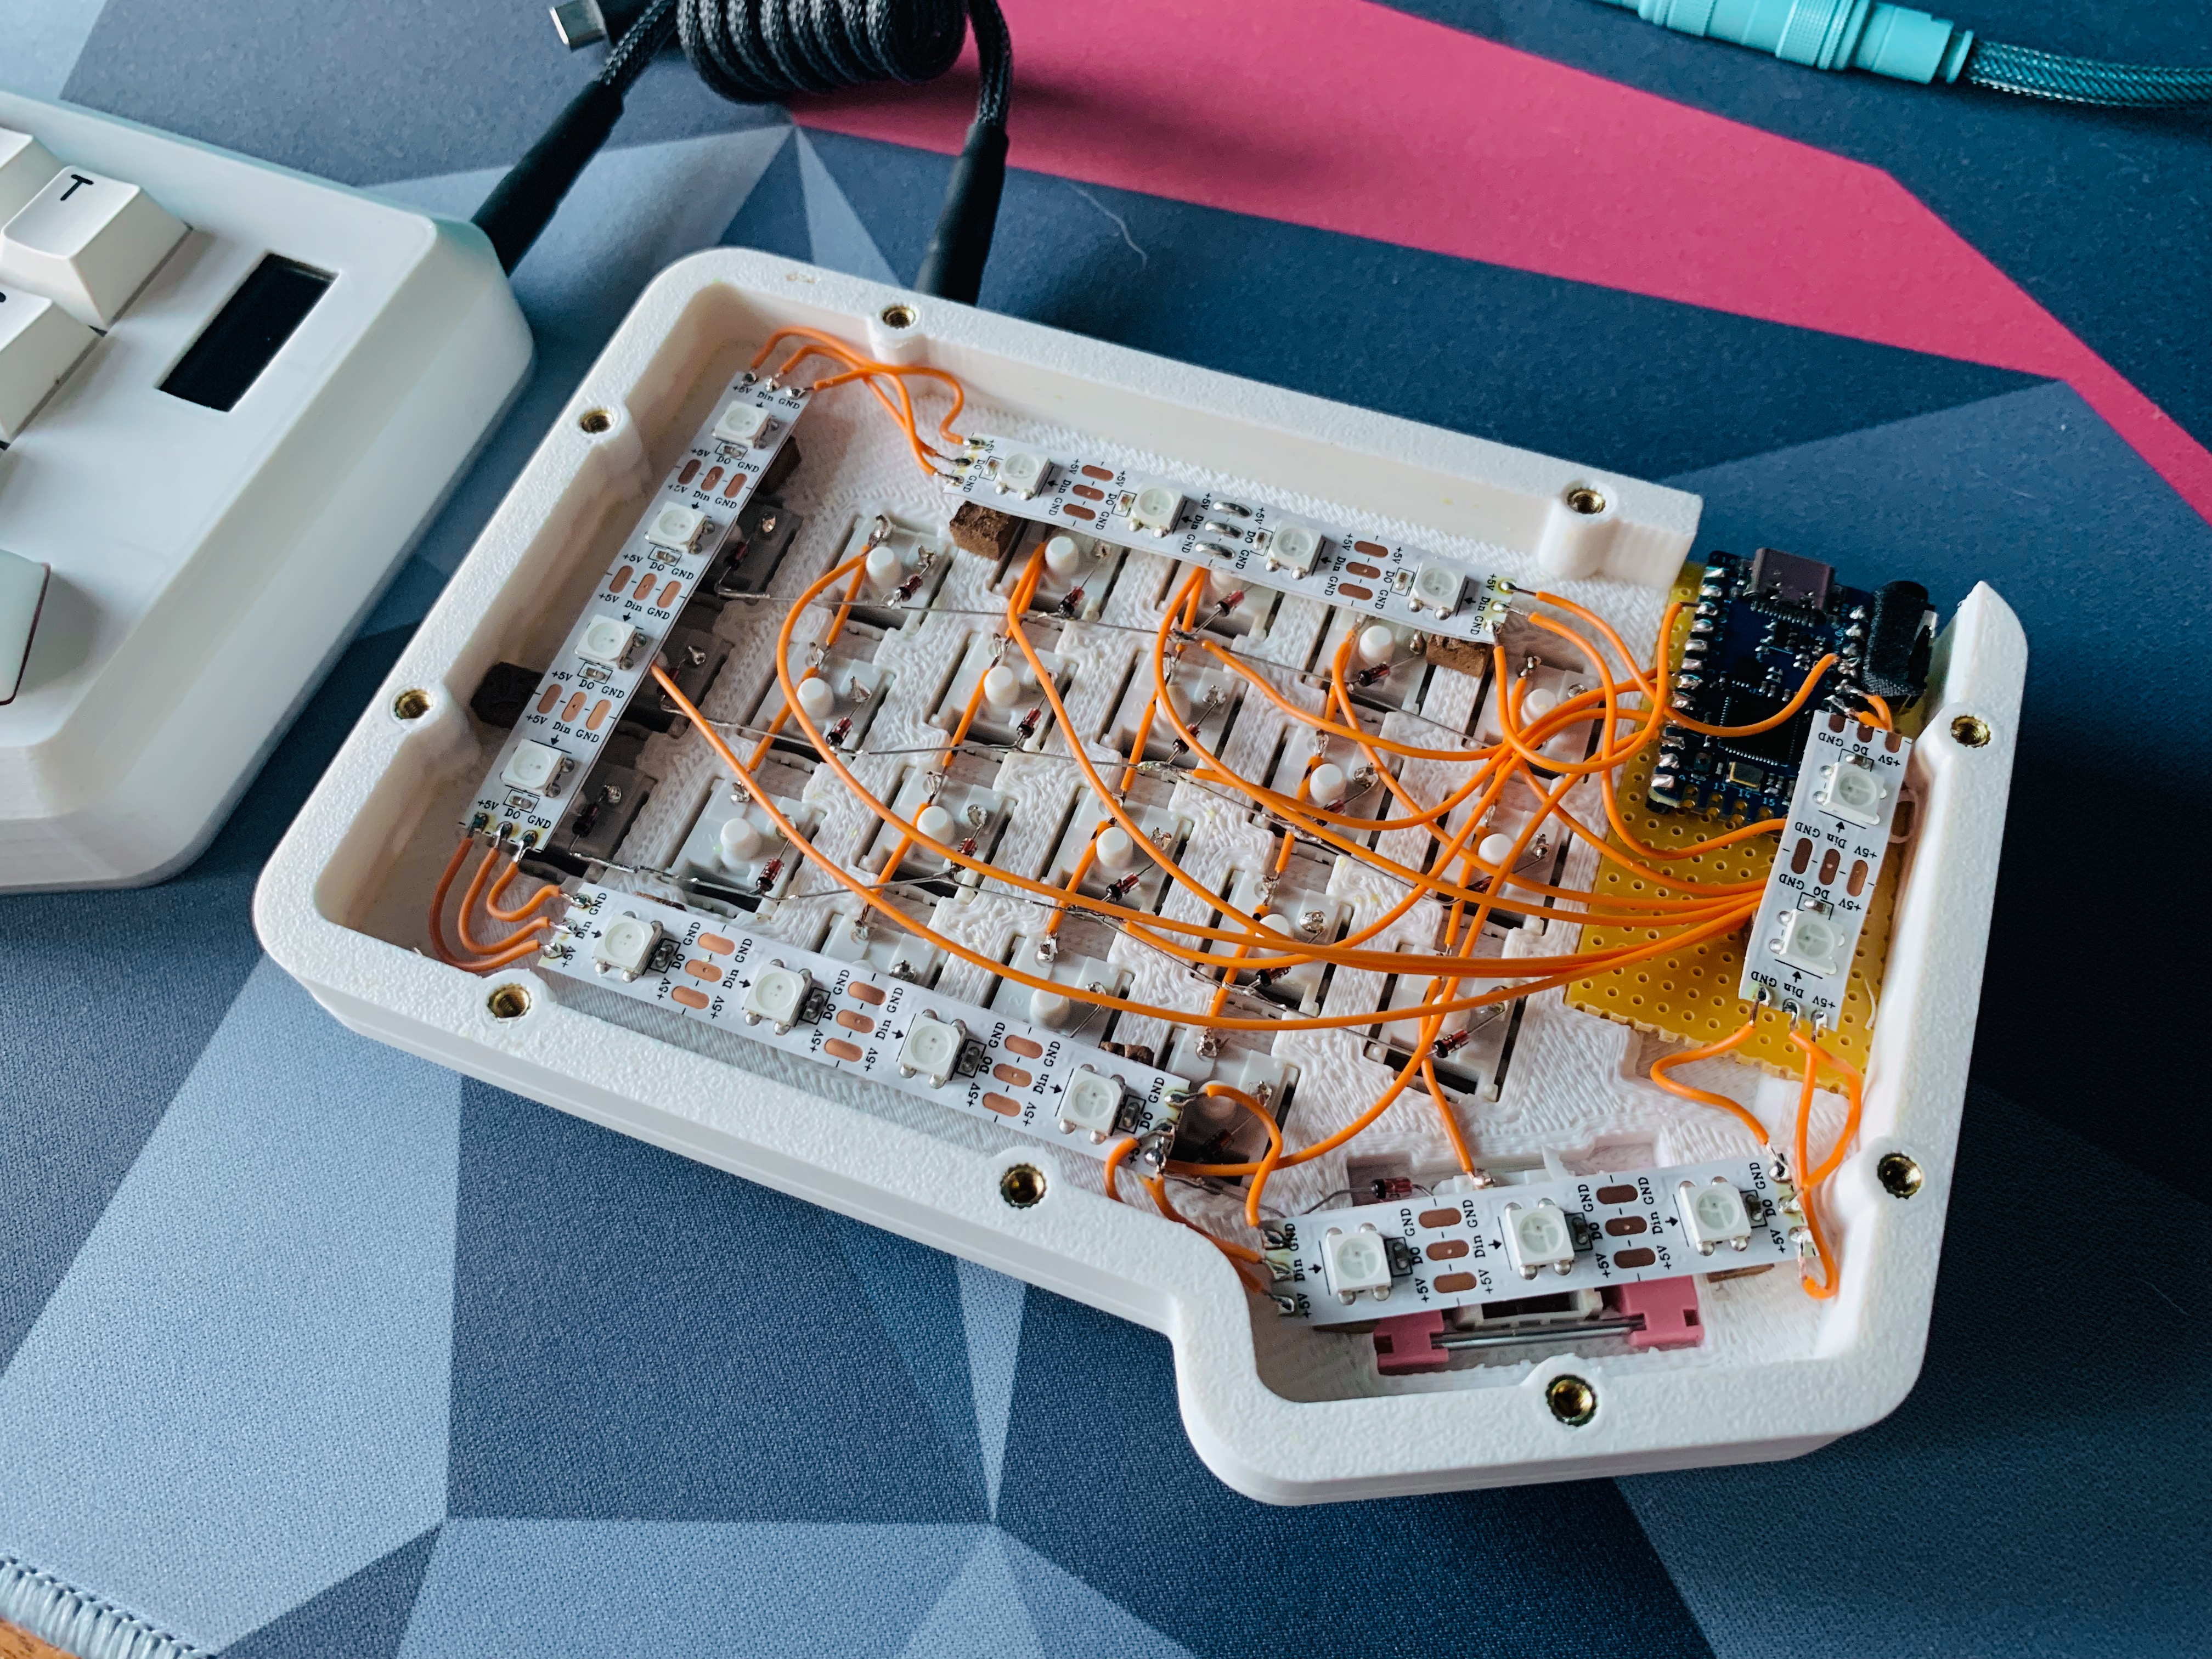
The internals
Took me embarrassingly long to realize this is the underside.
I really like your design!
Great job! Reminds me of the Apple M0110.
I was indeed thinking of this keyboard when I designed the case.
It’s so beautiful, I want them! haha
Thanks! I can give you the files so you can print it yourself 😉
Do you have a link you can share? I’d love to build an ergo one of these days, and your design is simply beautiful 😍
You’re so kind! Thanks a lot
deleted by creator
This is VERY nice.
This has such a nice finish, you really went above and beyond to get it looking good.
I don’t know much about 3D printing, how did you get the outer surfaces looking so clean?
Thanks! The top surface looks pretty clean because I used the ironing feature, where the hot nozzle of the printer runs across the surface without extruding filament (or very little) to even out imperfections and small gaps. The print has its problems tho, probably like any 3d print. Optimizing your 3d printer and the print results is basically a hobby in itself.
Either he used ironing or an resin printer. I don’t know if you can get such a smooth surface with just ironing.
He could also sanded it
That is super slick
Very nice design, I like it very much. The connection cable is self-made?
Thanks. Yep, cable is DIY
This is really, really cool. I would love to do this one day. How does it feel to type on? Any reason you didn’t make a PCB? They’re really cheap these days
It feels pretty good and the sound is actually okay too. Maybe next time I’ll try it with a PCB. One advantage of hand wiring is that the RGB also shows through the top. That wasn’t really intentional, but it looks nice. A PCB would have blocked the light and I would need to add per key LEDs for the same effect.
Damn, this sexy AF
This is absolutely gorgeous!
What processor did you use?
I am using Elite Pi microcontrollers (RP2040)
Nice! I’ve been doing a lot of learning of the ESP32 world for IoT stuff. It has built-in Bluetooth! Looks like that one is pretty similar!
Beautiful! I like those angled 2u keys!
I definitely wanted stabilized space bars. I don’t like 1U for space and 1.5 or even 1.75U unstabilized is not really great in my opinion. The space bars on this board are XDA blanks because 2U cherry profile bars are hard to come by if you don’t want to spend a lot of money on the bars alone.
Isn’t it great to make your own design that has the features you want in it. I found myself wanting a lot more aggressive stagger from what is common (my ‘Q’ is a full key-length down from where ‘E’ is. I mostly came up with by just looking at my fingers.
To mirror another commenter, perhaps consider doing a PCB next time. I did it after my first build, and am very happy with the result.


